
6. Advanced configuration
We could stop here! Fastly is caching our website. We’re using TLS to secure connections and we’re monitoring things with logs. Everything is working seamlessly. But, as you probably guessed, our work will never be entirely finished.
In this section, we’ll provide some tips and tricks for dealing with those day-to-day website issues and headaches that come with the territory. Call it advanced configuration. We’ll talk about using custom VCL to add redirects, using the API to purge the cache, and purging with surrogate keys.
Adding redirects using VCL snippets
When we remove content or rename a file, we should redirect the old URL to the new one. This helps inform search engines that the link is no longer available and that the new link should be indexed instead. Fastly makes it trivial to add redirects at the edge. By creating a couple of VCL snippets, we can add redirects to our Fastly service and activate them without ever touching our code or Amazon S3 bucket.
TIP: The instructions in this section come from our redirects tutorial. Refer to that documentation for a detailed explanation of the VCL code.
We’ll create three VCL snippets to support our redirects. The first snippet will contain the redirect table — this is where we’ll add URLs that we want to redirect. The other two snippets are “set it and forget it” — we won’t need to touch these again after we create them. One matches inbound requests against our redirect table, and the other generates the redirection response.
The dataset of redirects that will be stored as a VCL table looks like this:
table solution_redirects { "/source1": "/dest1", "/source2": "/dest2"}Let’s take a look at how this would work with Taco Labs. Say we had a recipe for beef hard tacos on our website that we needed to temporarily remove due to a critical national shortage of taco shells. We’ll remove the file with that recipe, then take the old URL (https://www.tacolabs.com/tacos/2021/05/15/beef-hard-tacos.html) and redirect it to our recipe for beef soft tacos (https://www.tacolabs.com/tacos/2021/07/02/beef-soft-tacos.html) Our VCL table will look like this:
table solution_redirects { "/tacos/2021/05/15/beef-hard-tacos.html": "/tacos/2021/07/02/beef-soft-tacos.html"}Of course, we can continue adding URLs to this table in the future as we remove content and rename files.
We can use the Fastly web interface to create all of the VCL snippets. Let’s click Edit configuration to clone our service and create a new draft version. On the VCL snippets page, click Create snippet. We’ll add a name for our snippet, select type init, and enter the VCL as shown below.
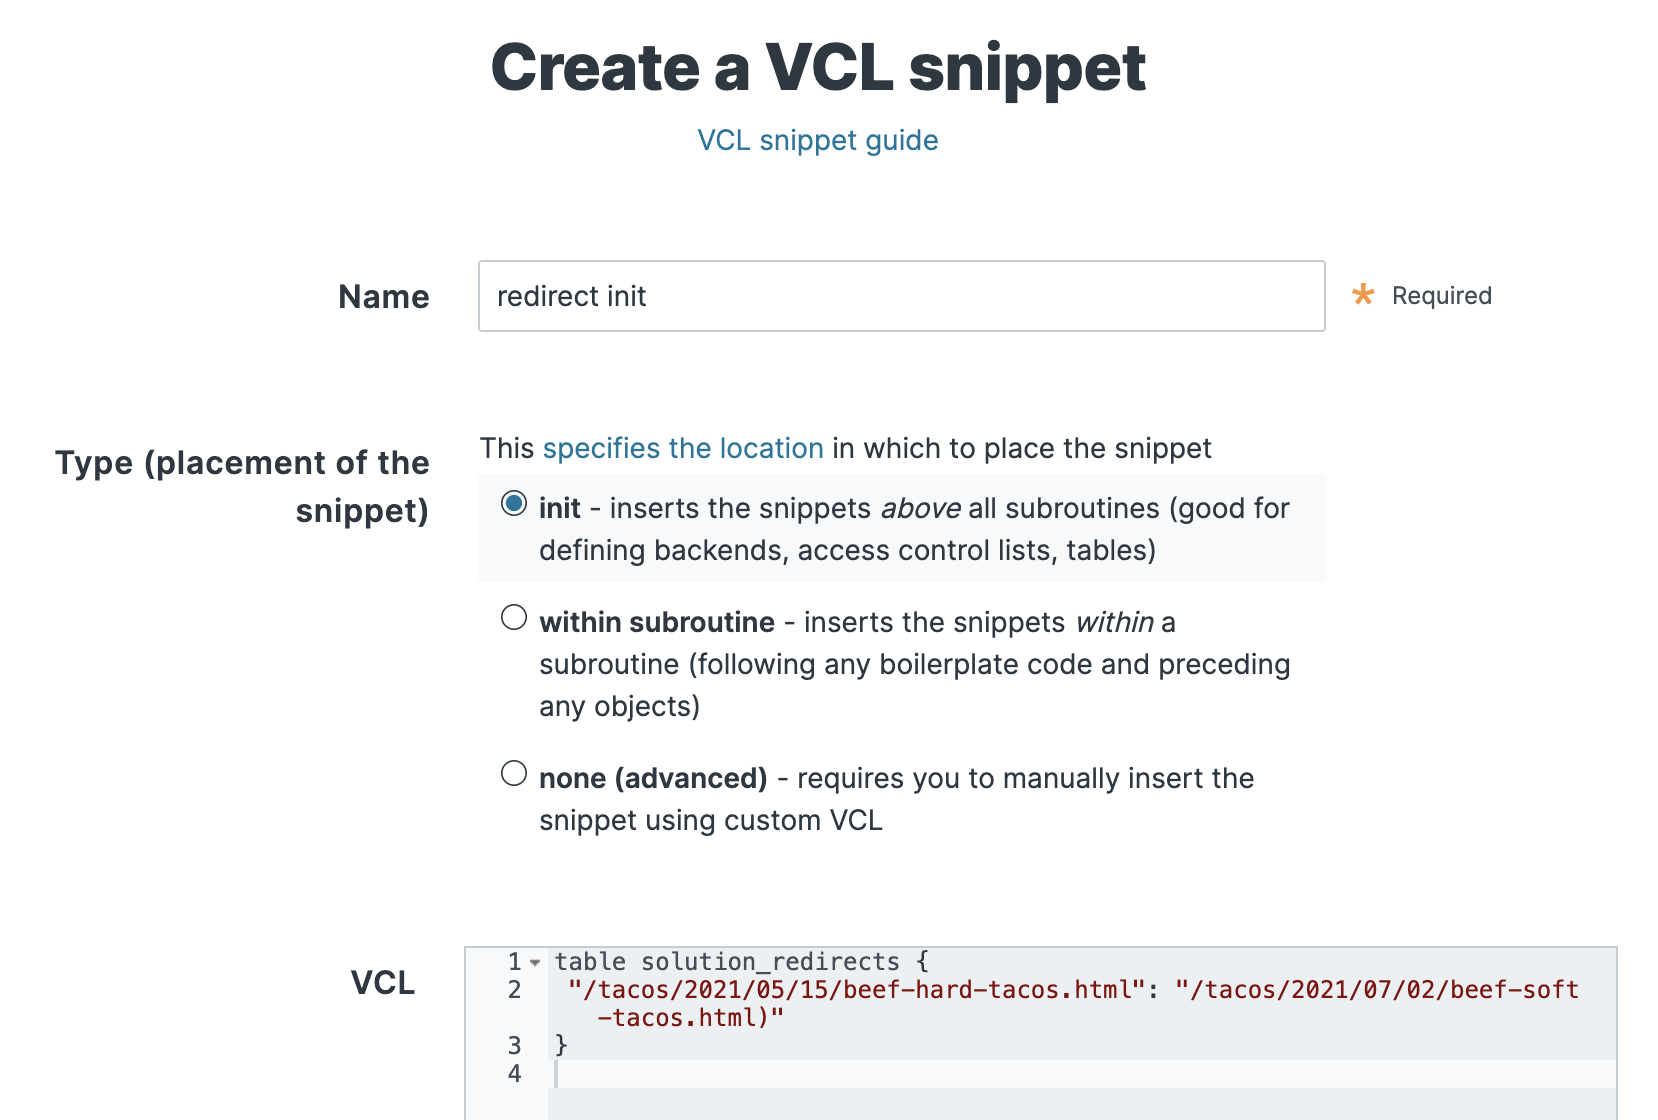
Click Create to save the VCL snippet.
Now we’ll create another snippet to match inbound requests against the redirect table we just created. Using the web interface to create the snippet, set the type to within subroutine and recv (vcl_recv) and use the following VCL:
if (table.lookup(solution_redirects, req.url.path)) { error 618 "redirect";}Finally, we’ll create the last VCL snippet to generate the redirection response. Using the web interface to create the snippet, set the type to within subroutine and error (vcl_error) and use the following VCL:
if (obj.status == 618 && obj.response == "redirect") { set obj.status = 308; set obj.http.Location = "https://" + req.http.host + table.lookup(solution_redirects, req.url.path) + if (std.strlen(req.url.qs) > 0, "?" req.url.qs, ""); return (deliver);}Let’s click Activate to activate the new version of the service configuration. We can check that our redirect is working by pointing our web browser at https://www.tacolabs.com/tacos/2021/05/15/beef-hard-tacos.html — it should redirect us to https://www.tacolabs.com/tacos/2021/07/02/beef-soft-tacos.html. It’s working!
Now that we’ve set everything up, it’ll be easy to add new redirects in the future. We’ll just clone our service, add the redirects to the VCL table, and activate our service. It’s that easy.
Using the API to purge all cache
Recall that when we discussed our purging strategy earlier in this tutorial, we decided that using purge all was preferable to the other options. By using Fastly’s API, we can use GitHub Actions to automatically perform the purge request as part of our deployment process.
First thing’s first. Since purge all requests need to be authenticated, we’ll use the web interface to create an account API token. From the account menu, select Account, and then select Personal API tokens from the sidebar. Click Create Token. Fill out the form fields as shown below.
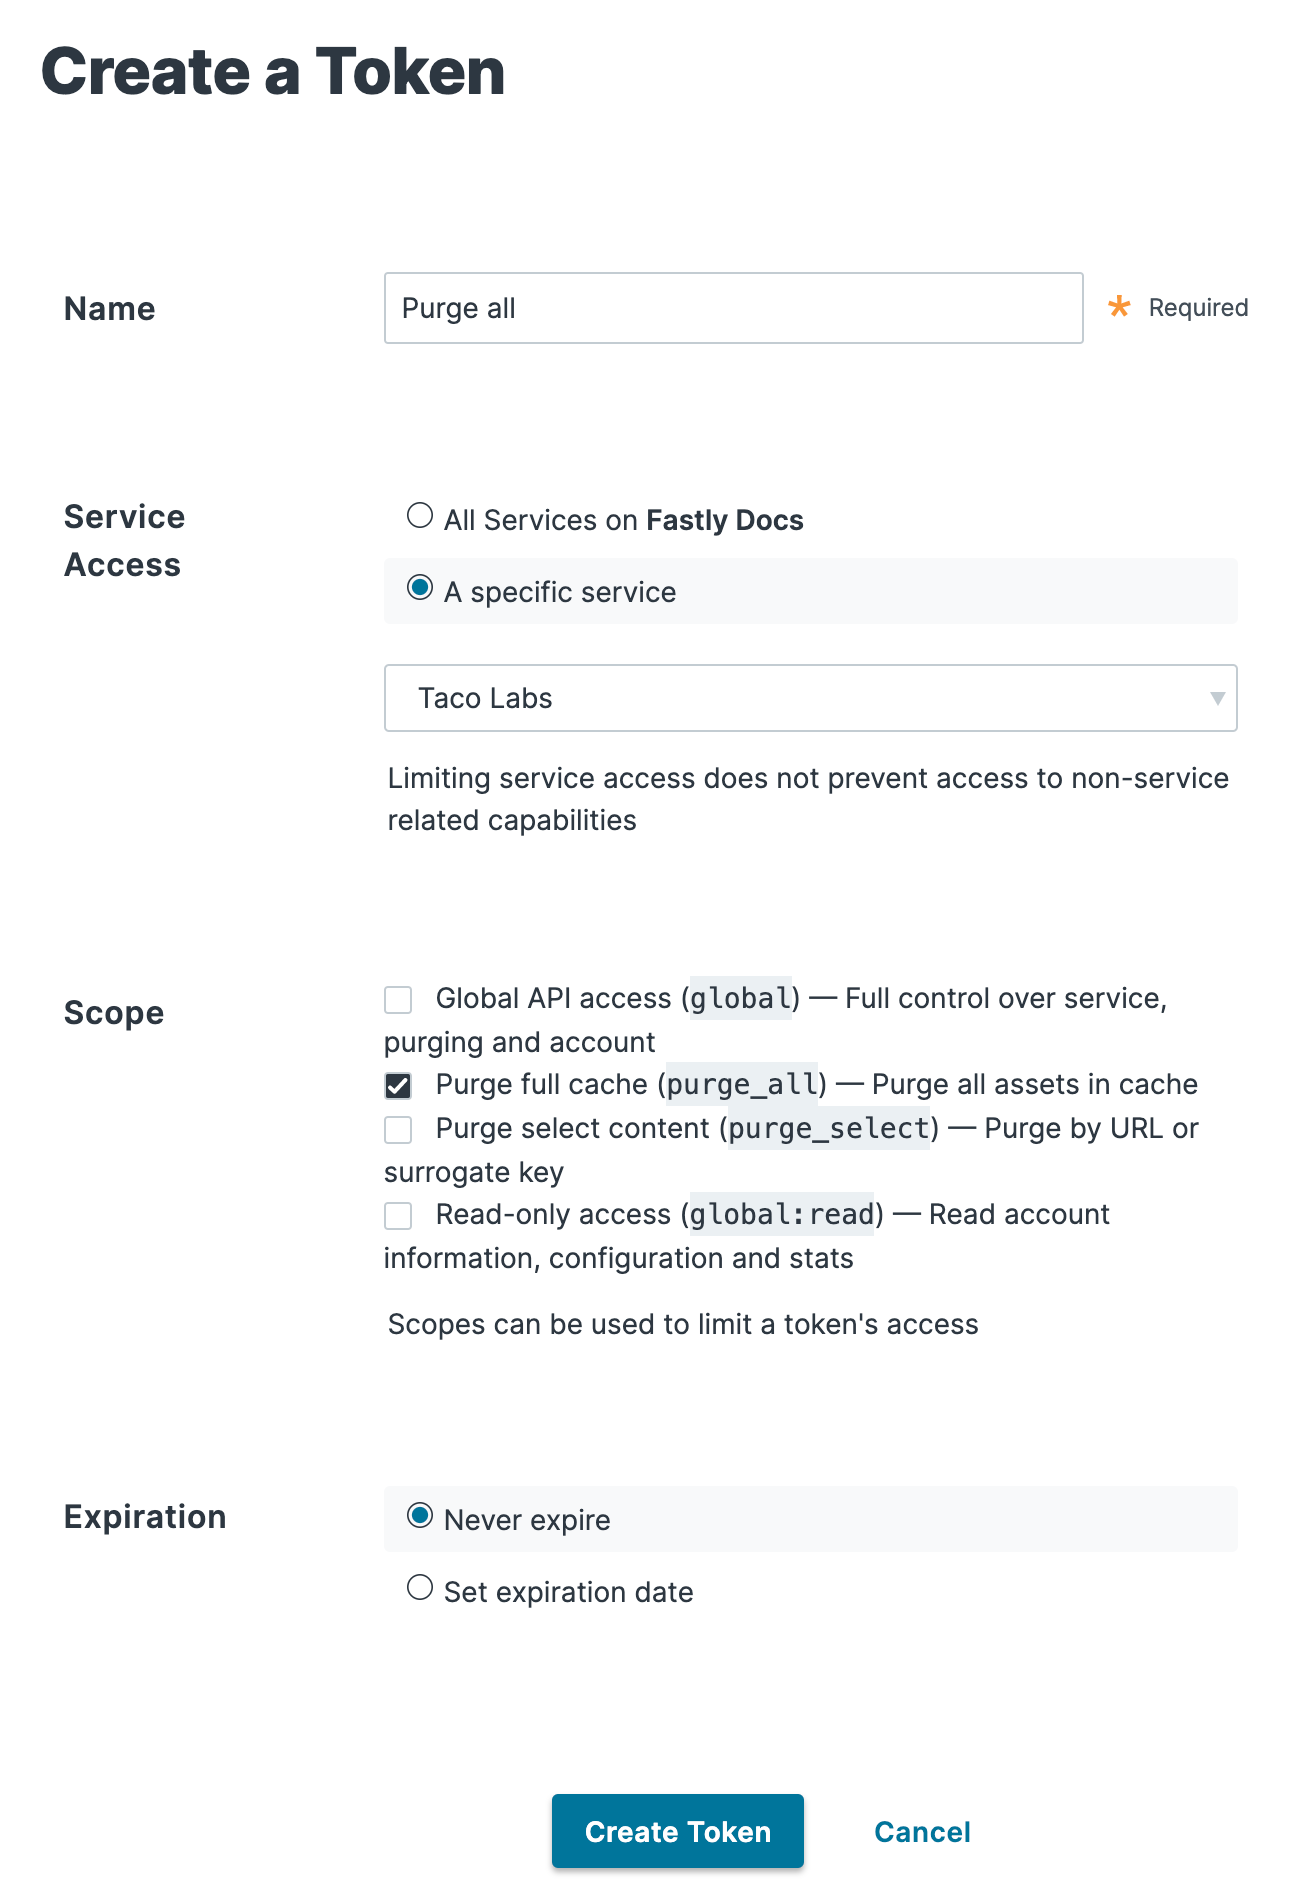
Click Create Token to create the API token. Copy and paste the token to a safe location — you won’t be able to see the token again after you browse away from the page.
Now we can test the purge all API endpoint using our Terminal application:
$ curl -X POST -H "Fastly-Key: YOUR_FASTLY_TOKEN" "https://api.fastly.com/service/SERVICE_ID/purge_all"We should see the following response:
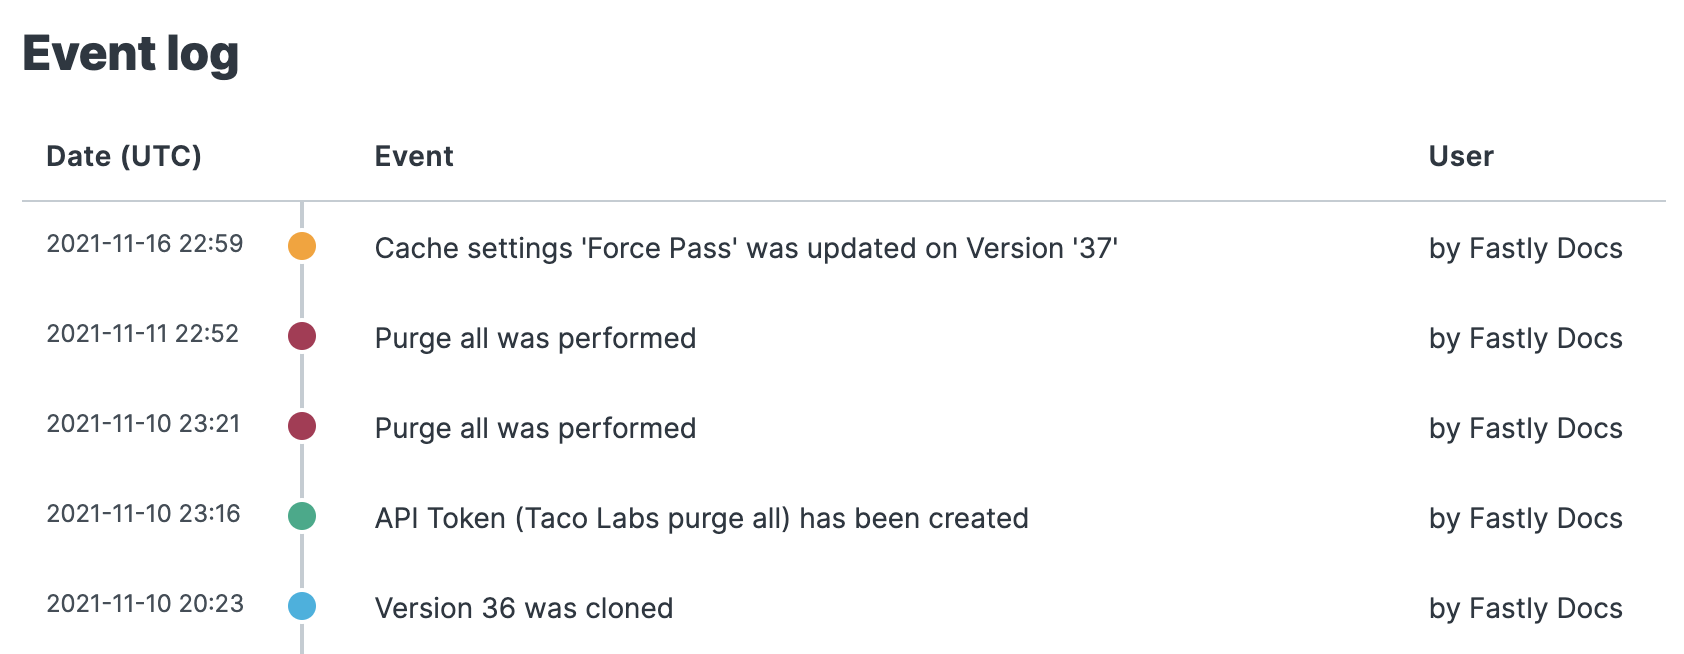
{"status":"ok"}We can check that the purge request was successful by looking at the event log in the web interface, as shown below. It worked!
TIP: You can use roles and permissions to restrict a user’s ability to purge using the Fastly web interface and API. For more information about the available user roles, see our documentation on configuring user roles and permissions.
Now we can add the curl command to the bottom of our GitHub Action:
- name: "Purge Fastly cache" run: | curl -X POST -H "Fastly-Key: YOUR_FASTLY_TOKEN" "https://api.fastly.com/service/SERVICE_ID/purge_all"That’s it! Now our GitHub Action will automatically purge all of our Fastly cache after it deploys our website to Amazon S3.
Purging by surrogate key
We’ve committed to using purge all for our static site, but it’s worth exploring — if only in theory — how we could use surrogate keys to purge a select group of content from cache. To understand how this could work, we’ll take a subset of our content and use a header to tag those content items with a surrogate key. Then we can purge the cache of only the content items tagged with that surrogate key.
Let’s say that we need a surrogate key for all of our mix-ins. Pretend that the prices of the ingredients change so often that we need to update and purge the mix-in content multiple times a day. We’ll use a VCL snippet to create a mixin key that we’ll use to tag all of our mix-ins content. We could also set the surrogate key at the origin or application level.
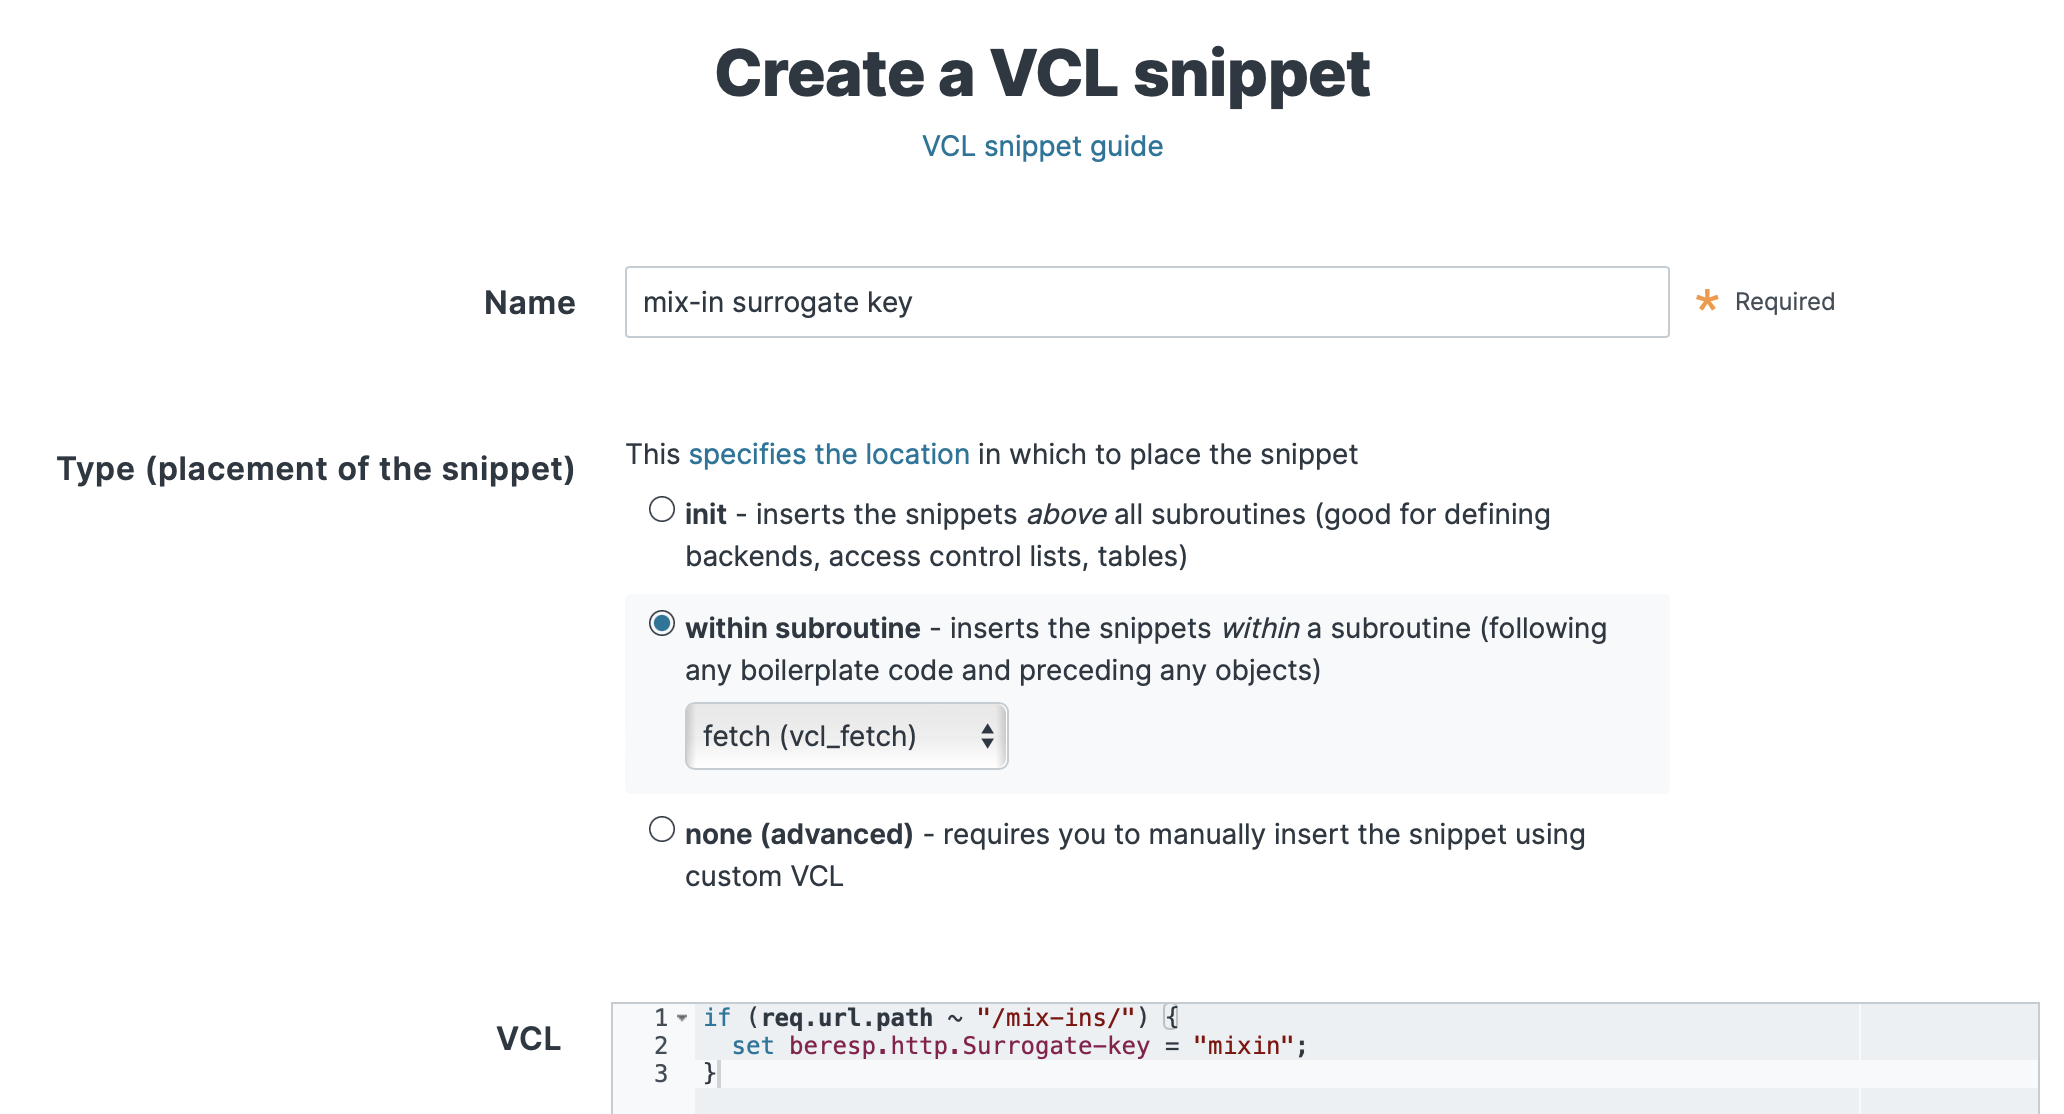
Let’s click Edit configuration to clone our service and create a new draft version. On the VCL snippets page, click Create snippet. We’ll add a name for our snippet, set the type to within subroutine and fetch (vcl_fetch) and use the following VCL:
if (req.url.path ~ "/mix-ins/") { set beresp.http.Surrogate-key = "mixin";}This will set the surrogate key for all content in the mix-ins path. Review the settings in the web interface, as shown below, and then click Create.
Let’s click Activate to activate the new version of the service configuration. After performing another purge all (follow the instructions from the previous section), we can check that our redirect is working by checking the headers of the mix-in index page:
$ curl -svo /dev/null -H "Fastly-Debug:1" "https://www.tacolabs.com/mix-ins/"We can see the surrogate-key header in the output:
< HTTP/2 200< x-amz-id-2: eDYmcGNu4Pk+AnTjHy5aO1kuOI802/tOdstMxa5FdZV0doL8Kjn7p/C+UBiE7u04Xg9bTmVooR8=< x-amz-request-id: 6KF7YW10F6Q19T0Y< last-modified: Thu, 04 Nov 2021 22:38:08 GMT< etag: "d89bec2183579e4c842d2590bc45bf9f"< content-type: text/html< server: AmazonS3< via: 1.1 varnish, 1.1 varnish< surrogate-key: mixin< cache-control: no-store, max-age=0< surrogate-control: max-age=31557600Now we can use the API to purge content tagged with the surrogate key:
$ curl -X POST -H "Fastly-Key: YOUR_FASTLY_TOKEN" "https://api.fastly.com/service/SERVICE_ID/purge/mixin"