
2. Setting up Fastly IO
Let's get started by picking up where we left off in Introduction to Fastly's CDN. At that end of that tutorial, we had a fully-functional website (Taco Labs) configured to use the Fastly CDN. You can use the same Fastly service and configuration as a starting point for this tutorial.
NOTE: We've made some changes you should know about. Specifically, we've:
- Duplicated our Fastly service configuration to a new service
- Forked the Taco Labs code and created a new branch to update the website
- Created a new Amazon S3 bucket
- Added a new domain (
io.tacolabs.com) with the associated DNS records in Route 53 - Provisioned a new TLS certificate for the domain
We did this to keep our settings and code discrete, but there's no reason you can't continue using the same Fastly service and domain you used throughout the Introduction to Fastly's CDN tutorial. Just remember to use your existing domain instead of io.tacolabs.com.
Starting your Fastly IO trial
It's time to enable Fastly IO for our account by starting a trial. This step assumes you've been assigned the role of superuser.
Let's log in to the Fastly web interface, clone the active version of the service, select Billing from the account menu, and then select Trials from the sidebar. Click Start trial in the Image Optimizer box to start your 30 day Fastly IO trial.
Once you've started the Fastly IO trial, you have the choice of when to enable it for a particular service. Before you can do that, however, you'll need to verify that shielding is enabled for the service that will use Fastly IO.
Verifying that shielding is enabled
Services that use Fastly IO need to have shielding enabled. Using shielding with Fastly IO helps ensure that the original images are only transformed once, which in turn reduces latency and the number of required origin fetches. If you followed along with Introduction to Fastly's CDN, you've already enabled shielding for your service.
You can verify that shielding is enabled by visiting the Origins page in the Fastly web interface and viewing the details for your host. If shielding is enabled, you'll see a shield POP specified, as shown below.
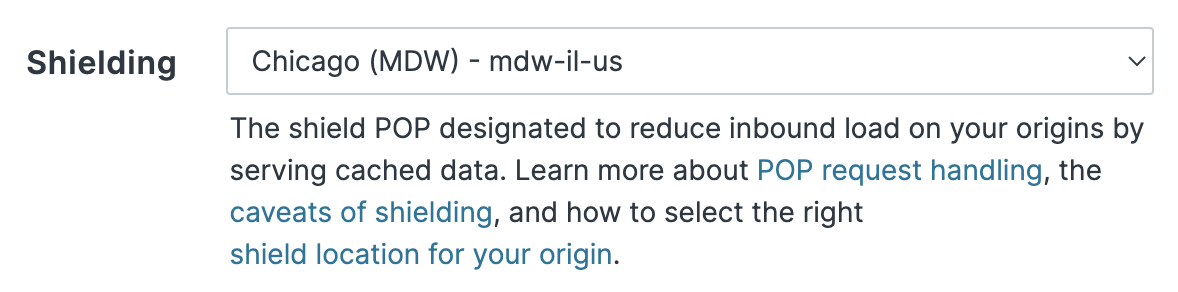
TIP: Generally speaking, we recommend selecting a shield POP close to your origin. See our documentation for help choosing a shield POP close to your origin.
If you just enabled shielding for the first time, click Activate to activate the new version of the service configuration.
Enabling Fastly IO on a specific service
Once you've confirmed that shielding is enabled for your service, you'll be ready to enable the Image Optimizer for that specific service as well. You can do this at any time by clicking Edit configuration to clone the service and create a new draft version. Then, on the Image Optimizer page, click the switch to enable Fastly IO, and you should be ready to go.

Once you flip the switch, the default settings will appear on the Fastly IO page, as shown below.
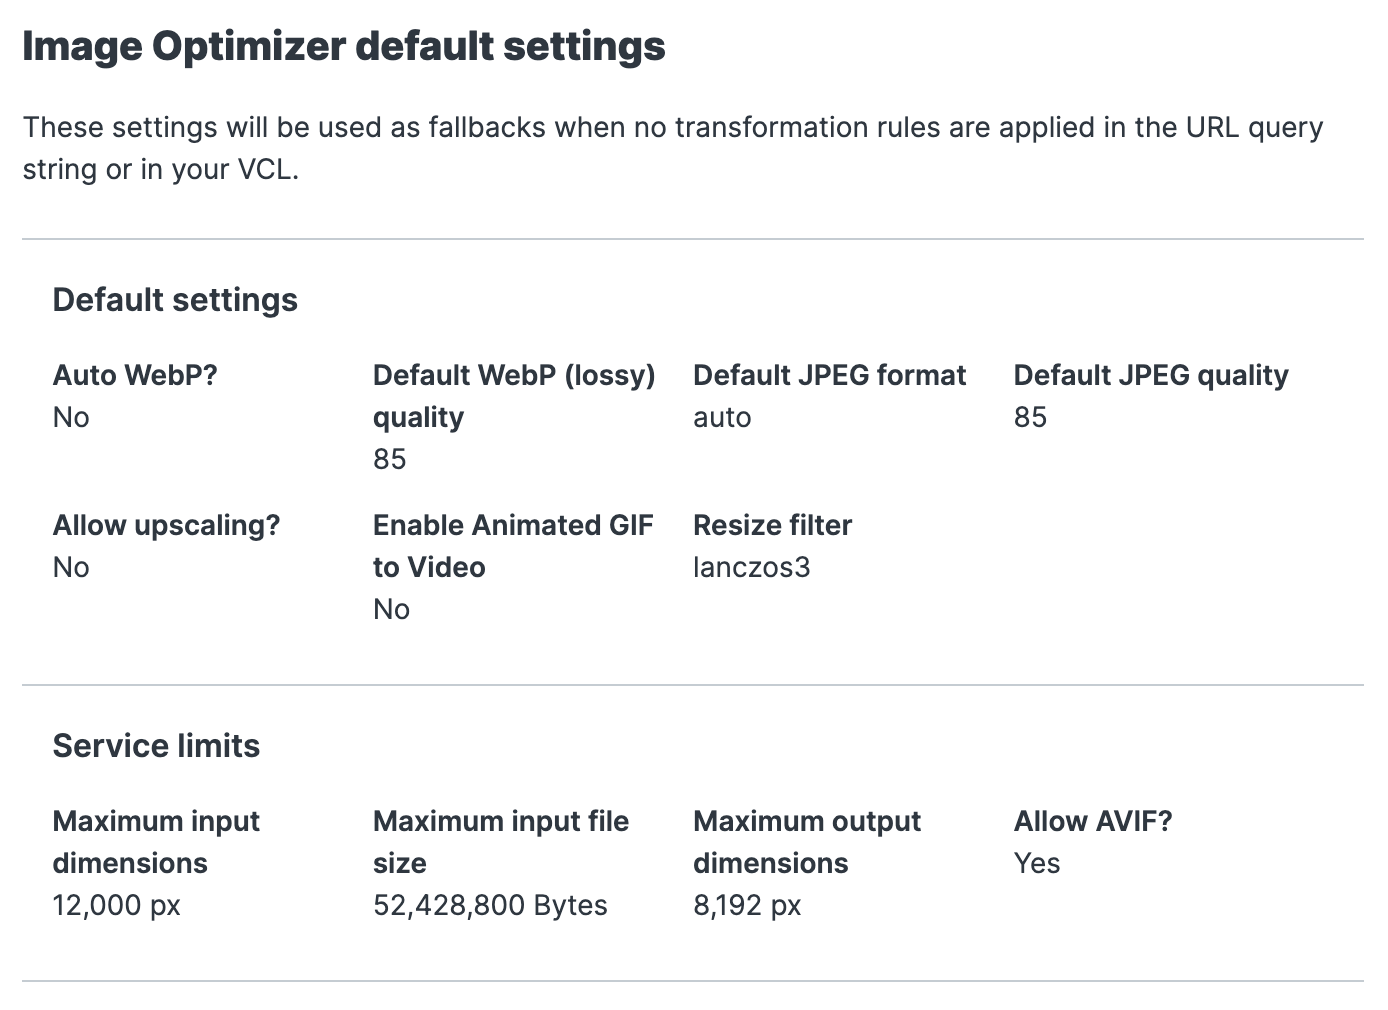
We'll talk about these settings later when we customize them for Taco Labs. For now, just know that when you see these settings in the Fastly web interface, you can rest assured that Fastly IO is enabled. However, there are still a couple of things we have to do before Fastly IO is working for our service.
Adding the Fastly IO header and request condition
Adding the Fastly IO header to our service is another prerequisite for enabling Fastly IO.
We can set headers in the Fastly web interface. Click Edit configuration to clone the service and create a new draft version. Then, on the Content page, click Create a header. The Create a header page appears, as shown below.
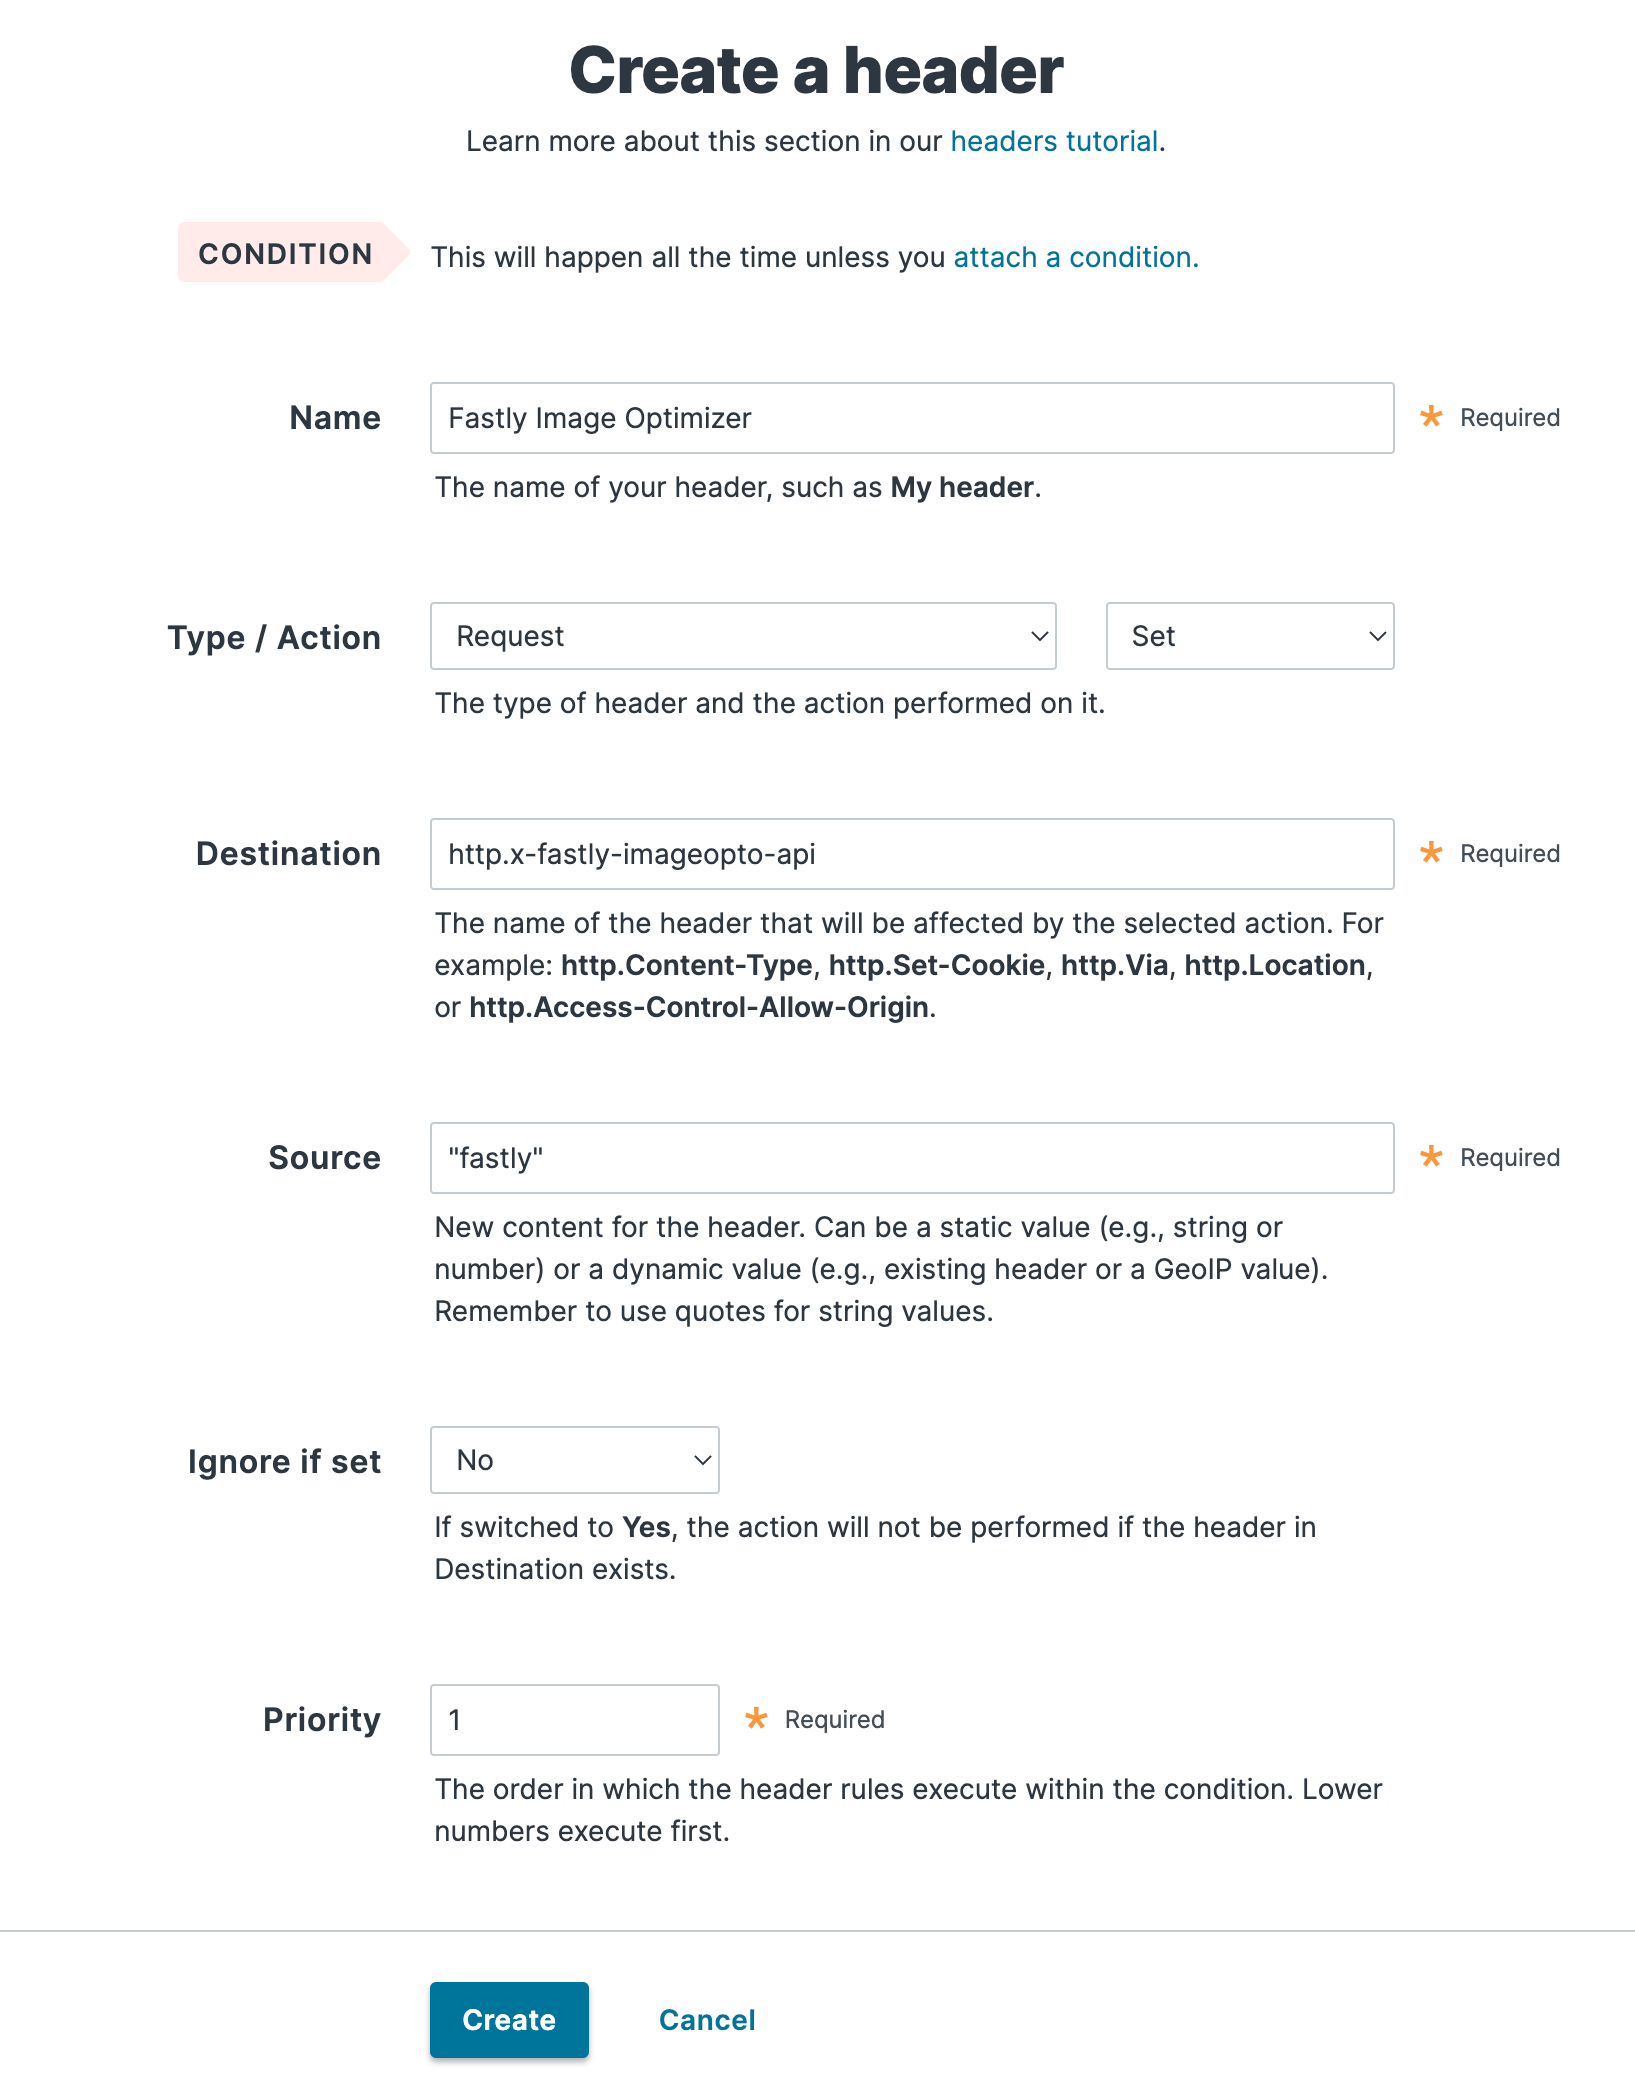
Fill out the Create a header fields as follows:
- In the Name field, enter a human-readable name for the header.
- From the Type / Action menus, select Request and Set.
- In the Destination field, enter
http.x-fastly-imageopto-api. - In the Source field, enter
"fastly". - From the Ignore if set menu, select No.
- In the Priority field, enter
1.
Click Create to save the header.
Now we need to create a request condition to ensure that only our image assets are routed through Fastly IO. If we sent non-image content through Fastly IO, it wouldn't be optimized, but we'd still be charged for it. To ensure that we only optimize images, we'll create a condition by clicking Attach a condition next to the header we just created. The Create a new condition page appears, as shown below.
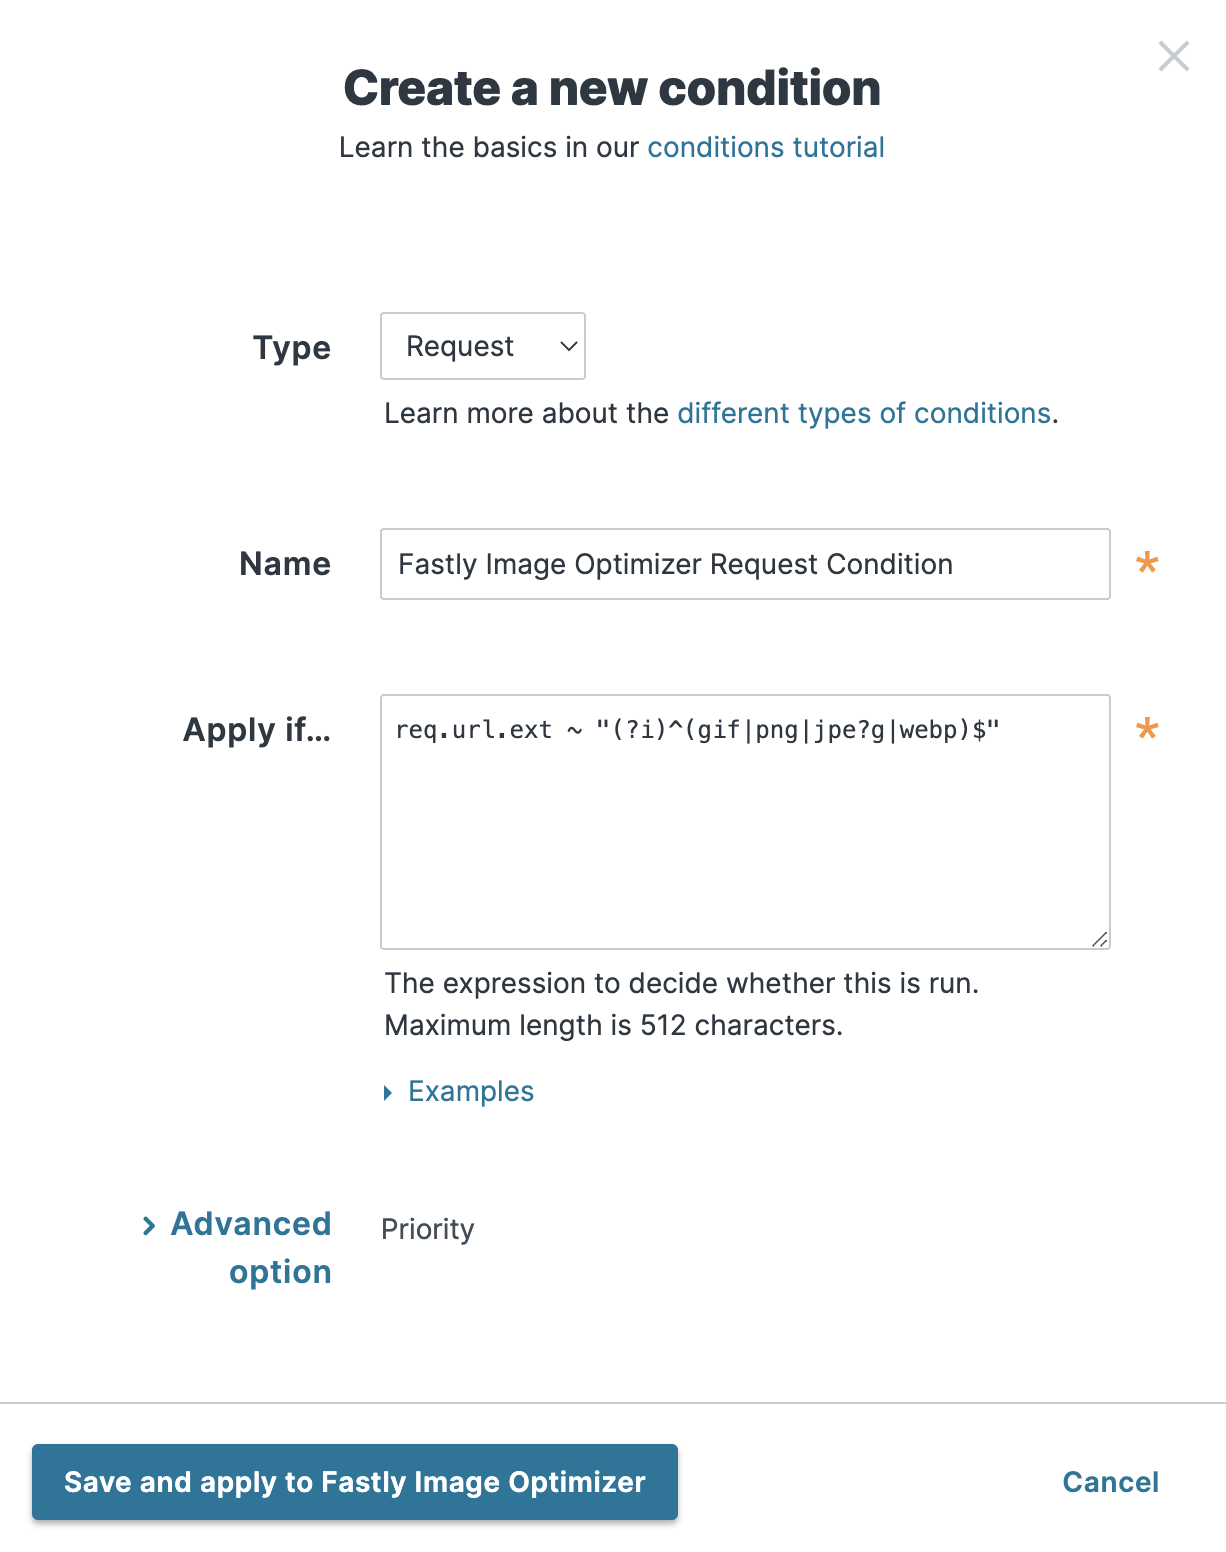
Fill out the Create a new condition fields as follows:
- From the Type menu, select Request.
- In the Name field, enter a human-readable name for the condition.
- In the Apply if field, enter
req.url.ext ~ "(?i)^(gif|png|jpe?g|webp)$".
Click Save and apply to Fastly Image Optimizer. Then we'll click Activate to activate our service configuration.
Examining VCL as an alternative
We learned in Introduction to Fastly's CDN that the web interface modifies the Varnish Configuration Language (VCL) code for our service. That's what just happened when we created our header and condition. The web interface hides the complexity, but behind the scenes, it takes our settings and uses them to generate custom VCL code that is used every time we activate our service configuration.
As you gain experience with VCL, you'll become more comfortable with modifying the VCL directly. For example, while going through this guide, we could have added the header and condition to the VCL instead of using the controls in the web interface. Let's take a look at how that could work.
NOTE: This is just an example. You don't need to follow these steps since we've already added the header and condition using the web interface. But these steps show how easy it is to perform tasks using VCL instead.
We can use the Fastly web interface to create a VCL snippet. Click Edit configuration to clone our service and create a new draft version. On the VCL snippets page, click Create snippet. We'd add a name for our snippet, select type within subroutine (recv (vcl_recv)), and then copy and paste the following VCL code:
if (req.url.ext ~ "(?i)^(gif|png|jpe?g|webp)$") { set req.http.x-fastly-imageopto-api = "fastly";}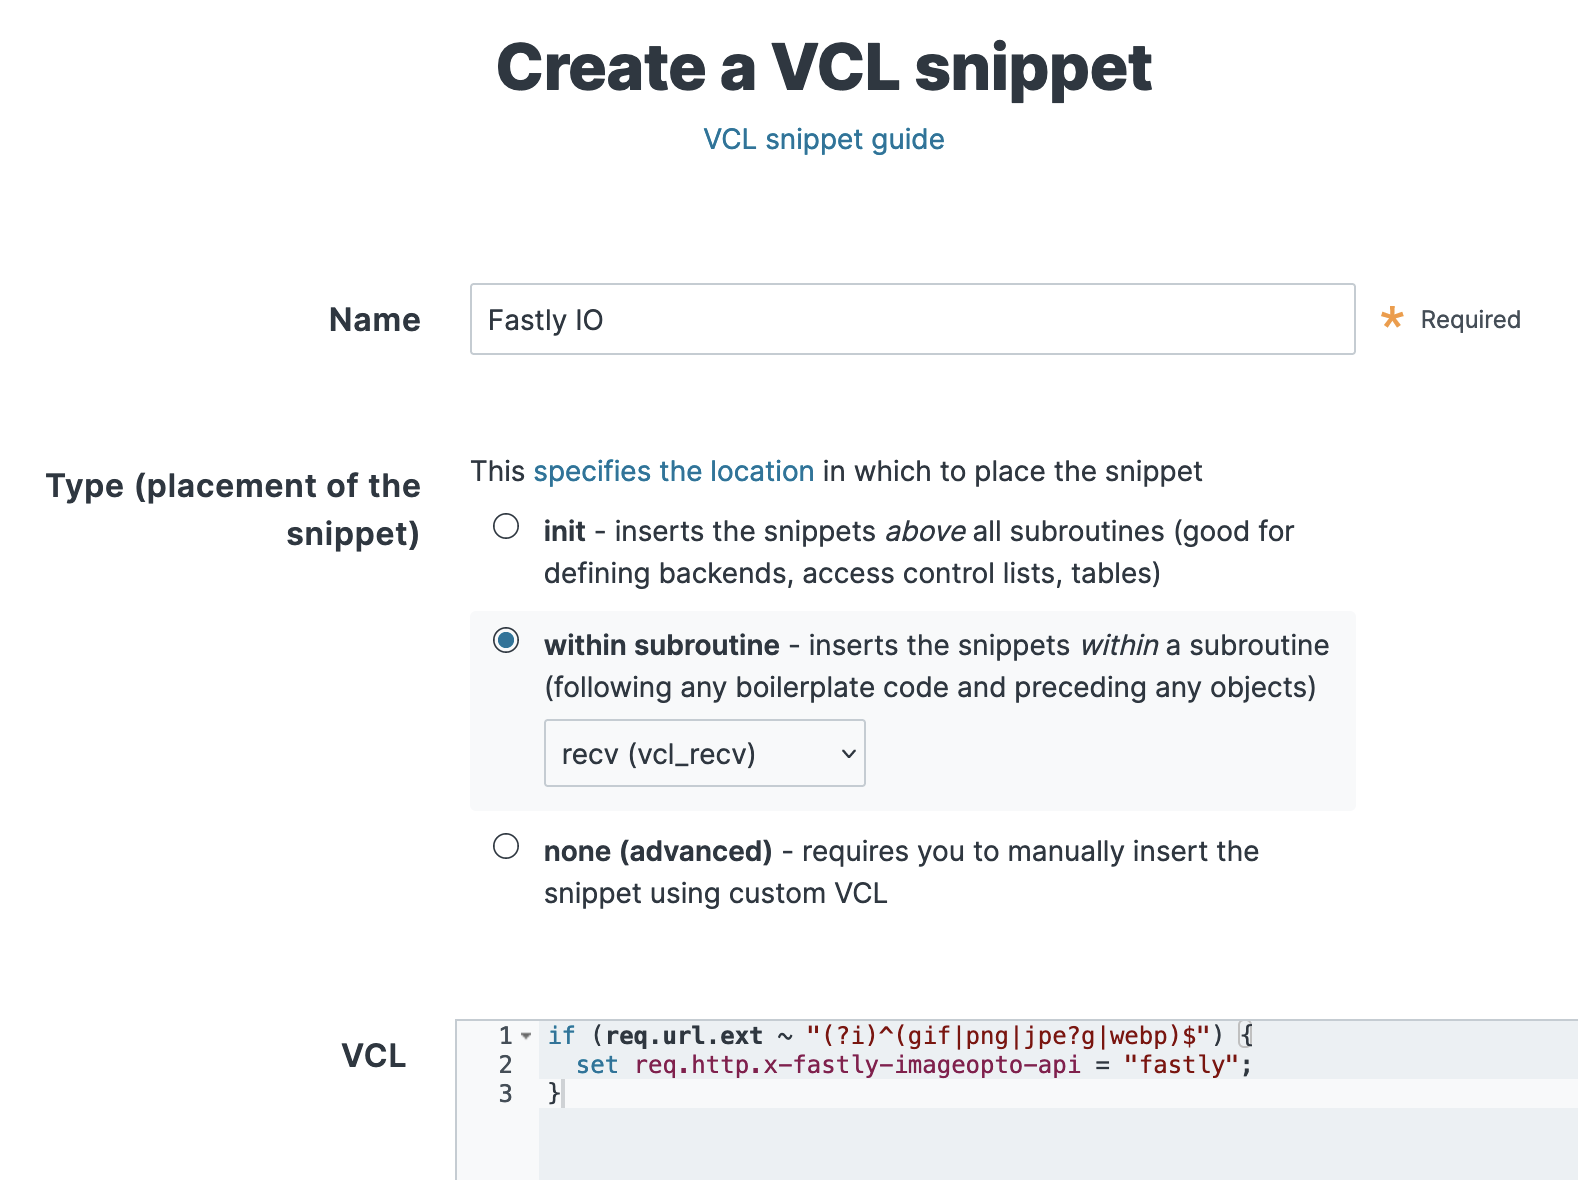
Adding this VCL would have the same effect as the steps we performed in the previous section when we added the header and condition in the web interface. As noted earlier, we aren't going to actually add this VCL to our service, so let's click Cancel.
Verifying that Fastly IO is working
We've enabled shielding and added the required header and condition for Fastly IO. Now we can check to see if Fastly IO is working for our service:
$ curl -sI "https://io.tacolabs.com/assets/tacos.jpeg?width=200"This command loads an image from the Taco Labs website and resizes it using Fastly IO. The ?width=200 parameter tells Fastly IO to resize the image's width to 200 pixels. We'll see the following in the output:
fastly-io-info: ifsz=98106 idim=720x467 ifmt=jpeg ofsz=12494 odim=200x130 ofmt=jpegIf everything's working, the output of the terminal command will contain the image dimensions (odim) and the width will be set to 200. Fastly IO is enabled for our service and ready to start transforming our images!
