
Working with request rules
Last updated 2024-04-02
Request rules allow you to define arbitrary conditions and block, allow, or tag requests indefinitely or for a specific period of time. For example, you could make a rule to block all requests with specific headers, requests to certain paths, or requests originating from specific IP addresses.
Limitations and considerations
Request rules are limited to 1000 per corp plus 1000 per site.
Creating request rules
To create a request rule, follow these steps:
- Log in to the Next-Gen WAF console.
- From the Sites menu, select a site if you have more than one site.
Click Add site rule.
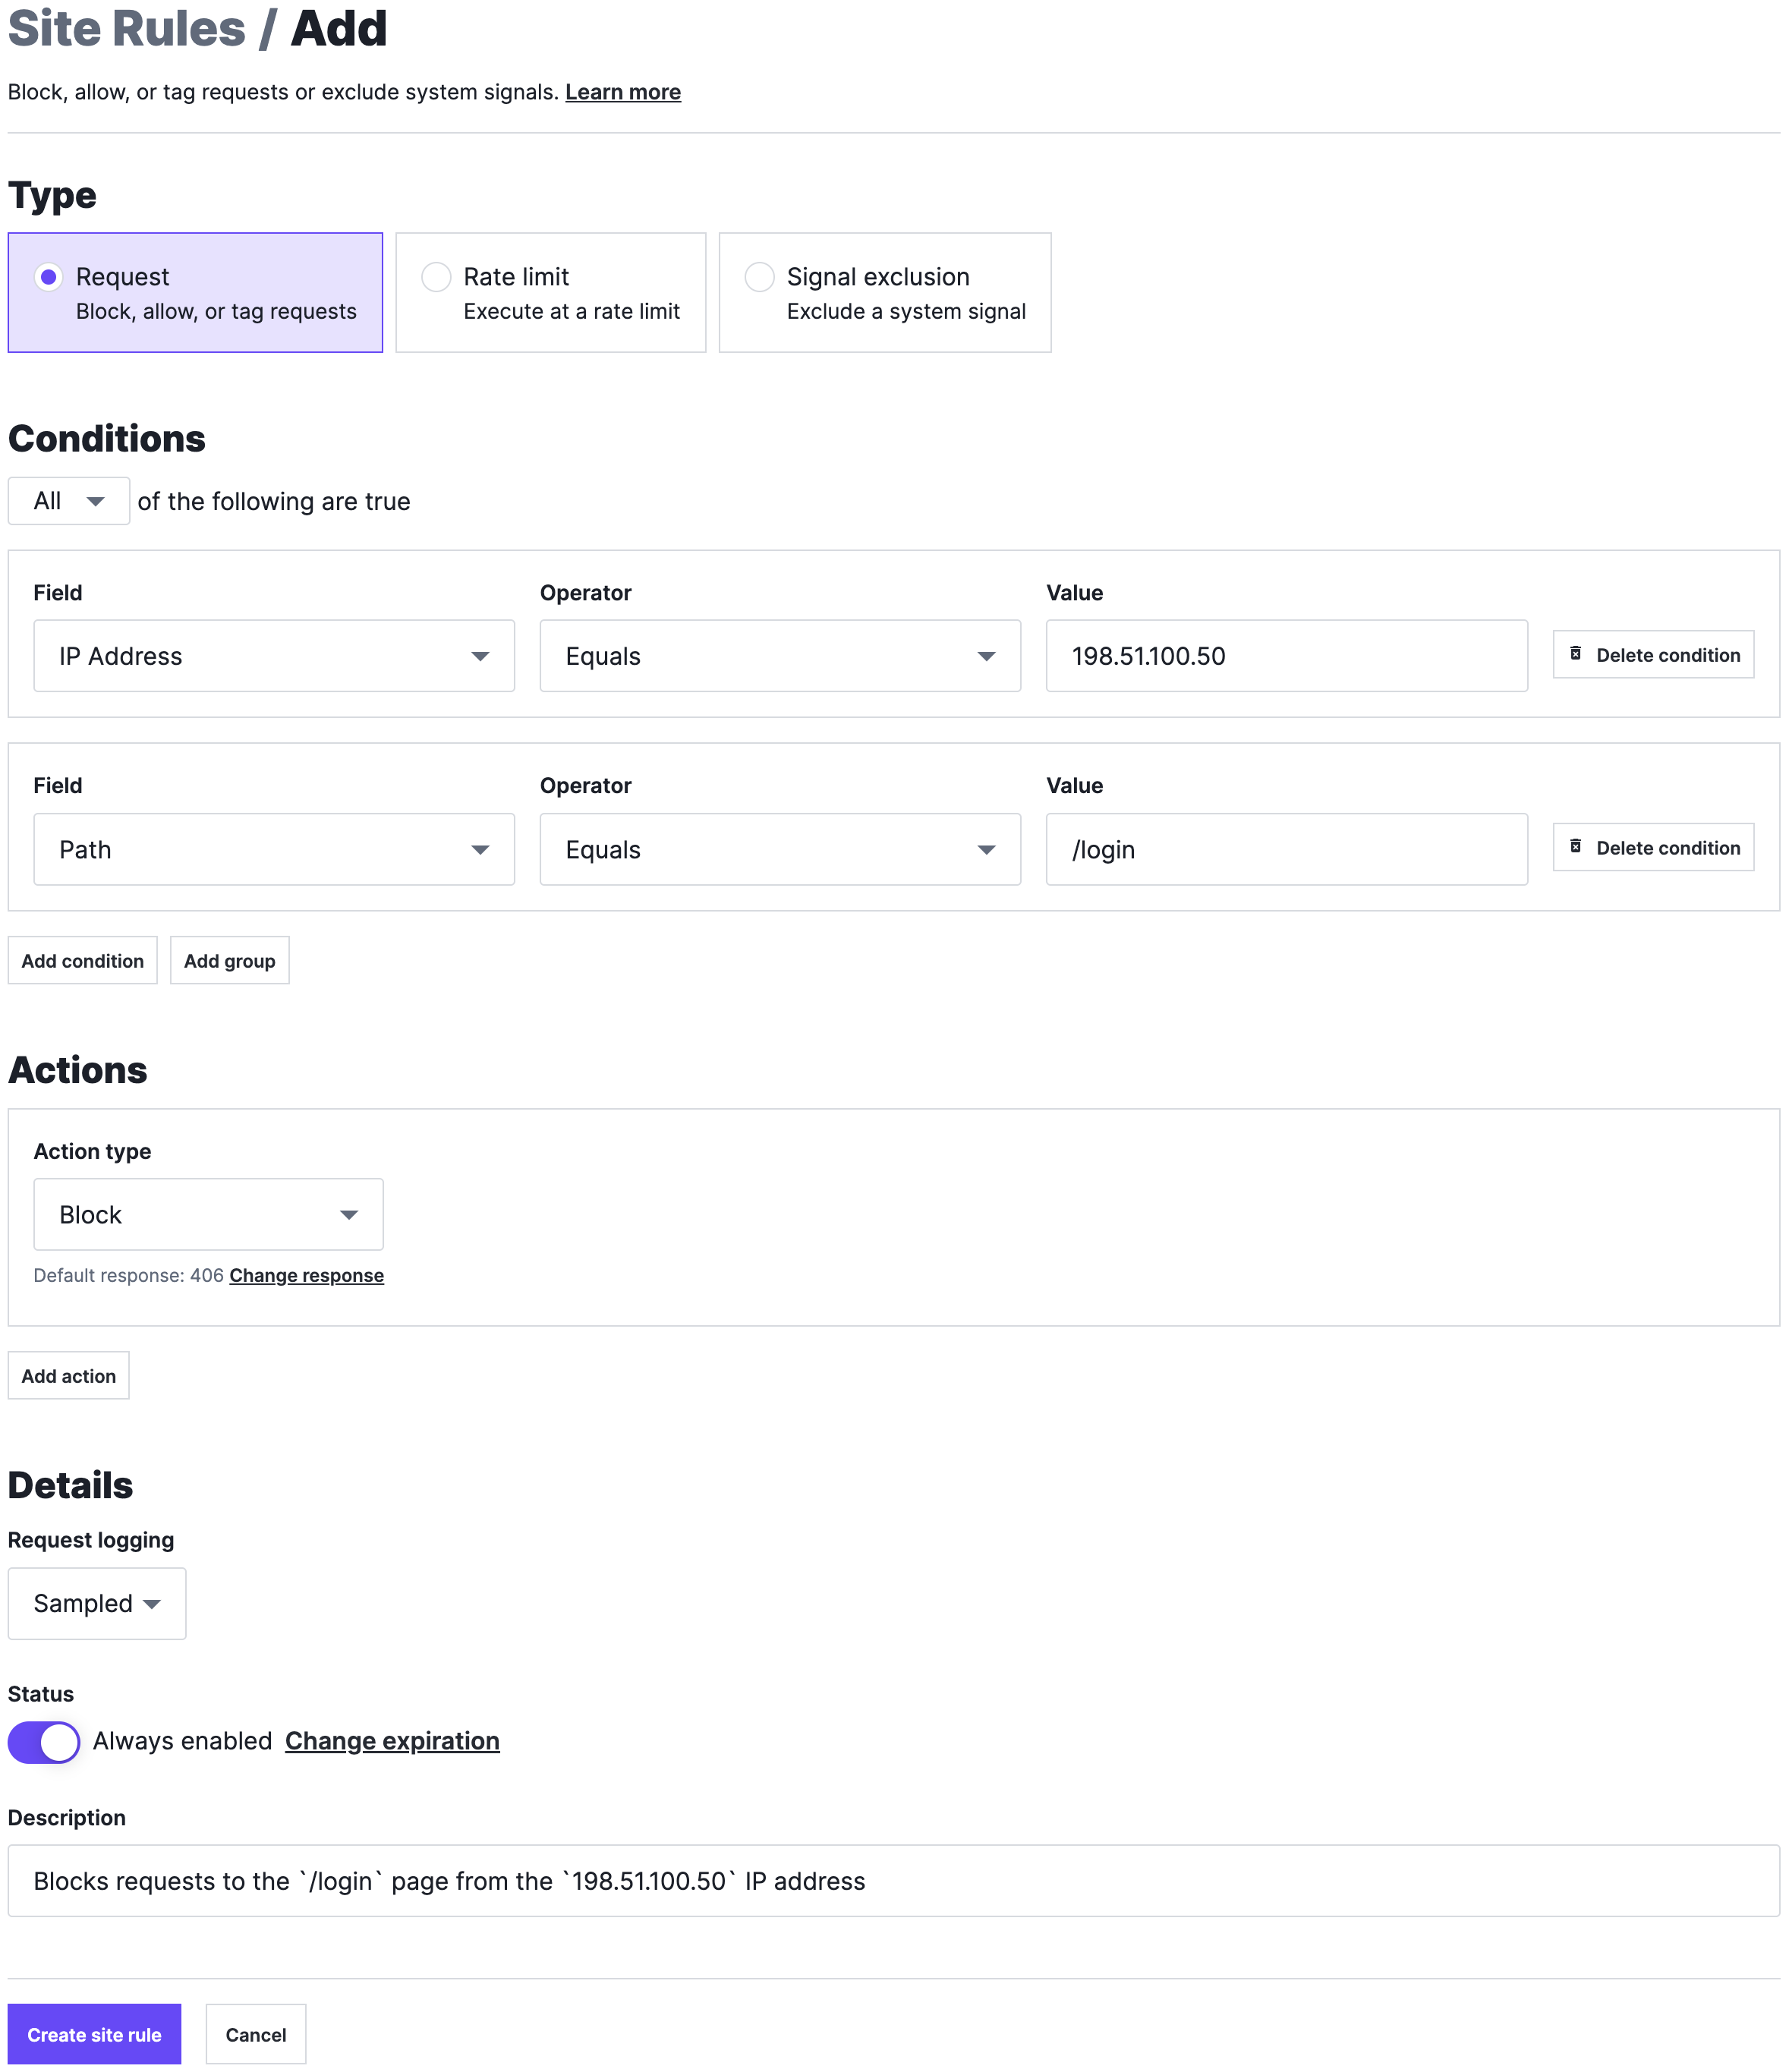
In the Type section, select Request.
Fill out the fields in the Conditions section as follows:
- From the Field menu, select the request field that the condition is based on.
- In the Value field, enter a value for the specified field.
- From the Operator menu, select an operator to specify how the selected field and value relate.
- (Optional) Click Add condition to add another condition or Add group to create a group of conditions.
- Select All to specify that a request must meet every condition or Any to specify that a request must meet only one condition.
Fill out the fields in the Actions section as follows:
- From the Action type menu, select the action that should be taken when a request meets the rule's conditions. Action types include
Block,Allow,Add signal,Browser challenge, andVerify token. Check out our guide to using client challenges for additional details on browser challenges and token verification. - (Optional) If you selected
Browser challengefrom the Action type menu, leave the Allow Interactive switch disabled to keep the challenge non-interactive or click the switch to require an interactive (CAPTCHA) challenge. - (Optional) Click Change response to specify the custom response code to return when the rule blocks a request. Supported custom response codes are
301,302, and400-599. - (Optional) If you entered
301or302in the Response code (optional) field then, in the Redirect URL (optional) field, enter the absolute or relative URL of the redirect location. For more information, check out our guide on using redirect custom response codes. - (Optional) Click Add action to add another action.
- From the Action type menu, select the action that should be taken when a request meets the rule's conditions. Action types include
Fill out the fields in the Details section as follows:
- From the Request logging menu, select Sampled to store the logs for requests that match the rule's criteria and None to not store the logs. When you select None, the time series graphs will still include data from requests that match the rule's criteria. Read our guide on request data storage for more information.
- Leave the Status switch enabled.
- Click Change expiration and select from the menu when the rule should be disabled.
- In the Description field, enter a description of the rule.
Click Create site rule. The request rule is created and the Site Rules page appears.
Do not use this form to send sensitive information. If you need assistance, contact support. This form is protected by reCAPTCHA and the Google Privacy Policy and Terms of Service apply.
