
4. Updating the Taco Labs website
We've enabled Fastly IO, configured the default settings, and verified that Fastly IO is automatically transforming all of the images on our website. Now we can add some new images to the Taco Labs website and make use of all of Fastly IO's features. By the time we reach the end of this section, we'll have:
- Added hero images to every recipe, base layer, and mix-in page, and displayed those same images on the index pages
- Created a Jekyll plugin to help us transform the images we reference in our Markdown source
- Added a watermark to protect the images on our website
Let's get started!
Working with hero images on feature pages
The existing implementation of Taco Labs is functional but — how do we say this gently? — visually unappealing. The pages containing our recipes, base layers, and mix-ins have lots of text but no images. To improve the design and aesthetic of the website, we'll add a hero image to the top of each of these pages.
For the purposes of this tutorial, we'll use Unsplash to find some free images, and then we'll add to our repository a single, full-sized hero image for every page. When we reach the end of this section, the hero image will take up the entire width of the container, as shown below.
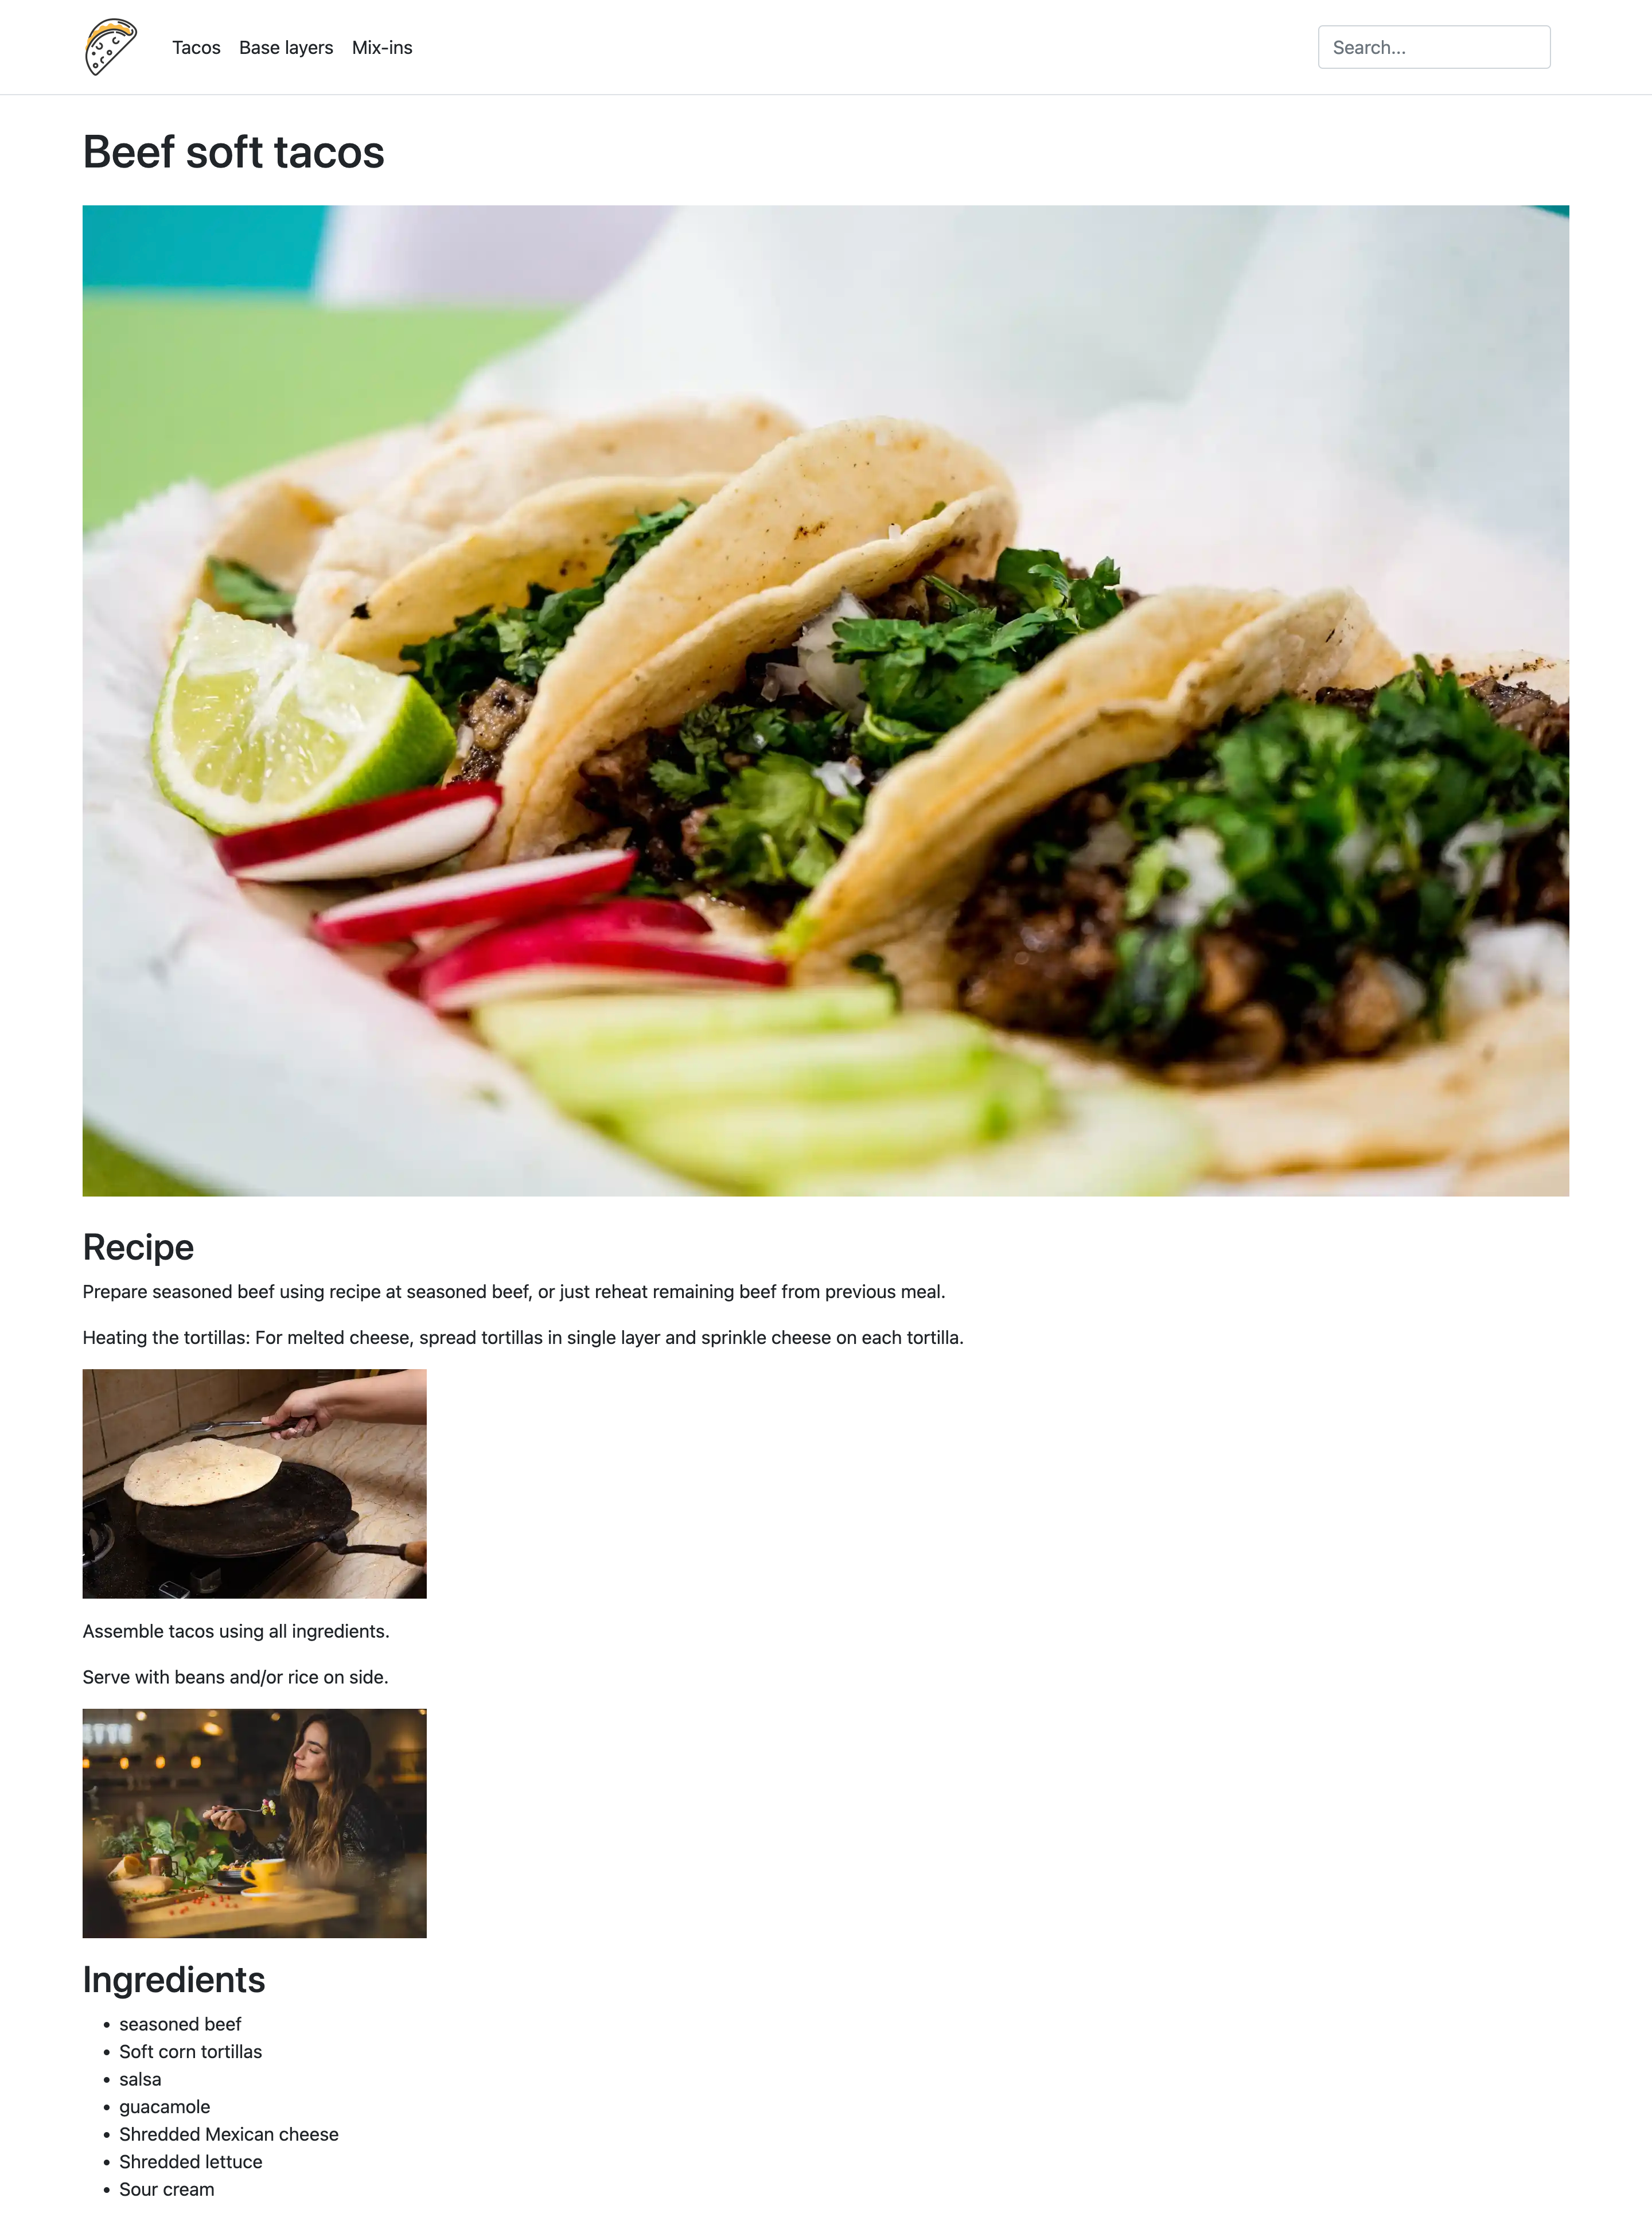
The source file for the beef soft taco hero image weighs in at a hefty 1.19 MB with dimensions of 5858x3905 pixels. We'll obviously need to transform this image for Taco Labs, but how?
We have three primary concerns when it comes to hero images:
- Dimensions: Not all of the source images we picked have the same dimensions. Some images are taller than they are wide, and some are more rectangular. We'll need to find a way to crop the images so they're a consistent height and width.
- DPR: We need to find a way to adjust the device pixel ratio (DPR) of the image depending on the client device's screen resolution.
- Quality: Related to the DPR, we need to find a way to reduce the quality of higher DPR images to reduce their file size.
We'll start with the following HTML, using this sample hero image for all pages, in our layout's source code (default.html) to display the image:
<img src="https://io.tacolabs.com/assets/beef-soft-tacos.jpg">We'll continue to revise this code as we work through the issues.
Adjusting image dimensions
Fastly IO can transform images for the client device, but it's up to us to prompt the client device to request the most appropriate image variant. To do that, we'll use responsive image technology. This technology ensures that we display the right image on the right client device.
Bootstrap, the front-end framework we're using for Taco Labs, provides a feature (class="img-fluid") that allows us to make the hero image responsive. However, this feature only scales the full-size image to the dimensions of our CSS container — it doesn't resize the image itself. This means client devices will load the full-size image regardless of how Bootstrap displays it on the screen. We can still use this feature, but we'll have to use Fastly IO to resize the image in any case.
After adding that class, we have this in our source code:
<img src="https://io.tacolabs.com/assets/beef-soft-tacos.jpg" class="img-fluid">Now the image fits on the webpage, but it's still 1.19 MB and 5858x3905 pixels. If we examine the source code, we'll see that Bootstrap scaled the image to 1296x864 pixels. It's safe to assume that's the maximum size that will be displayed on any client device, so we can use Fastly IO to resize the image to those dimensions using the width and height parameters.
NOTE: This isn't a perfect solution. Bootstrap will use the 1296x864 pixel image for both desktop computers and mobile devices, and it's larger than it should be for mobile devices. However, when combined with DPR, it'll be good enough to pass the PageSpeed Insights audit.
Being mindful of our other issue — differing dimensions of the source images — we decide to use the fit parameter to control how the image will be constrained within the width and height values that we provide. The fit parameter allows us to use one of three different values to resize the image. For our particular use case, crop will work best. Using the crop value with the fit parameter will resize and crop the image centrally to fit the specified region. As with any cropping, parts of the images might be cut off after the transformation is applied, but all of the images will fit the 1296x864 dimensions exactly.
After adding those parameters, we have this in our source code:
<img src="https://io.tacolabs.com/assets/beef-soft-tacos.jpg?width=1296&height=864&fit=crop" class="img-fluid">Handling DPR
DPR is the number of physical device pixels corresponding to logical pixels (also referred to as CSS pixels). If we did nothing with DPR, the images on the Taco Labs website would look blurry on high-resolution displays. We can use Fastly IO and the dpr parameter to provide different images for client devices depending on the DPR.
Client-side software, such as web browsers, can determine the DPR of the display the user is viewing. We can modify our HTML as follows to use the srcset property to request the correct image for the client device:
<img srcset="https://io.tacolabs.com/assets/beef-soft-tacos.jpg?width=1296&height=864&fit=crop&dpr=1.5 1.5x, https://io.tacolabs.com/assets/beef-soft-tacos.jpg?width=1296&height=864&fit=crop&dpr=2 2x, https://io.tacolabs.com/assets/beef-soft-tacos.jpg?width=1296&height=864&fit=crop&dpr=3 3x" src="https://io.tacolabs.com/assets/beef-soft-tacos.jpg?width=1296&height=864&fit=crop" alt="Beef soft tacos" class="img-fluid"/>This code tells the client device to automatically load the appropriate image (transformed by Fastly IO) for the display the user is viewing. For example, on a MacBook Pro, the dpr=2 image will be loaded and displayed.
Reducing the quality of higher DPR images to manage file sizes
One side-effect of using DPR is that the higher DPR images will have larger file sizes. To compensate for that and reduce the file sizes of those images, we can lower the quality for the higher DPR images while still maintaining a denser pixel set for the images. Recall that our default Fastly IO settings specify that the quality of all of our images is 85. We'll override the value of the quality parameter for higher DPR images by adding the quality parameter as follows:
<img srcset="https://io.tacolabs.com/assets/beef-soft-tacos.jpg?width=1296&height=864&fit=crop&dpr=1.5 1.5x, https://io.tacolabs.com/assets/beef-soft-tacos.jpg?width=1296&height=864&fit=crop&quality=30&dpr=2 2x, https://io.tacolabs.com/assets/beef-soft-tacos.jpg?width=1296&height=864&fit=crop&quality=10&dpr=3 3x" src="https://io.tacolabs.com/assets/beef-soft-tacos.jpg?width=1296&height=864&fit=crop" alt="Beef soft tacos" class="img-fluid"/>Setting the quality is a balancing act. Set it too low, and users will notice the reduction in quality. Set it too high, and users will wait longer for the image to load. The general idea is that higher DPR will offset lower quality, effectively allowing us to lower the file sizes while still making the images look acceptable on high-resolution displays.
Making the code work with our static site generator
So far, we've used a sample hero image to test our code. Now that it's working, we can add the rest of the hero images to the repository and update the code in default.html to show the correct hero image for each article.
Since we're using the Jekyll static site generator, we'll add the hero image file name in the YAML of each page, then use a bit of conditional logic and Liquid templating language to insert the image file name and alt text.
Here's the final code that we'll use in default.html for hero images in the layout for recipes, base layers, and mix-ins:
{% if page.image %}<img srcset="https://io.tacolabs.com/assets/{{ page.image }}?width=1296&height=864&fit=crop&dpr=1.5 1.5x, https://io.tacolabs.com/assets/{{ page.image }}?width=1296&height=864&fit=crop&quality=30&dpr=2 2x, https://io.tacolabs.com/assets/{{ page.image }}?width=1296&height=864&fit=crop&quality=10&dpr=3 3x" src="https://io.tacolabs.com/assets/{{ page.image }}?width=1296&height=864&fit=crop" alt="{{ page.title }}" class="img-fluid"/>{% endif %}Now we can add and commit our new images and code to our repository. Our GitHub Action will automatically deploy the generated site to our Amazon S3 bucket and purge the cache. Our hero images are now live on the website!
Revising index pages to add cards with hero images
It's time for the next order of business: updating our index pages to display the hero images there, too. These pages already show all of the recipes, base layers, and mix-ins, but like the other pages on the initial version of the Taco Labs website, the index pages are quite bland. We're going to add the hero images as thumbnails on the index pages to spice things up!
The ability to use source images in multiple places and in different ways is one of the main selling points of image optimization. In our case, we first used the hero images in the layout, and now we're planning on using them again as the thumbnail images on the index page. Fastly IO has effectively transformed a source image into two different images that we can use in different parts of the Taco Labs website.
Using Bootstrap's card feature and all of the Fastly IO parameters we used in the previous section, we create the following HTML and add it to our three index pages:
<div class="col"> <div class="card mb-3" style="max-width: 540px;"> <div class="row g-0"> <div class="col-md-4"> <a href="{{ post.url }}"> <img srcset="https://io.tacolabs.com/assets/{{ post.image }}?width=180&height=270&fit=crop&dpr=1.5 1.5x, https://io.tacolabs.com/assets/{{ post.image }}?width=180&height=270&fit=crop&quality=40&dpr=2 2x, https://io.tacolabs.com/assets/{{ post.image }}?width=180&height=270&fit=crop&quality=15&dpr=3 3x" src="https://io.tacolabs.com/assets/{{ post.image }}?width=180&height=270&fit=crop" alt="{{ post.title }}" width="180" height="270" /> </a> </div> <div class="col-md-8"> <div class="card-body"> <h5 class="card-title"><a href="{{ post.url }}">{{ post.title }}</a></h5> <p class="card-text">{{ post.excerpt }}</p> </div> </div> </div> </div></div>Notice that we've changed the values of the width and height parameters to match the dimensions expected by the card. The result is shown below.
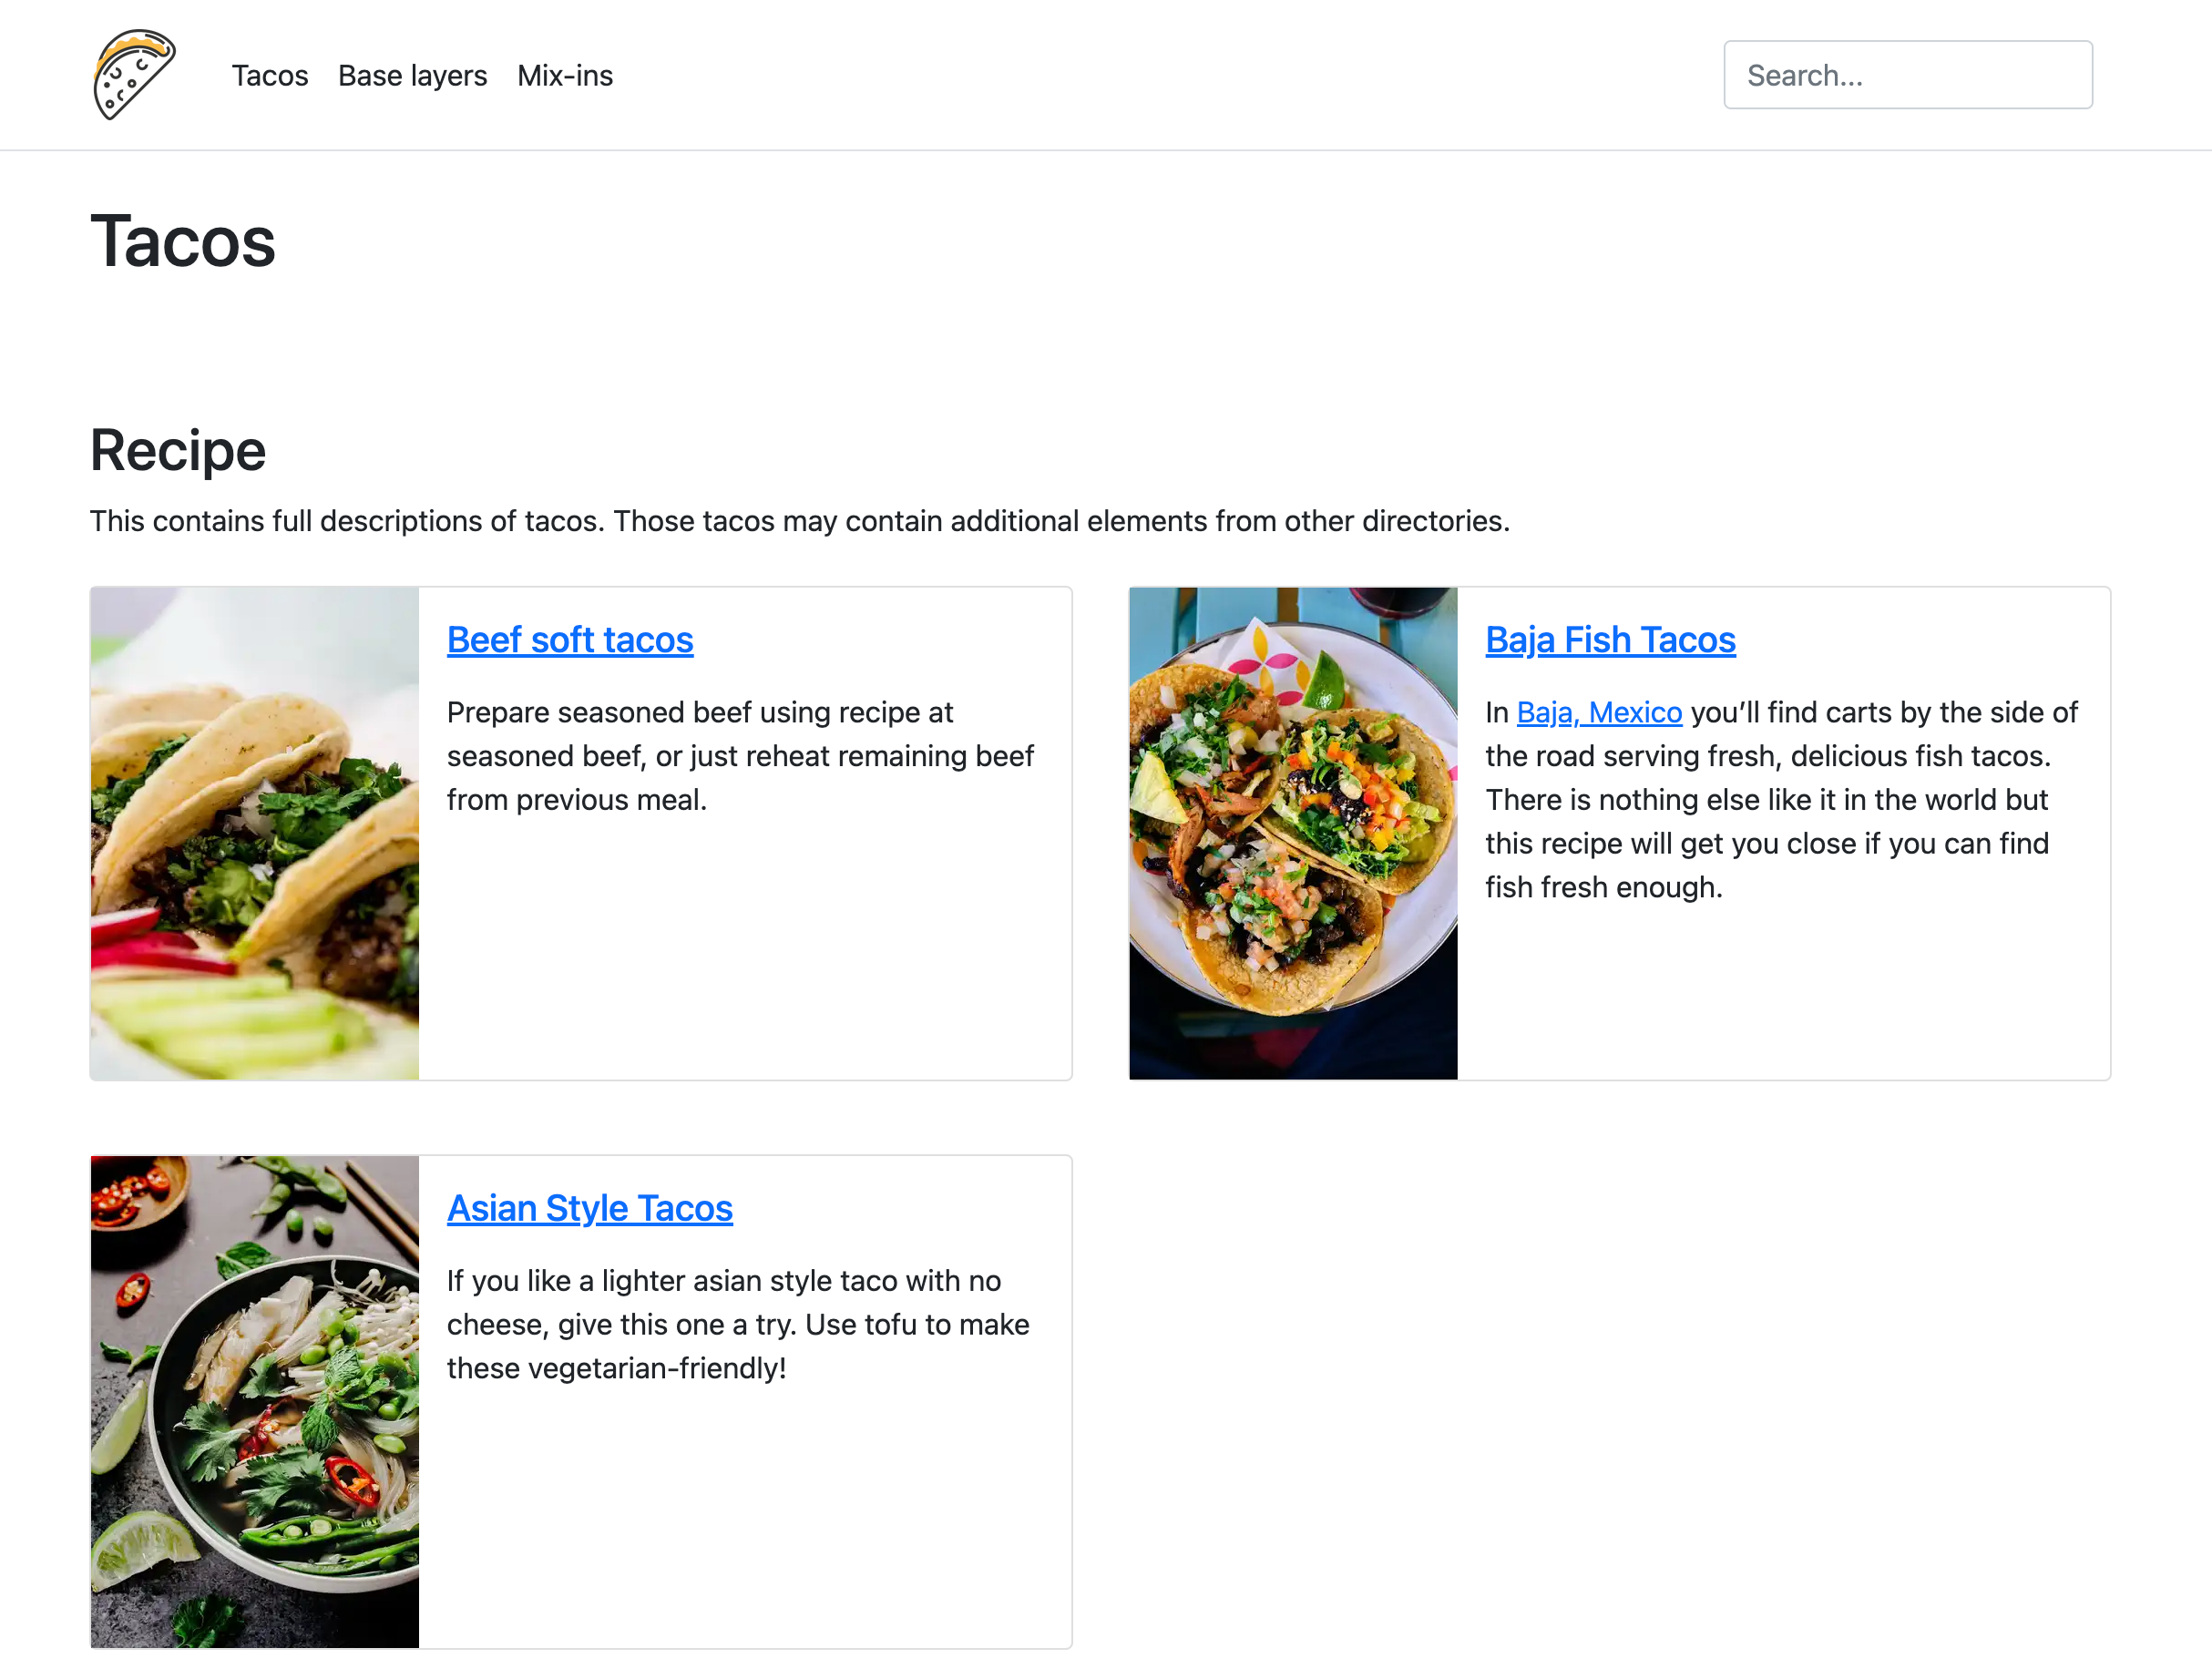
After we commit the changes and purge the cache, our updated index pages will be live!
Transforming images in Markdown
The Taco Labs website is looking a lot better thanks to a refreshed design and professional-looking images that load quickly. One lingering issue is how to handle the images we reference in Markdown, like this:
By default, Jekyll transforms these lines into the corresponding HTML at build time:
<img src="https://io.tacolabs.com/assets/warming.jpg" alt="warming up tortilla">Our default Fastly IO settings will be applied to these images, so they'll be displayed in WebP format with a quality value of 85. But what if we want to add other transformations to all of the images in our Markdown files? For example, say we'd like to resize all of these images to a width of 300 pixels. We could manually add the parameters to each image, but even then, there's no way to handle DPR without using HTML in the Markdown file. There's a better way!
Because we're using Jekyll, we can use a custom Jekyll plugin to override the default HTML used for images. Our plugin will send all of the images in our Markdown files through the following code in an include file:
<img srcset="{{ include.url }}?width=300&dpr=1.5 1.5x, {{ include.url }}?width=300&quality=40&dpr=2 2x, {{ include.url }}?width=300&quality=15&dpr=3 3x" src="{{ include.url }}?width=300" alt="{{ include.alt | xml_escape }}" class="img-fluid"/>We're using most of the parameters we used earlier. One notable difference is that the width parameter is present without the height parameter. That will cause Fastly IO to scale the image in proportion to the requested width — in this case, 300 pixels. We've also bumped up the quality of the higher DPR images a bit. These images are so small that the file size won't increase much if we set the quality a bit higher.
Now when we reference an image in Markdown, Jekyll will use the HTML in the include file for the image at build time. The resulting output shows that the images we referenced in Markdown (below the hero image) are appearing the way we expected them to, as shown below.
Let's commit our changes to deploy to the production environment and purge the cache.
Adding a watermark
When it comes to images on websites, copyright infringement is always an issue. Some websites add watermarks to their photos to protect them. Fastly IO provides the overlay header for exactly this reason. To show you how this could work, we'll use the overlay header to add a watermark to our hero images so that people know that they're ours.
Since overlay is a header and not a parameter, we'll need to consider how to implement this for Taco Labs. If we wanted to enable the watermark for all images, we could just add the header for all of the images on our website. But in this case, we only want to display the watermark on certain images, and we only want to display the watermark when those images are displayed on certain pages. In other words, we want the watermark to appear on the hero images, but not when those same images are used as thumbnail images on the index pages.
To implement the watermark for Taco Labs, we'll use the following VCL snippet:
if (querystring.get(req.url, "overlay") == "yes") { set req.http.X-fastly-imageopto-overlay = "overlay=/assets/fastly.png&overlay-height=0.10&overlay-align=bottom,left&overlay-pad=25,25";}This code effectively creates a custom overlay parameter that we can use to add the watermark to specific images. When Fastly sees that the overlay query string has been added, it will place the Fastly logo in the lower-left corner of the image.
Now we can update the code in default.html as follows:
<img srcset="https://io.tacolabs.com/assets/{{ page.image }}?width=1296&height=864&fit=crop&overlay=yes&dpr=1.5 1.5x, https://io.tacolabs.com/assets/{{ page.image }}?width=1296&height=864&fit=crop&overlay=yes&quality=30&dpr=2 2x, https://io.tacolabs.com/assets/{{ page.image }}?width=1296&height=864&fit=crop&overlay=yes&quality=10&dpr=3 3x" src="https://io.tacolabs.com/assets/{{ page.image }}?width=1296&height=864&fit=crop&overlay=yes" alt="{{ page.title }}" class="img-fluid"/>The rendered output looks like this:
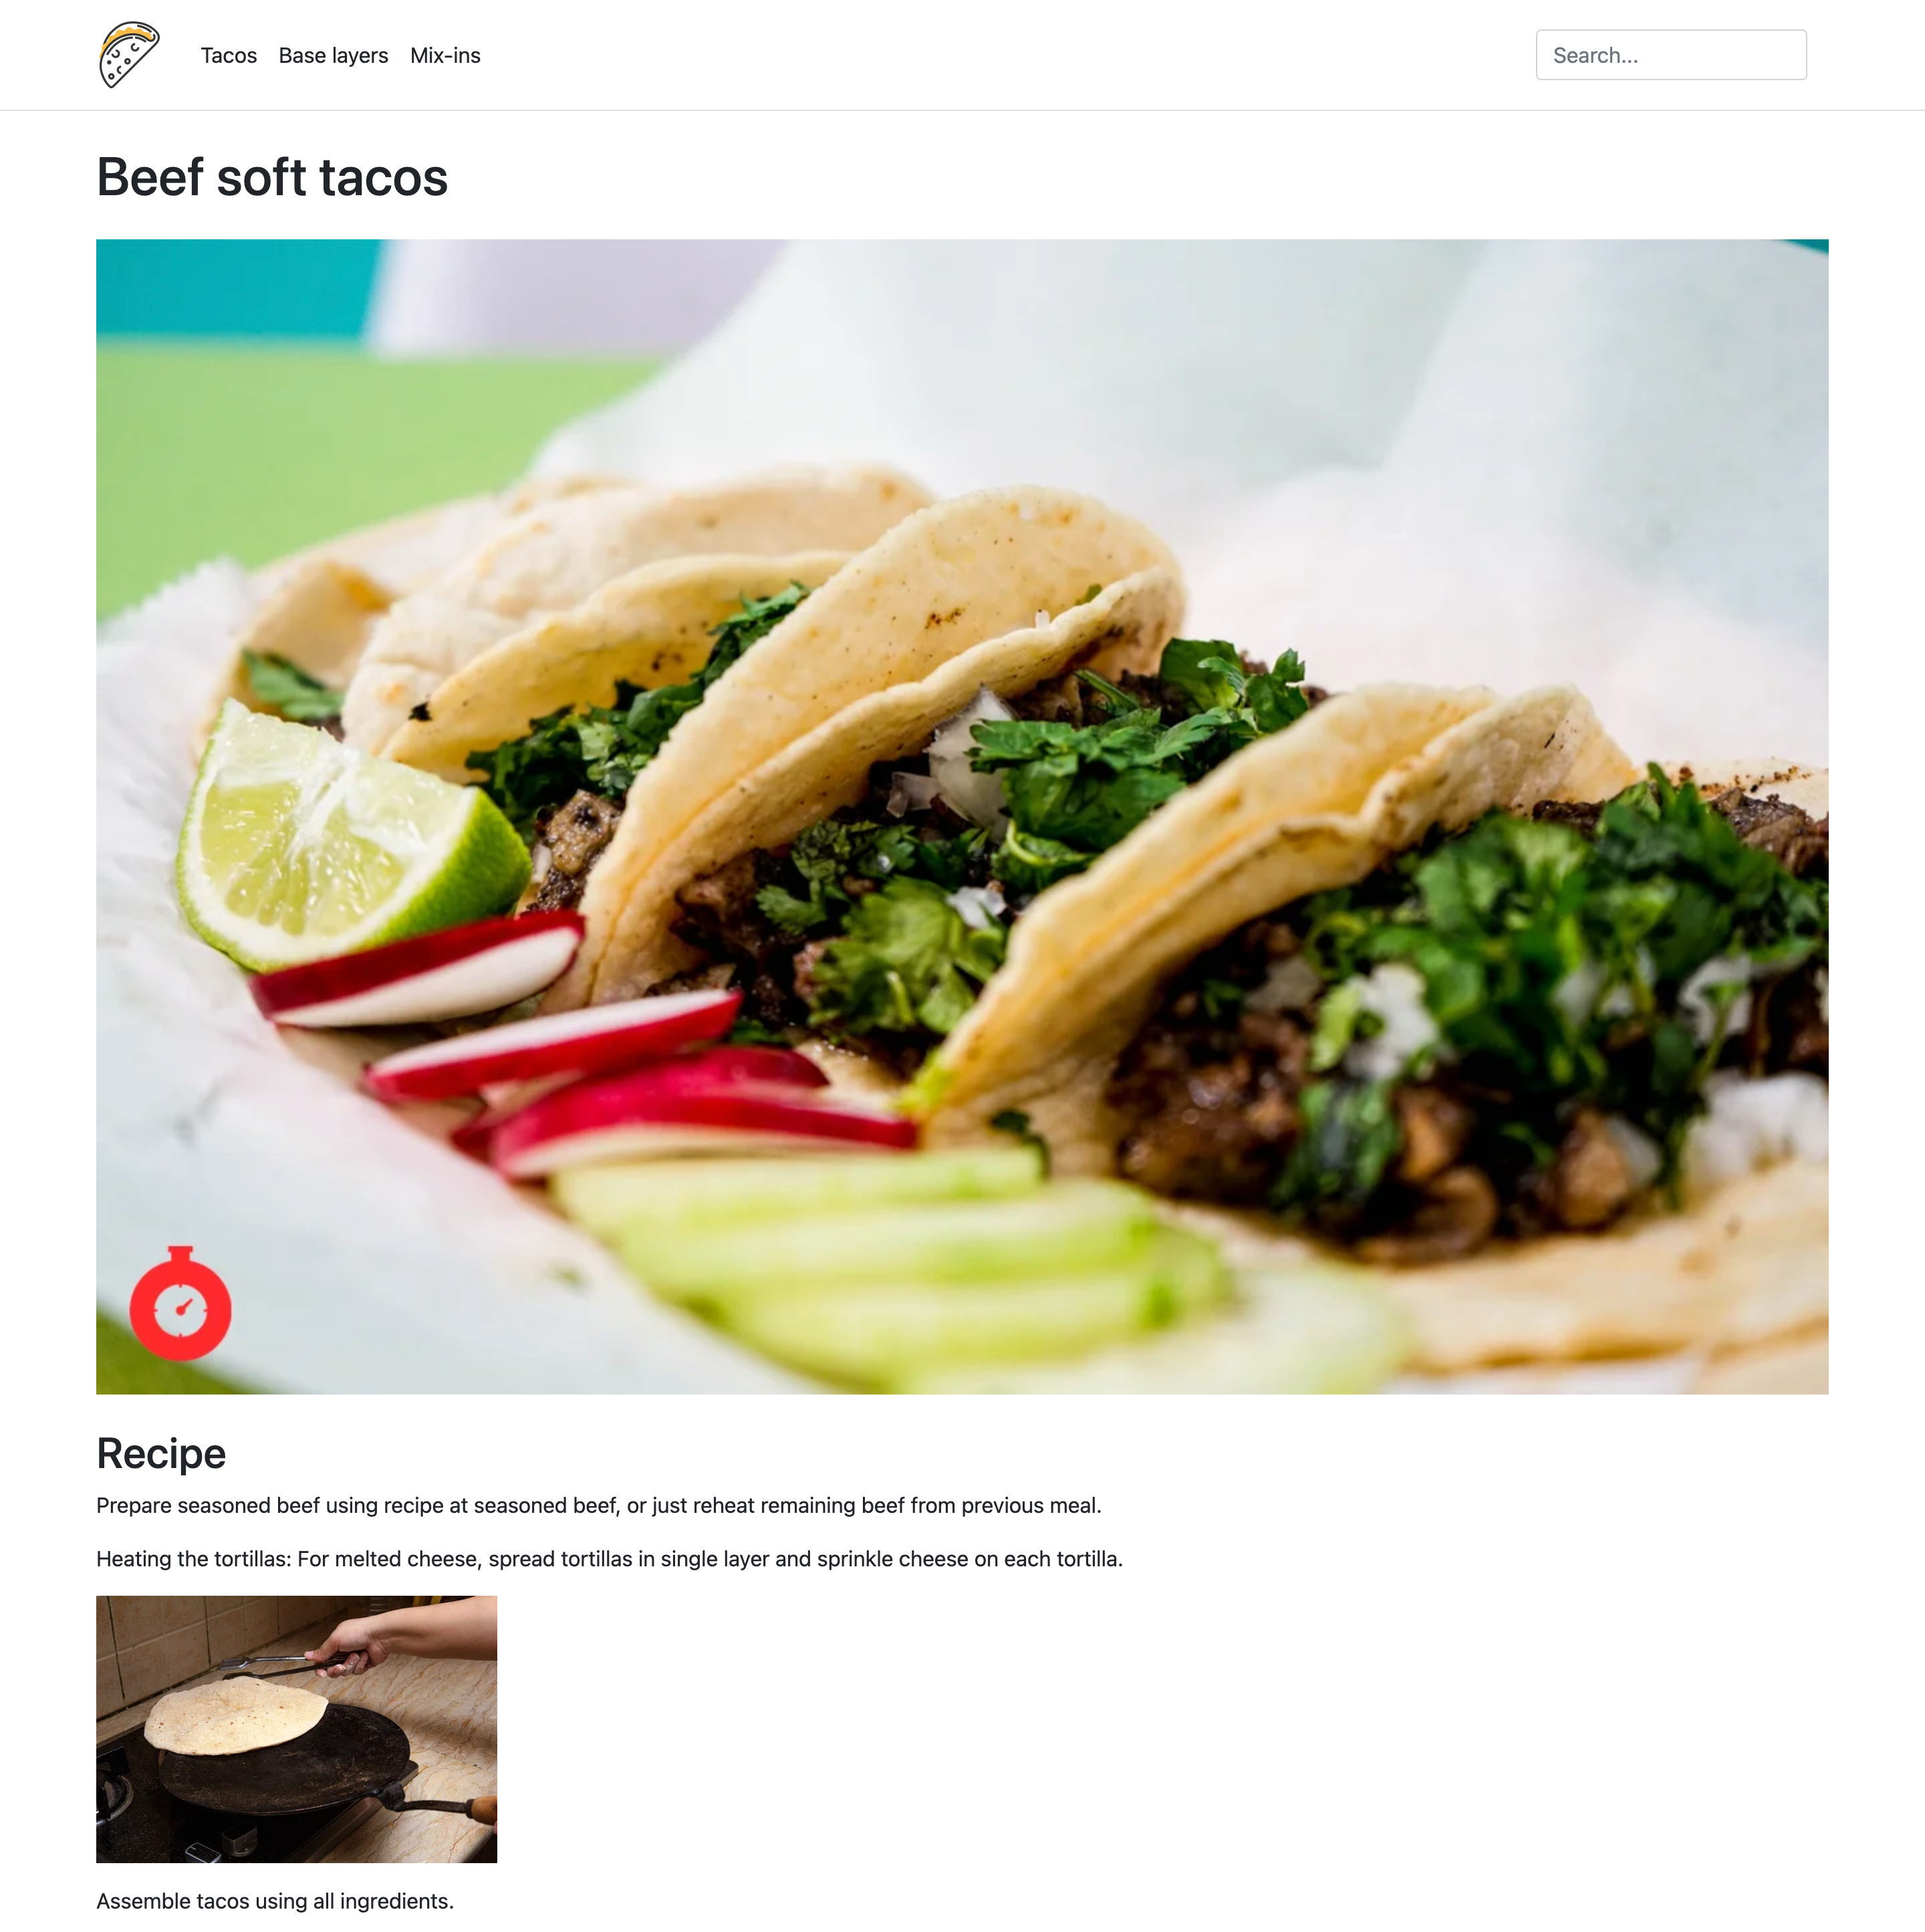
The beauty of this approach is that we can control precisely when and where the watermark is applied. Nobody will steal our hero images now!
That concludes our changes to the Taco Labs code base. Let's make one final commit to purge the cache and push everything to the production environment.
