
1. Introduction
Images are an important part of your website or application. To ensure that your images load quickly, you should optimize each image for every client device. Fastly's Image Optimizer (Fastly IO) is a paid add-on that can automatically optimize your images on demand to reduce image load times, improve your website's search engine rankings, and reduce your origin's compute and storage requirements.
To help you get started with Fastly IO, we've created this step-by-step tutorial. It builds on the concepts introduced in Introduction to Fastly's CDN, and it guides you through the steps of optimizing the images for Taco Labs, the static website we used as an example. By the end of this tutorial, you'll understand how to optimize your images using Fastly IO.
Prerequisites
This tutorial assumes that you've completed Introduction to Fastly's CDN and that you're familiar with the following technologies and concepts:
- Fastly CDN: We'll continue using Fastly's delivery products to cache and optimize our website's delivery.
- Static site generators: We'll use the Jekyll static site generator to output our Markdown source as HTML files.
- Version control: We'll use git for version control and GitHub for remote storage and continuous integration.
- Amazon Web Services (AWS): We'll use S3 to store our files and serve them as a website.
- Command line interface: We'll use curl to examine HTTP headers.
How to follow along
Trying things yourself is the best way to learn! To show you how things work, we use a specific domain name (io.tacolabs.com) as an example throughout this tutorial. However, to make the most of your experience, we encourage you to fork the example website and follow along by using your own domain name, DNS records, and web hosting provider. Use your own domain name wherever you see our example domain name.
NOTE: We don't recommend using the Taco Labs domain name to follow along. If you use it, you might see errors in the web interface and unexpected output in your Terminal application.
The need for optimized images
Images account for more than 60% of the bytes on average needed to load a web page, but optimizing images for the web is notoriously difficult. There are many factors to consider. For example, Google's performance audits check for properly sized images, efficiently encoded images, and whether or not images are delivered in modern formats.
If the images on your website don't pass the audits, your website's ranking in search engine results might suffer. Google knows that visitors expect your website to load quickly and efficiently, even on cellular networks. Slow sites are deprioritized in Google's search results.
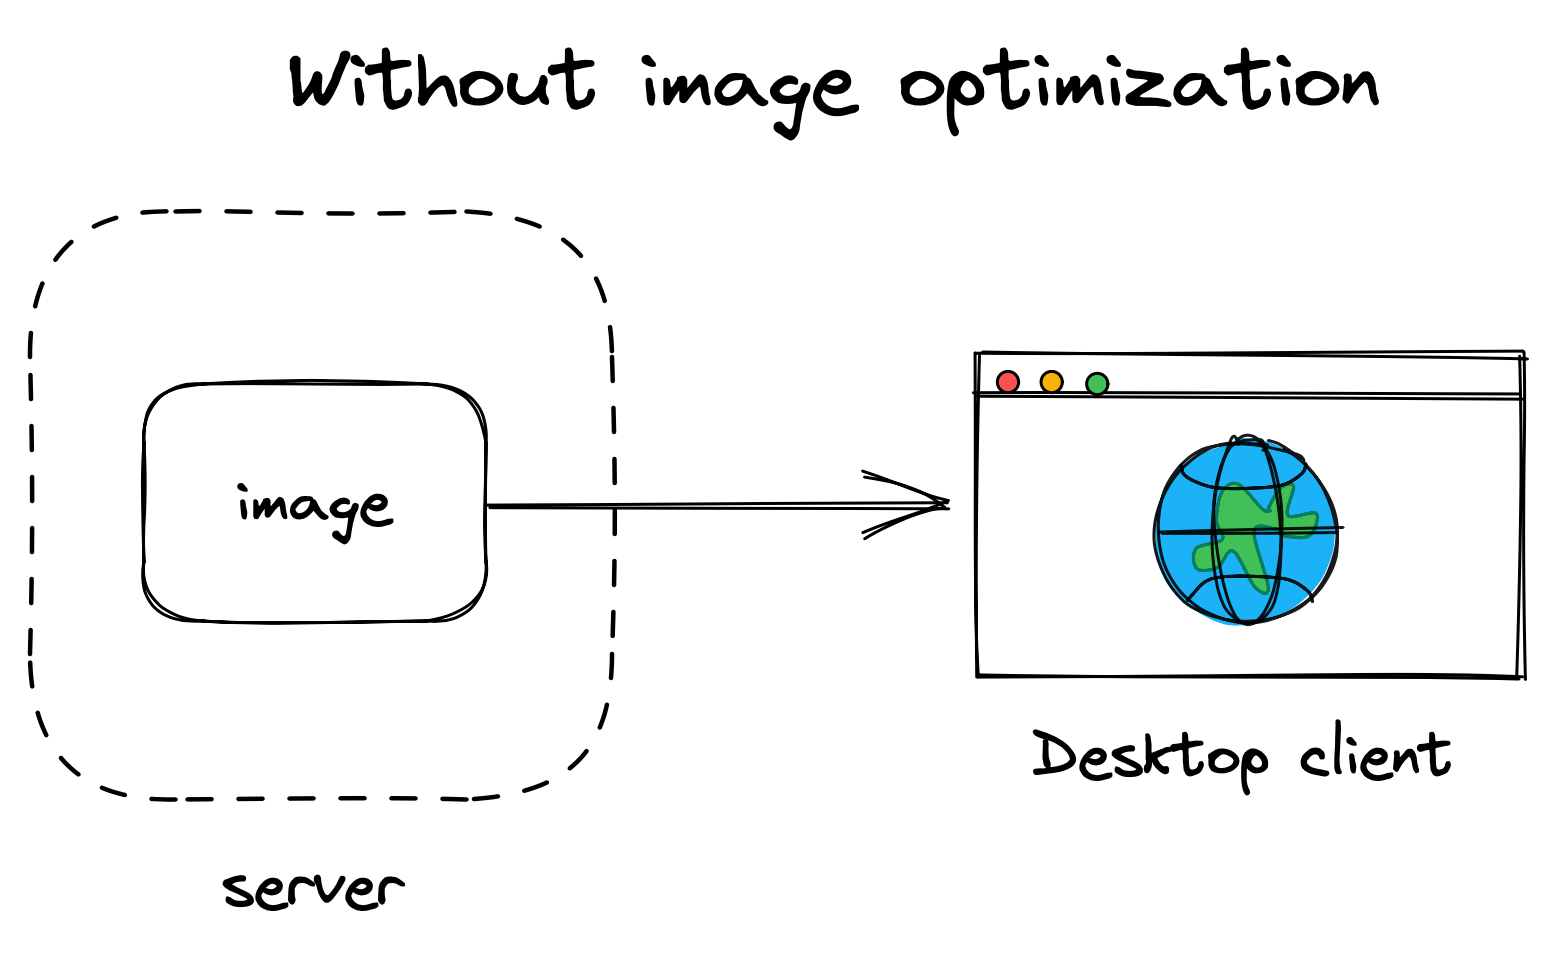
It wasn't always like this. For example, most traffic to websites in 2009 originated from desktop computers. You could upload a single image and be relatively confident that it would look good on most desktop displays — even if it did load slowly — as shown below.
But the advent of mobile devices, such as the iPhone and the iPad, combined with the introduction of higher pixel density retina displays and responsive CSS frameworks like Bootstrap, necessitated a new approach to images on the web. Instead of uploading a single image, website owners were expected to upload several different versions of every image, each one correctly sized and optimized for different devices and displays.
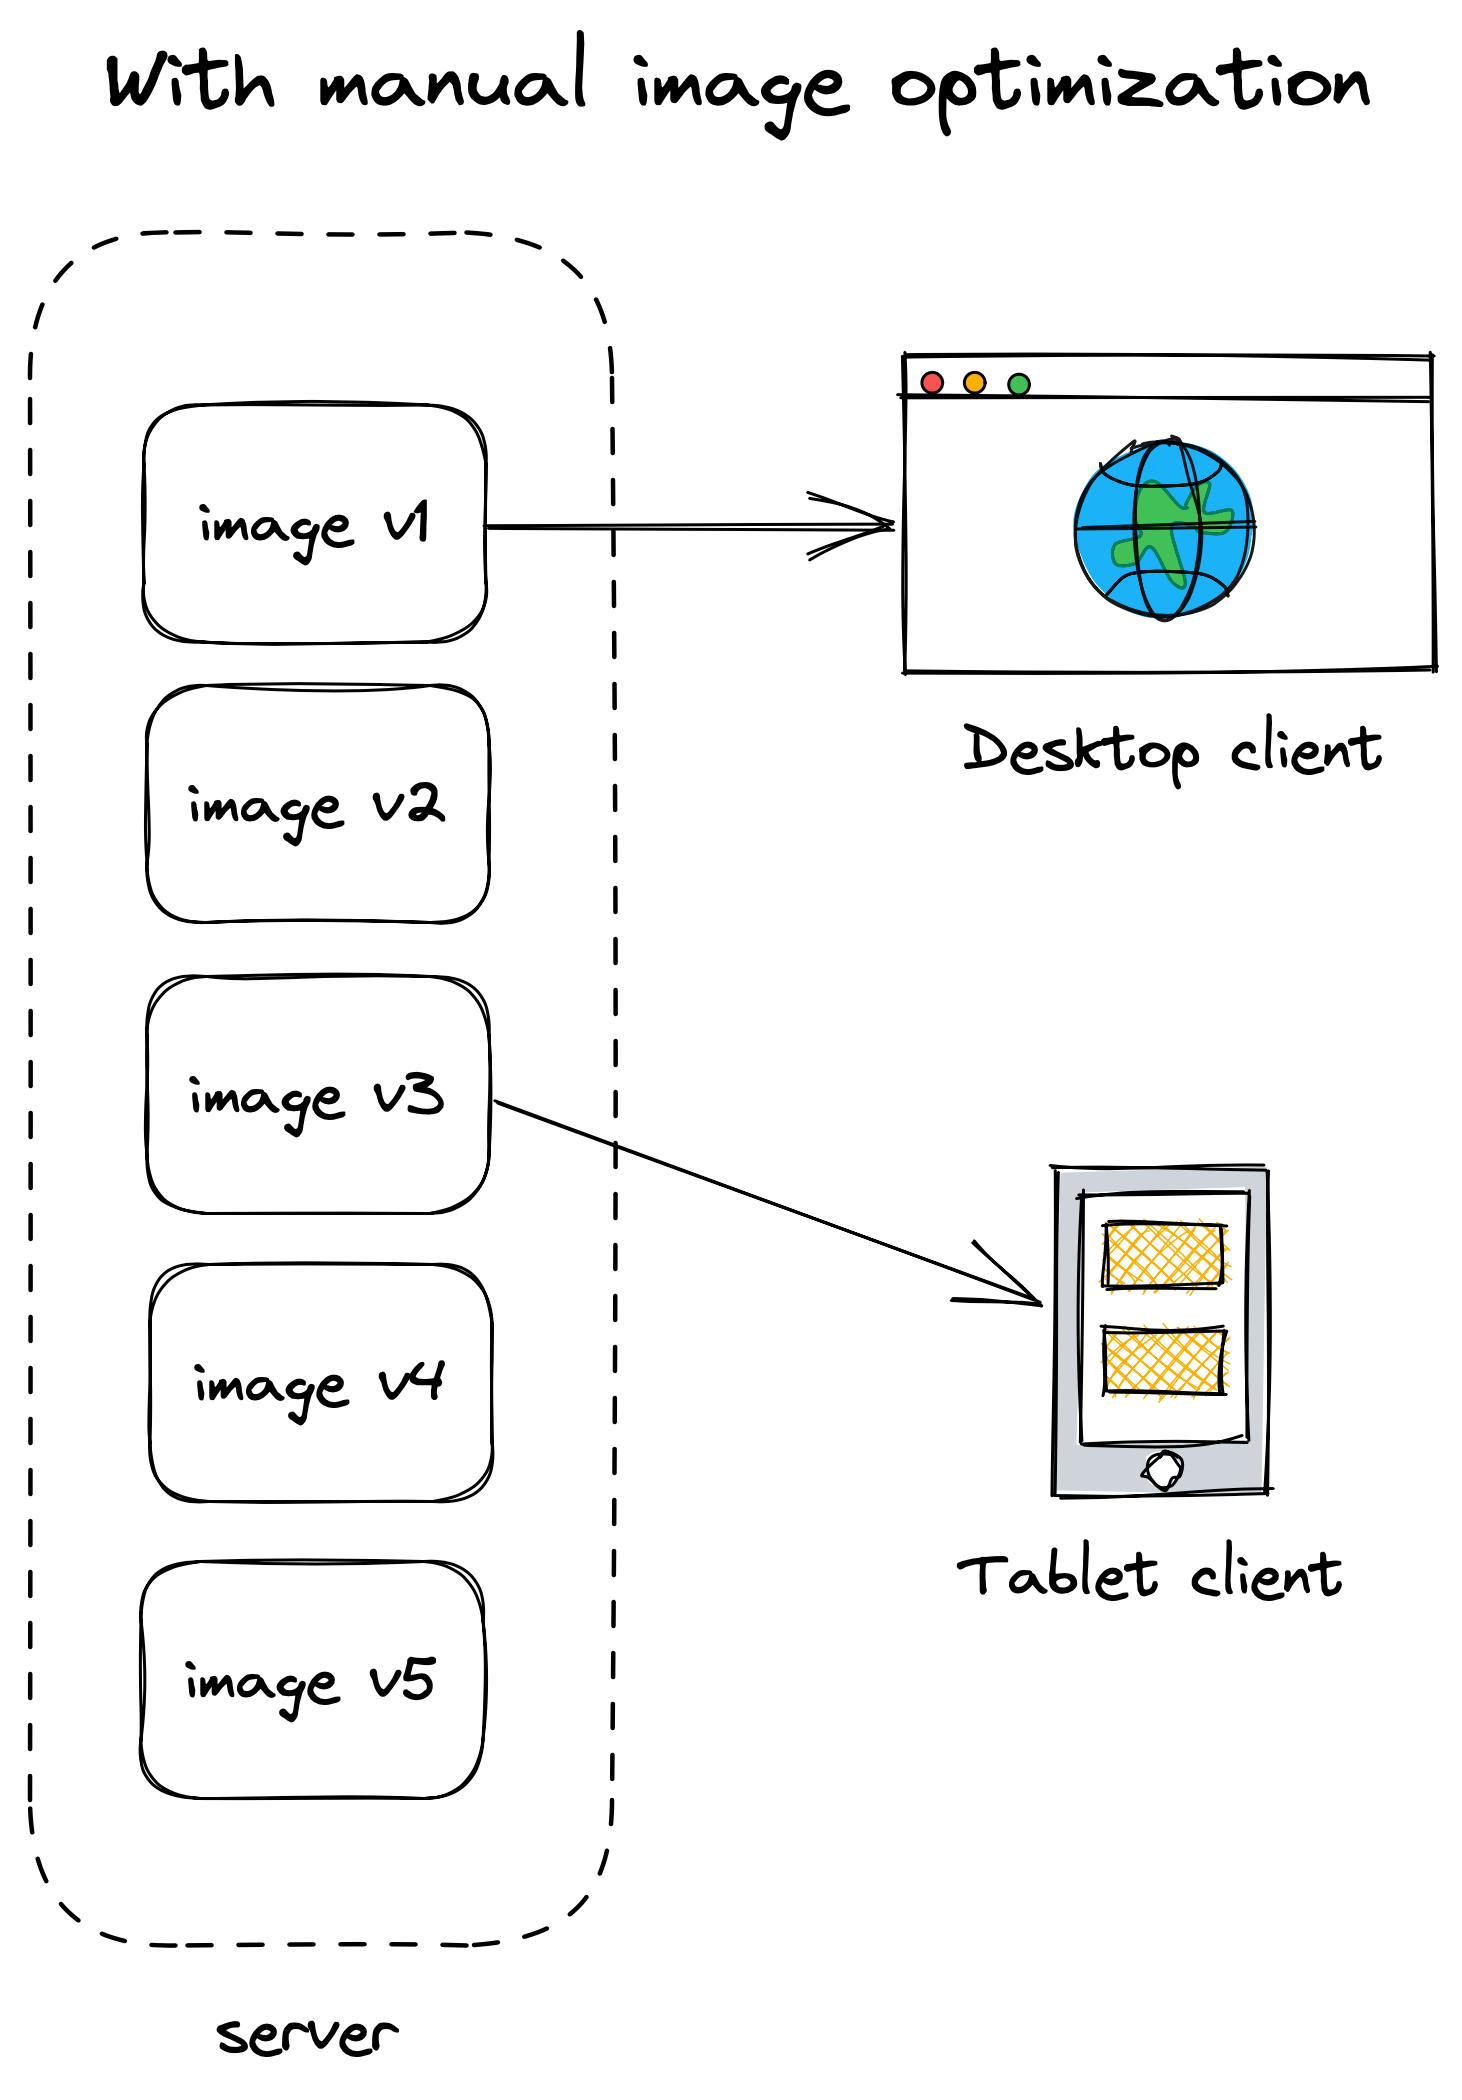
People devised various solutions to this problem. You could, of course, manually resize the images in an image editing application like Gimp or Adobe Photoshop and then optimize the images using an application like ImageOptim. To alleviate that tedious and time consuming work, other people created scripts that could be run on their desktop computers to help automate that process before the images were uploaded to the server. Another solution was to use a server-side extension to optimize images and store all of the transformed images on the origin server.
Today, a single image typically needs to be resized and optimized into 10 or more versions (each a different file) for the most popular screen resolutions. The client's web browser — working in conjunction with a website's JavaScript and CSS — automatically determines which version of the image is appropriately sized for the client device and then loads that version, as shown below.
Problems and pitfalls
The manual hand-editing and scripted pre-processing approaches to image optimization work for smaller websites, but they don't scale. Larger websites require a different solution. If you have a team contributing to a WordPress website, it's unrealistic to expect the team to manually resize and optimize every image they upload. On the other end of the spectrum, server-side solutions can use a massive amount of compute and storage resources.
The issues become apparent when you consider the web applications used by millions of people. For example, consider a popular vacation home rental website.
When a vacation rental host uploads an image of a property, the image will need to be displayed on a variety of different webpages, such as a city index and the homepage for the property, so the image will need to be resized depending on the layout of the webpage. The image's quality will also need to be adjusted depending on the user's device and screen resolution. Other transformations may also need to be performed, such as image rotation. These tasks have to be performed for every image uploaded to the vacation home rental website.
There's obviously a need for an efficient image optimization solution that handles all of this automatically. The ideal solution would be capable of handling all of these tasks without manual intervention, at a reasonable price point. Server-side solutions take care of the automation component, but the compute and storage requirements can be cost prohibitive when you're working with a lot of images.
Why use Fastly IO?
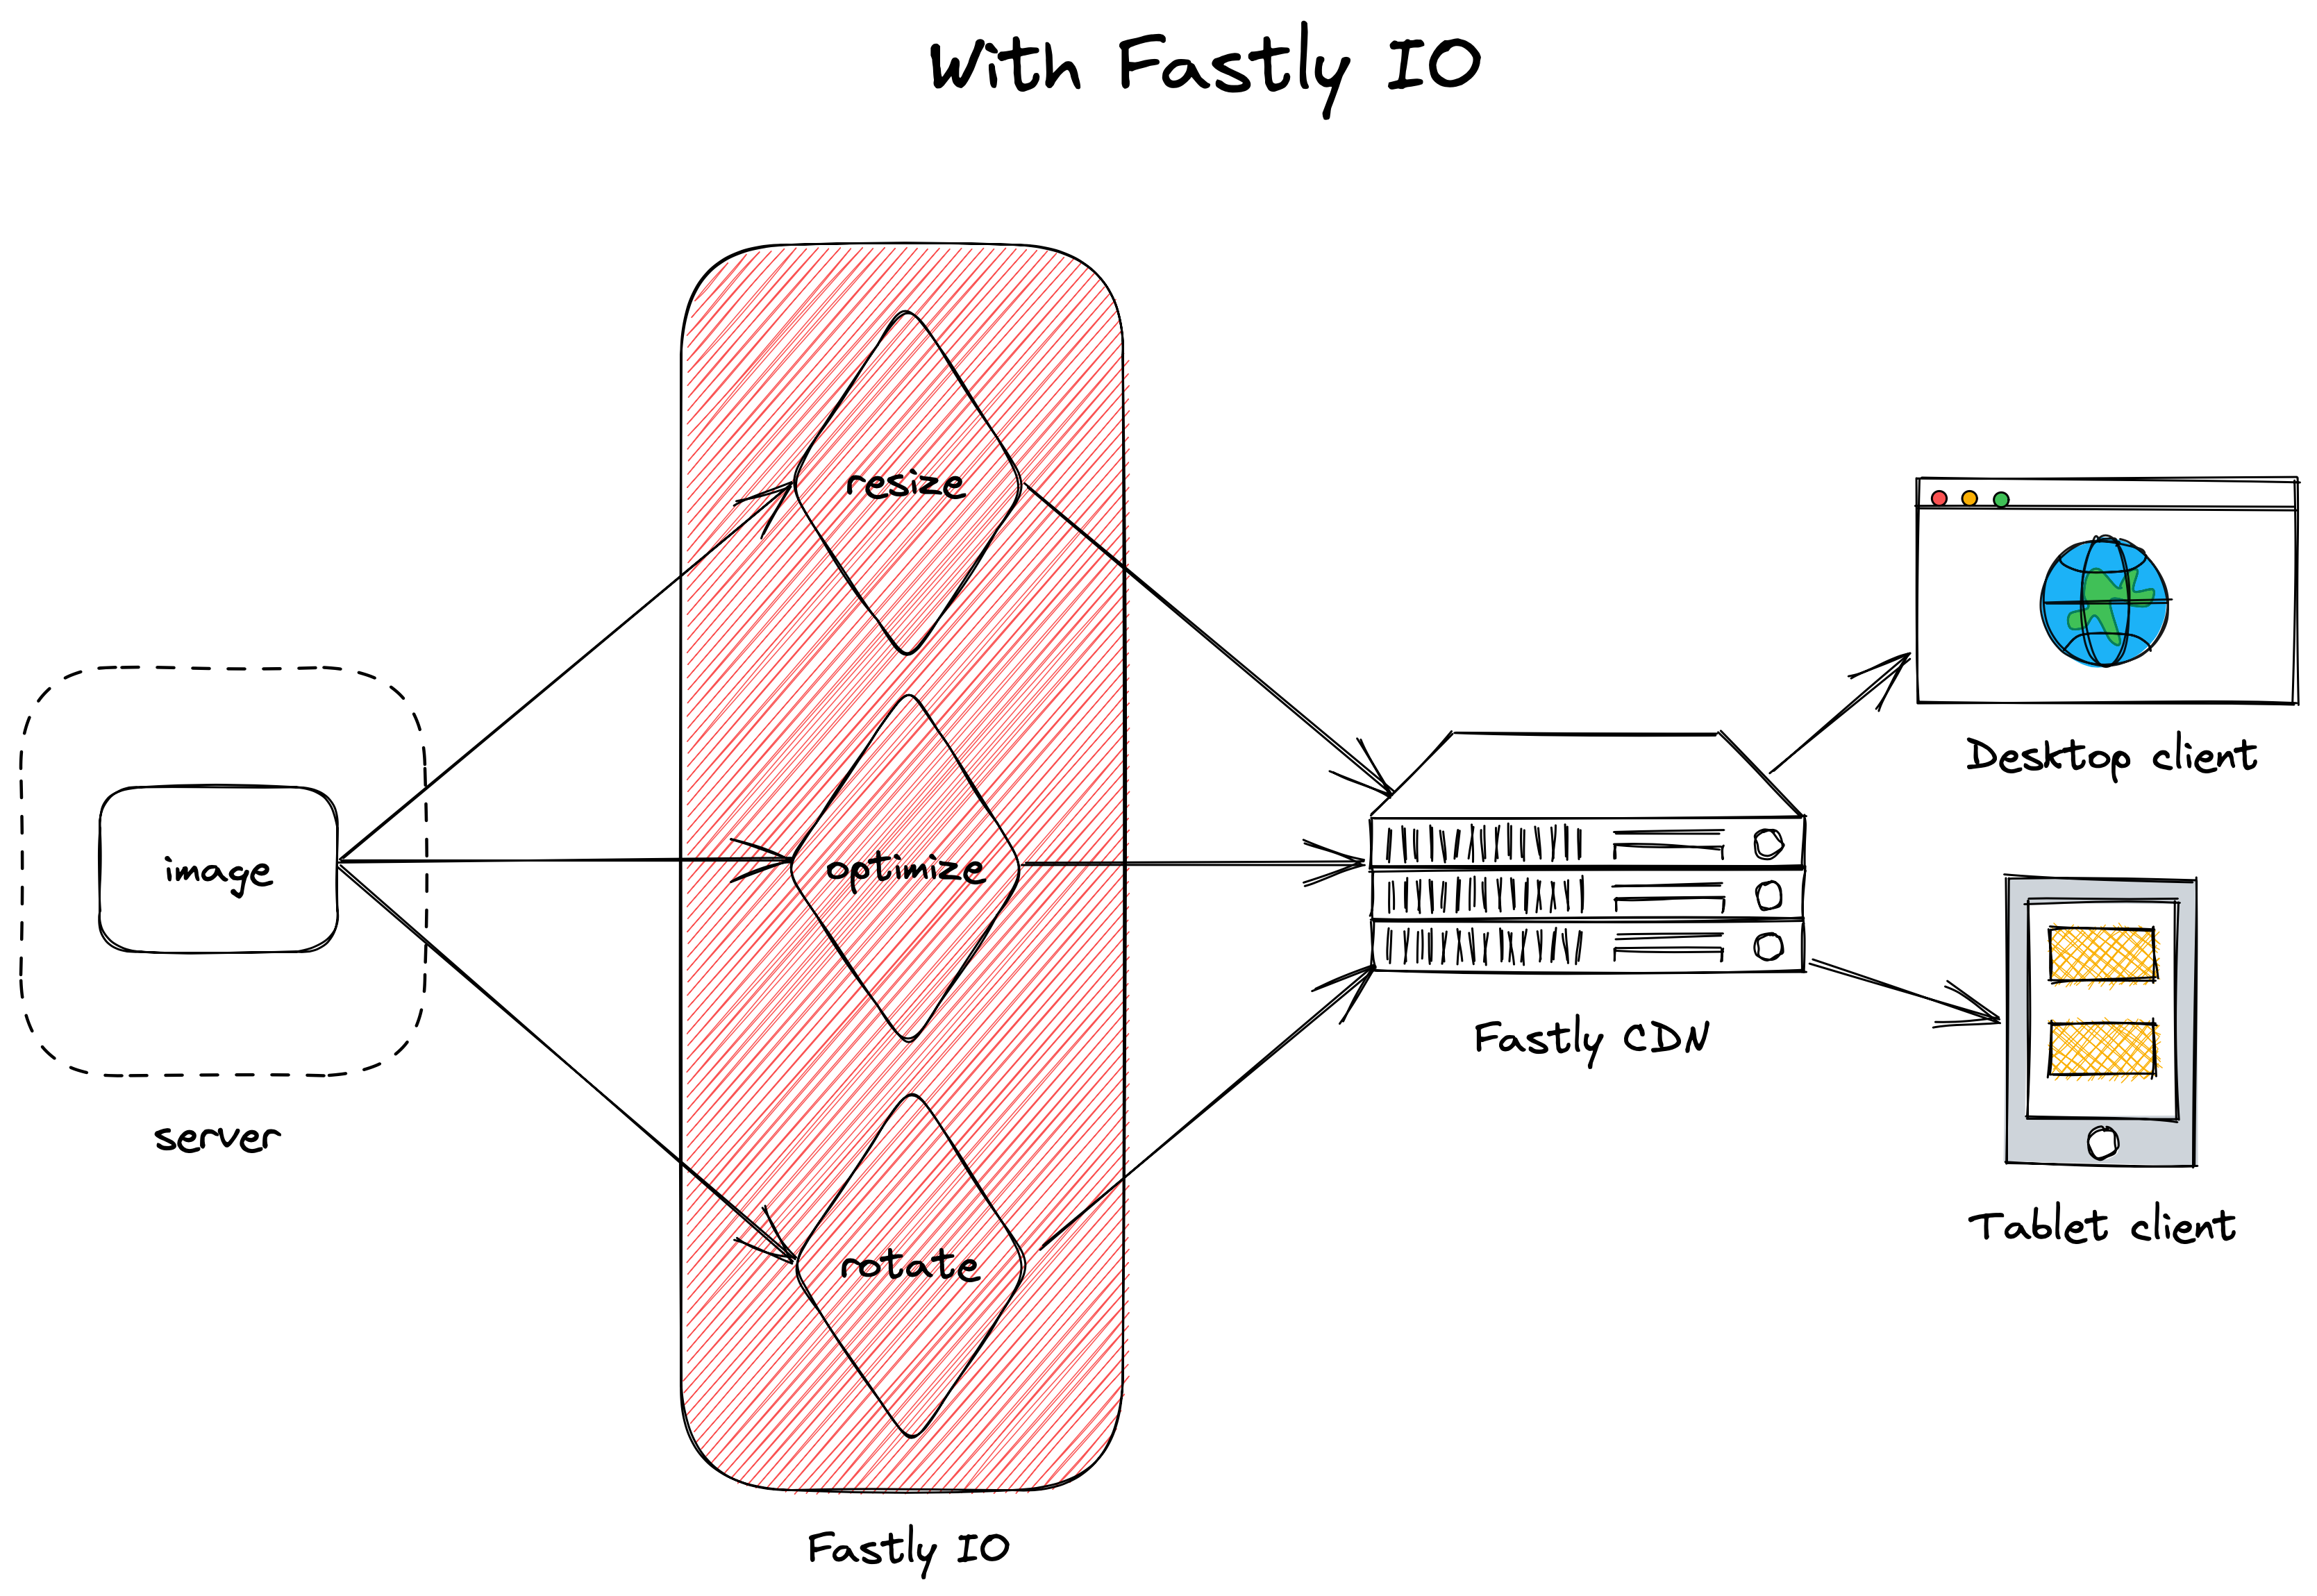
Fastly provides a convenient solution for image optimization. Our Fastly IO product retrieves a single, full-size source image from your origin server and automatically transforms it using the parameters you specify. This transformation happens in real time, between your servers and the client, at what we call the edge. After Fastly IO performs the transformation, it caches the transformed image in the Fastly CDN so that future users can retrieve the image even faster, as shown below. If you're currently using a server-side image optimization solution, Fastly IO can significantly reduce the amount of money you're spending on compute and storage resources.
Let's look at a hypothetical example using our Taco Labs website. Say we update our website to have a primary image for every recipe. This primary image will be displayed in two different places: The recipe page, where it will be displayed at 100% of the width of our layout, and on the recipe index page as a thumbnail image.
With Fastly IO, we don't need to worry about manually modifying the original images and storing the transformations. Instead, we can add the full size image to our repository and let Fastly IO do the rest.
Some image transformations — such as quality settings, upscaling, and using webp as the default format — can be automatically applied to every image. Using other transformations will require us to add query string parameters to the end of the image path. For example, to resize the image, we could add width=200 to our img tag to resize the image to a width of 200px:
<img src="image.png?width=200">In this case, the height of the image would automatically be scaled in proportion to the width. We can add parameters to transform any of our images, making the image optimization process quick and easy. After we add the parameters, Fastly IO will automatically transform the images.
How Taco Labs will use Fastly IO
If you followed Introduction to Fastly's CDN to completion, you already have a fully-functional website configured to use the Fastly CDN.
In this tutorial, we'll build on top of the website we used in Introduction to Fastly's CDN. We'll enable Fastly IO to automatically transform the images on the Taco Labs website, completely eliminating the need for any manual processing of the original, full-size images. Because Fastly IO will reduce the size of the images, we'll effectively speed up the overall delivery of the Taco Labs website.
We'll step through all the changes in this tutorial, but you can see the final product at https://io.tacolabs.com. The code is available in the Taco Labs repository on GitHub. If you haven't already done so, we recommend checking out the repository to your computer so you can follow along.
Our initial configuration
Before we move on and start using Fastly IO to optimize our images, let's take a snapshot of our current configuration:
- Domain:
io.tacolabs.com - S3 bucket name:
io.tacolabs.com - Origin hostname:
io.tacolabs.com.s3-website.us-east-2.amazonaws.com - An alias DNS record:
io.tacolabs.comtos3-website.us-east-2.amazonaws.com
