
5. Go live
We've done a lot of work to prepare our Fastly service for the Taco Labs website! Now it's time to put the finishing touches on things so we can go live and start using Fastly for our production website.
Generating a TLS certificate
It probably goes without saying that encryption is a hard requirement for virtually all websites and web applications these days. Taco Labs is a static website that lacks many interactive features common to web applications, such as user authentication. We still want to use TLS though, because search engines and web browsers will penalize us if we don't!
Up to this point, we've been using TLS on a shared Fastly domain to secure traffic between Fastly and client web browsers. We could continue to use that URL (https://tacolabs.global.ssl.fastly.net) if it wasn't exposed to customers. For example, if we were using Fastly to serve assets from within an iOS application, we could probably continue using TLS on a shared Fastly domain. But we can't use it for custom domains, like tacolabs.com, because visitors will receive a certificate error.
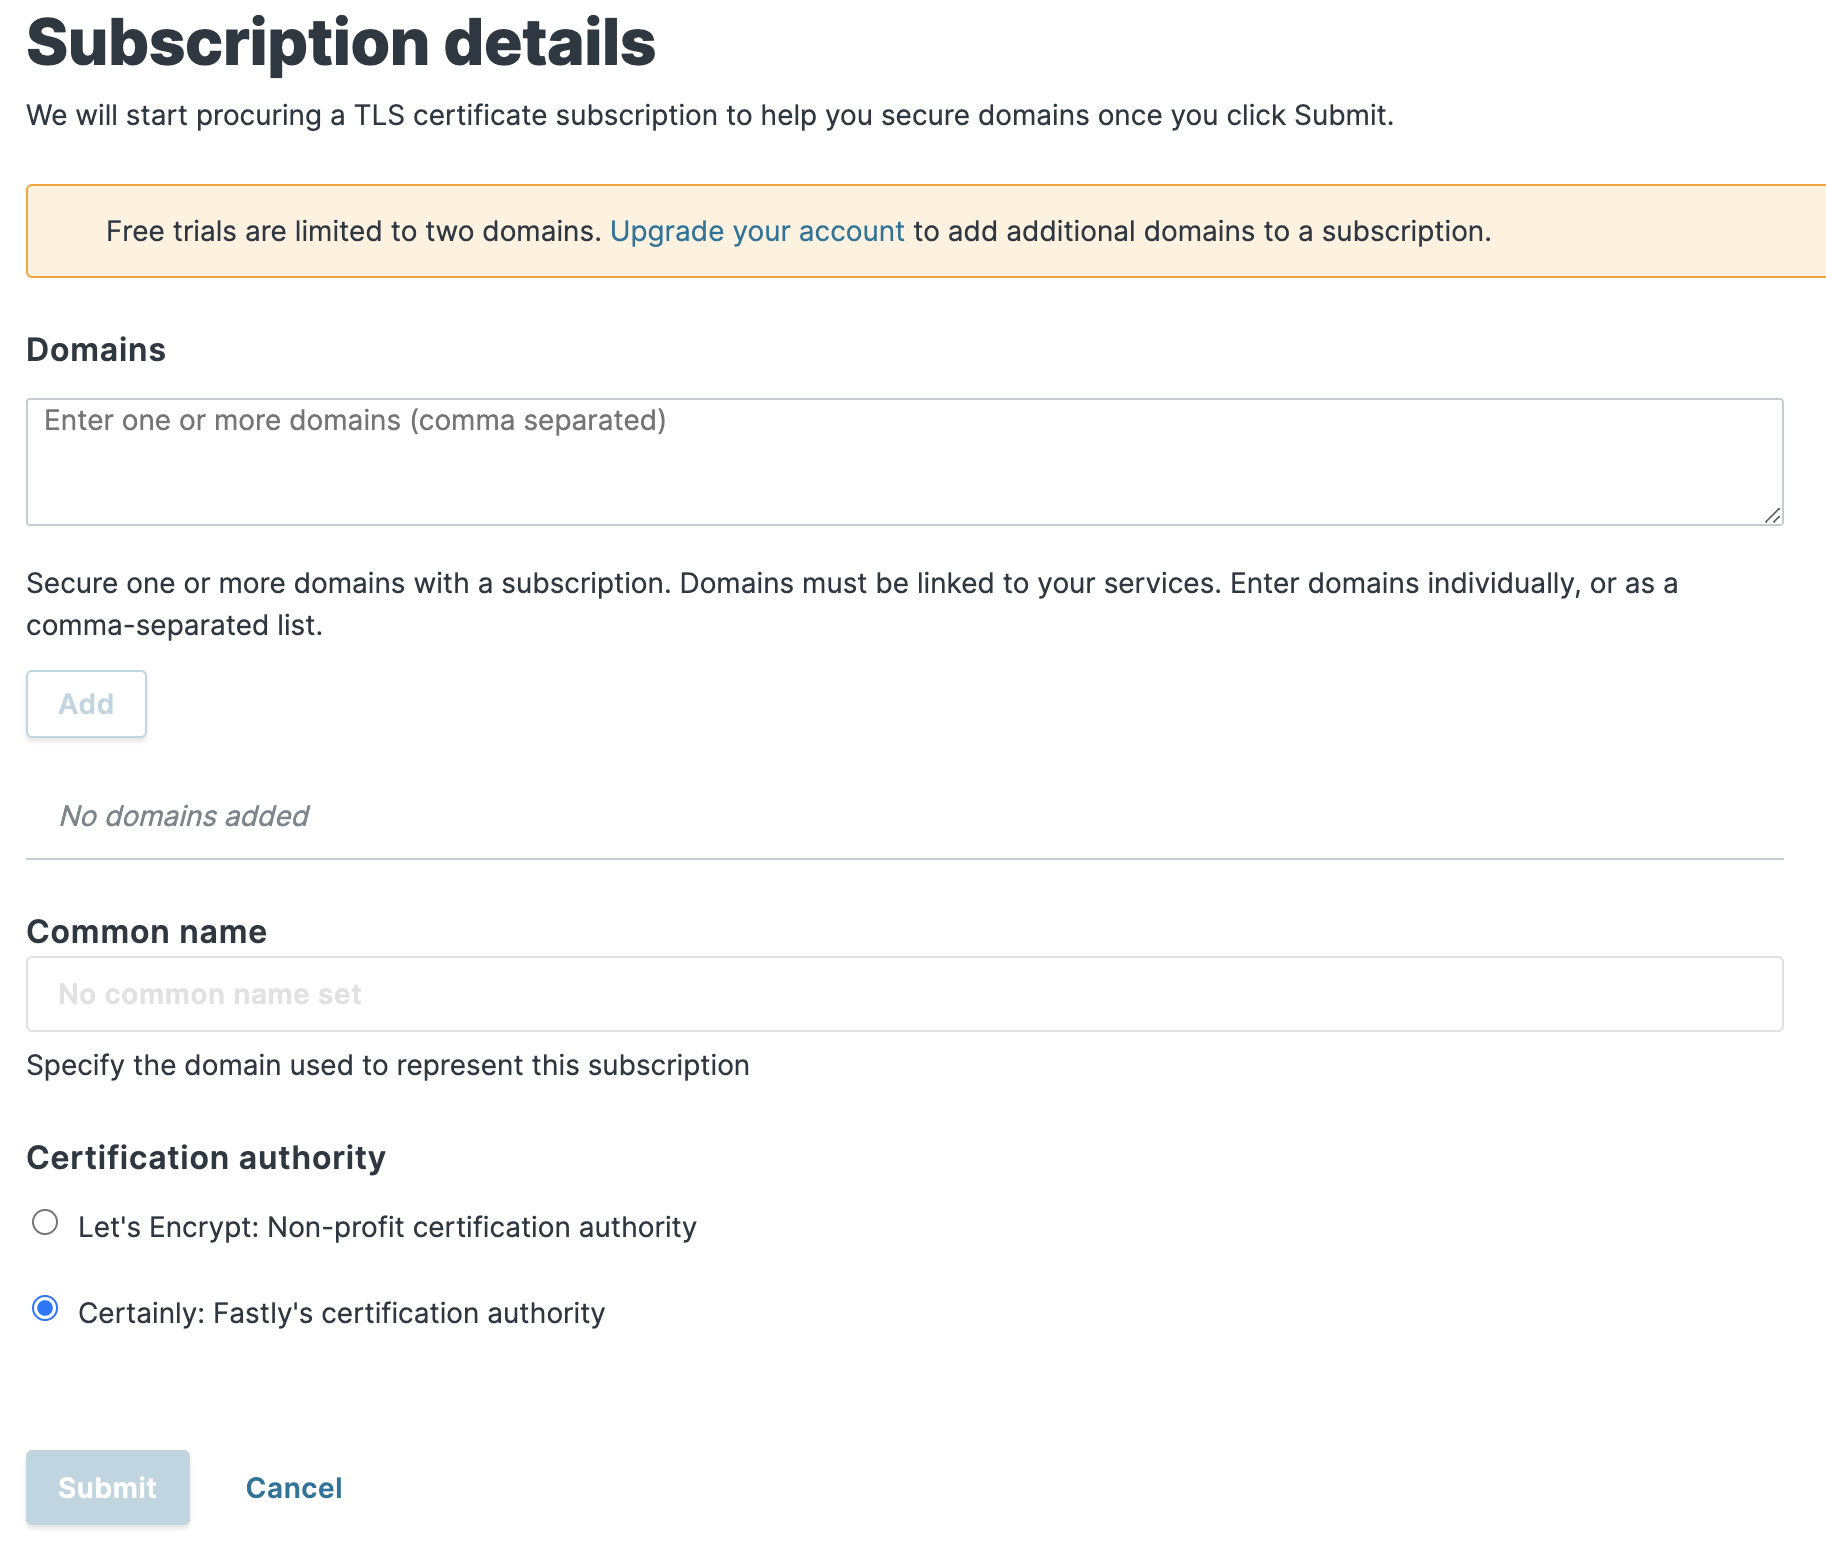
Since we need TLS for a custom domain, we can use Fastly-managed certificates. Trial accounts include Fastly-managed certificates for two domains using Certainly, Fastly's certification authority, or the free Let's Encrypt certification authority. Alternatively, with a paid account, we could use GlobalSign, the commercial certification authority, or upload and manage our own certificates.
Click Secure at the top of the screen, and then click TLS management. Then click Get started. The window shown below appears.
After we fill out the form, add our domain, and click Submit, we'll see instructions directing us to add a CNAME record, as shown below. Fastly uses this information to verify that we own the tacolabs.com domain name.
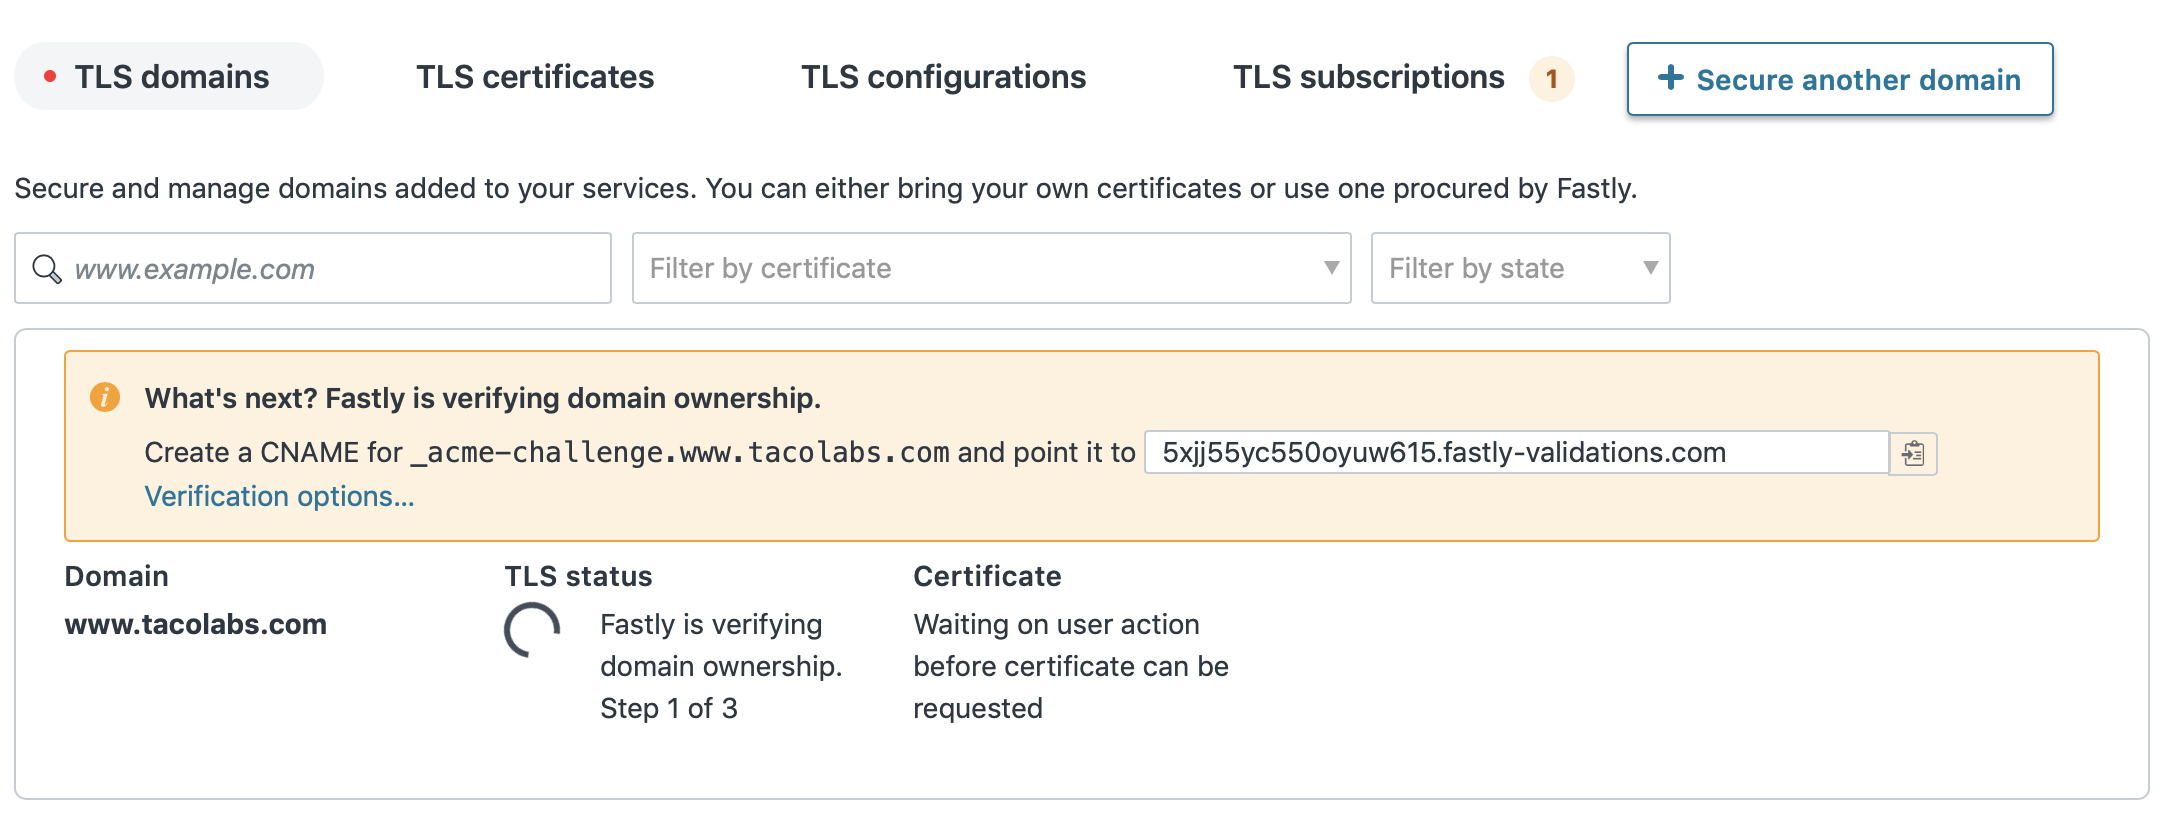
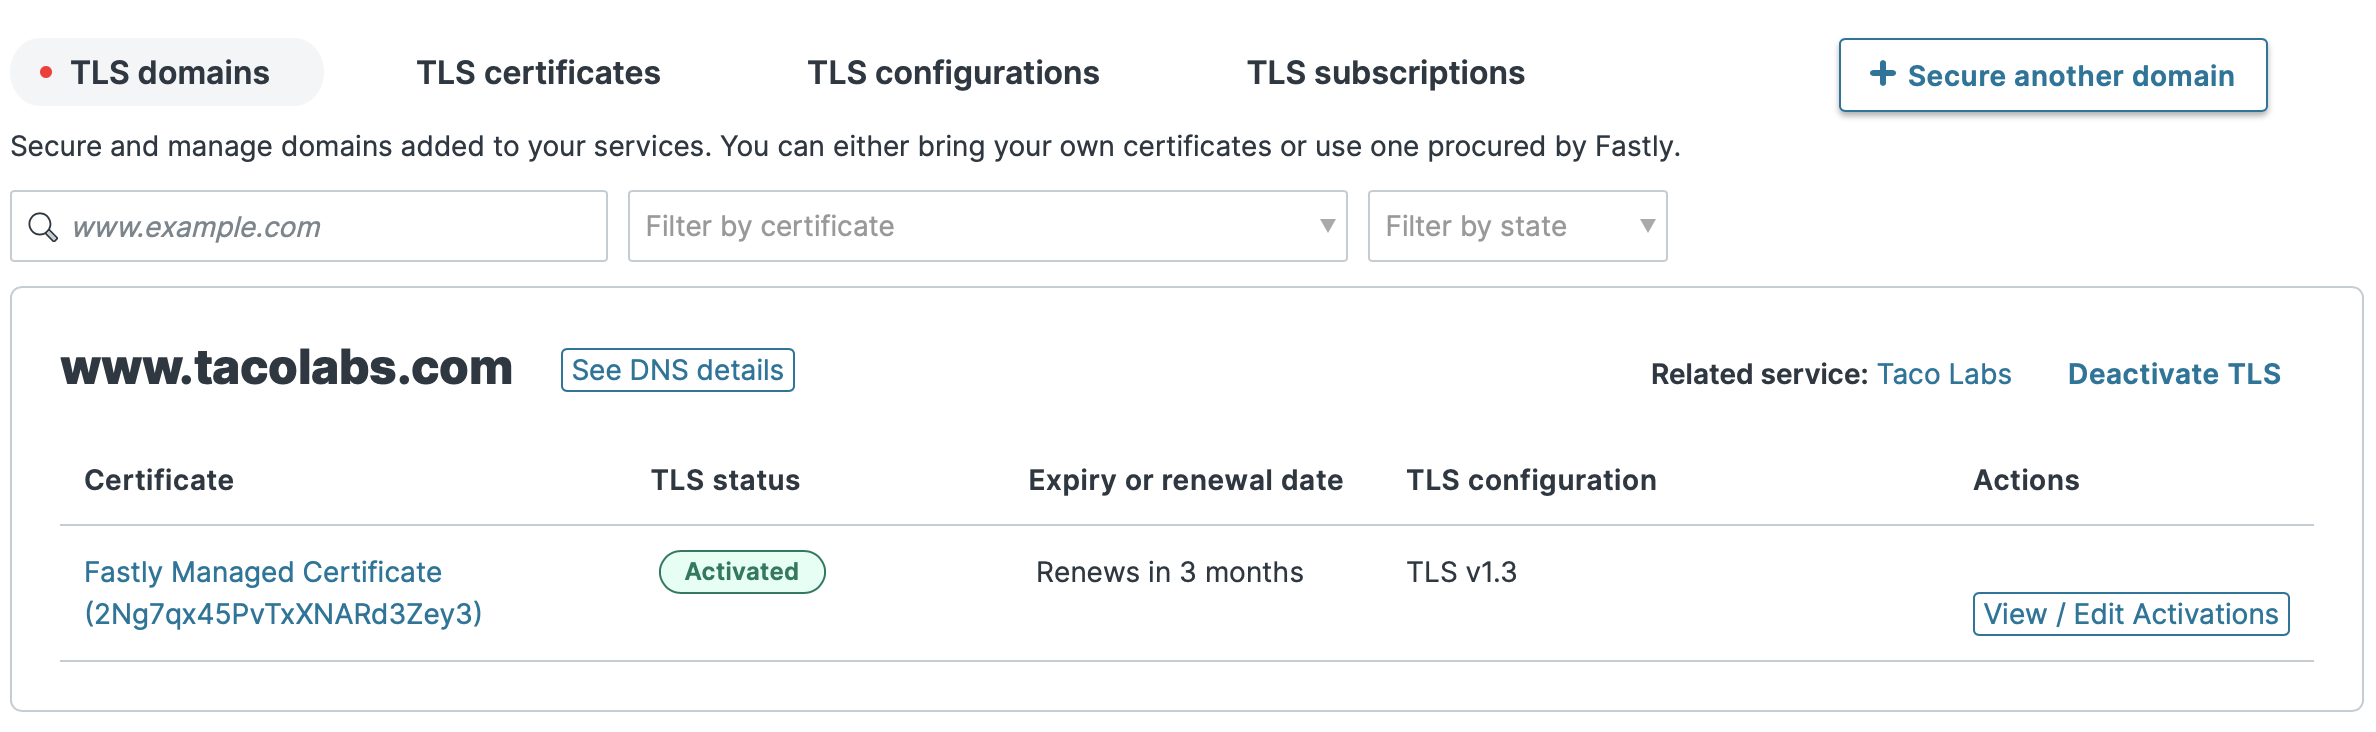
To add the CNAME record, we'll head back over to AWS Route 53, which is handling our DNS service. It can take several minutes for the DNS record to propagate. When Fastly discovers the DNS record and verifies it, TLS will be enabled for www.tacolabs.com, as shown below.
Updating DNS records
We've enabled TLS for our domain and now we're ready for the final step: Updating our domain's DNS records to point to Fastly. After we do this, all production traffic will start flowing through Fastly. It's a good idea to review the settings one more time to make sure everything's in order.
The first order of business is taking stock of any existing DNS records for your website or web application. Taco Labs is a new website — we didn't have any DNS records to start with. But in a real-world scenario, you'll probably be working with an existing website that already has DNS records. Before you add the new CNAME record for Fastly, you may need to remove existing DNS records for your domain.
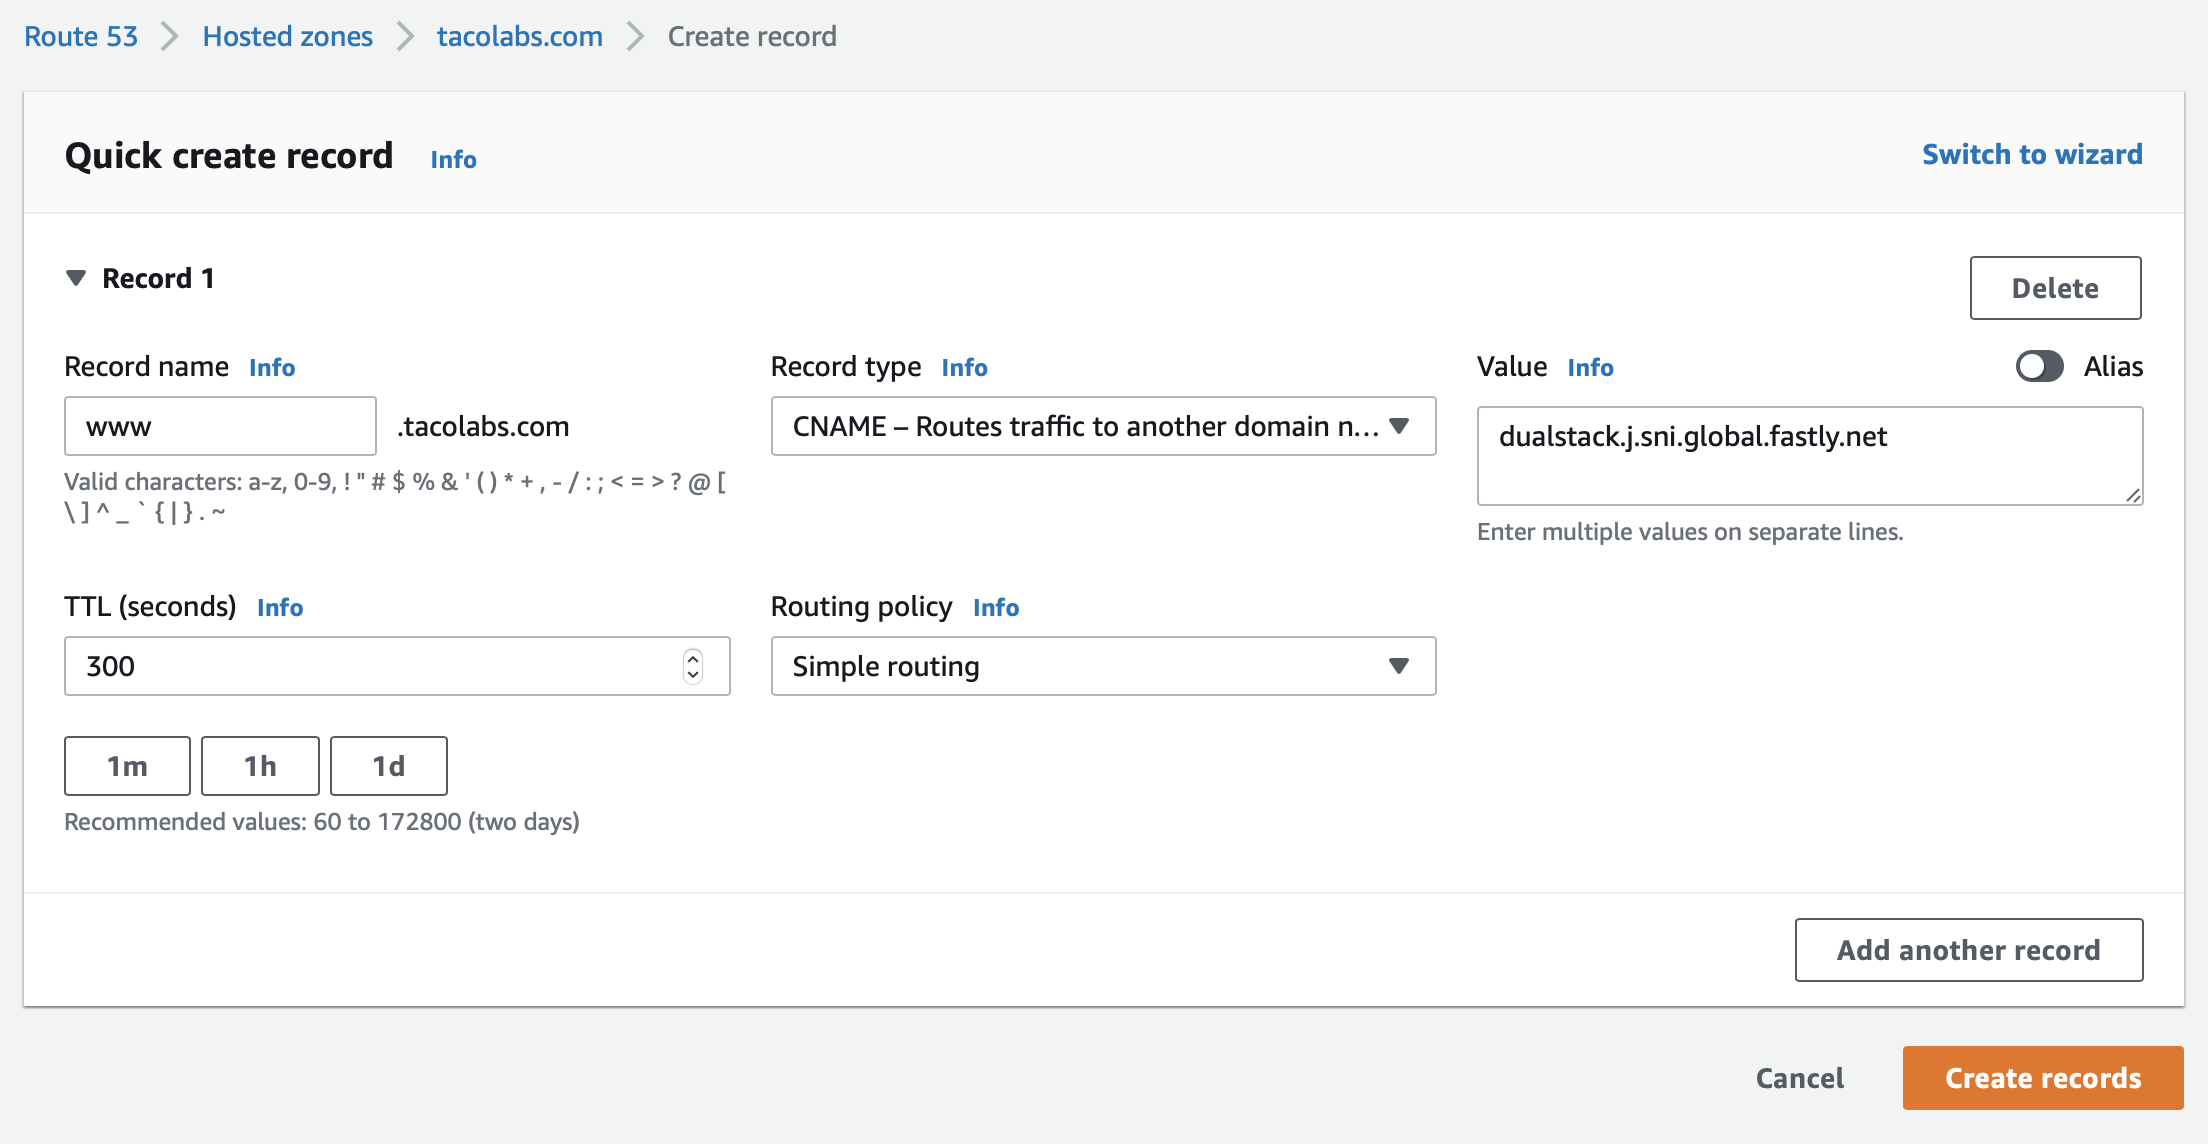
You can find the value for the CNAME record for your domain by clicking See DNS details on the TLS domains page, as shown below. This value doesn't support IPv6 addresses, but you can preface dualstack to enable IPv6 support.
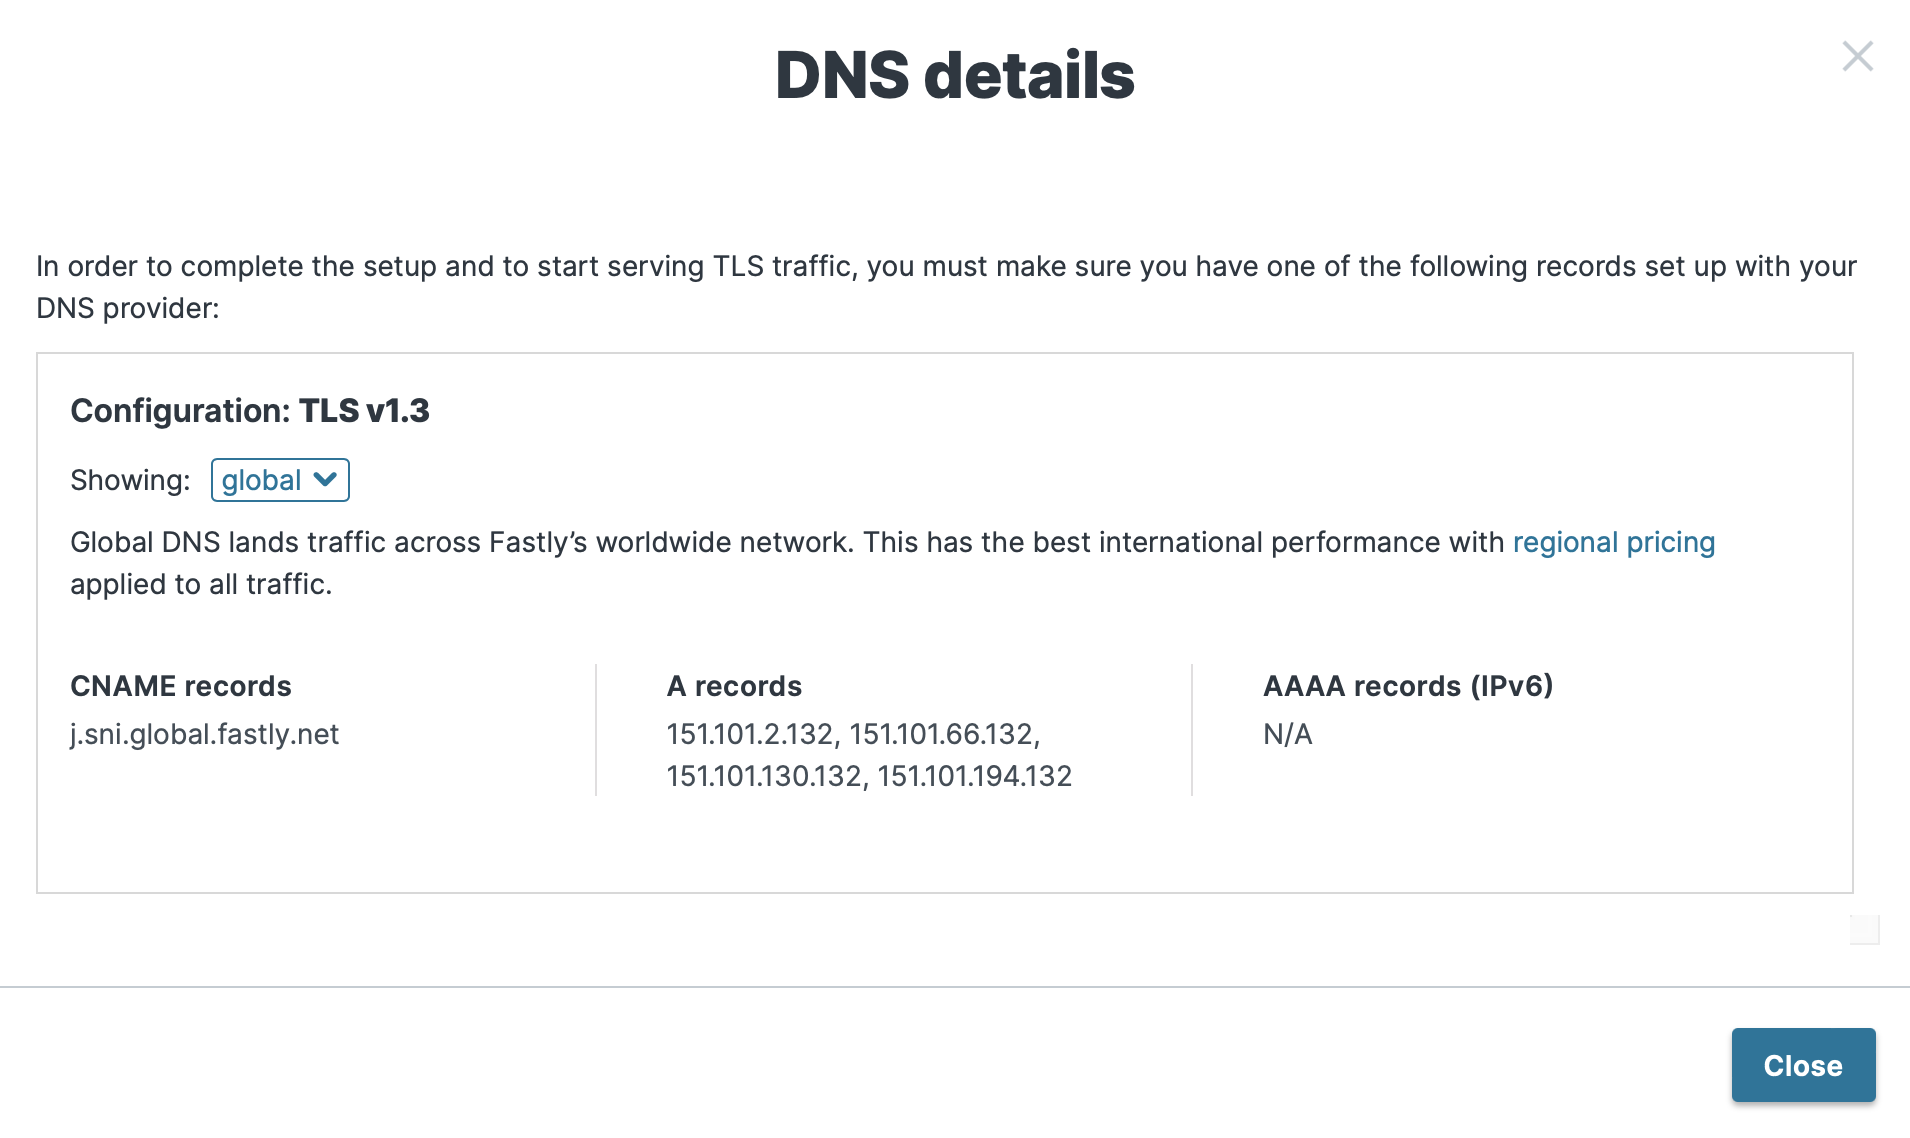
In this case, since the Fastly web interface says that the value for our CNAME record is j.sni.global.fastly.net, we're going to use dualstack.j.sni.global.fastly.net as the value to enable IPv6 support. Let's add the CNAME record to AWS Route 53. The entry is shown below.
DNS records can take some time to propagate, but we can use the following command to check the status:
$ dig www.tacolabs.com +shortdualstack.j.sni.global.fastly.net.151.101.198.132Looks like we're all set!
Redirecting the apex domain to www
One thing we need to address is our apex domain: http://tacolabs.com. We're using Fastly for www.tacolabs.com, but what if people type in our domain without the www? We need to add a redirect so that people who type http://tacolabs.com will be automatically redirected to http://www.tacolabs.com.
First, we need to add tacolabs.com as a domain in our Fastly service. Let's click Edit configuration to clone our service and create a new draft version. Then, on the Domains page, we'll click Create domain. In the Domain field, enter tacolabs.com, and then click Add.
Now we can add the redirect for the apex domain. On the Settings page, in the Redirect traffic to www subdomains section, we'll click Add apex redirect. We'll select tacolabs.com from the Domain menu, and then select 301 from the Status menu to use a 301 redirect, as shown below. Finally, we'll click Save, and then click Activate to activate the new version of the service configuration.

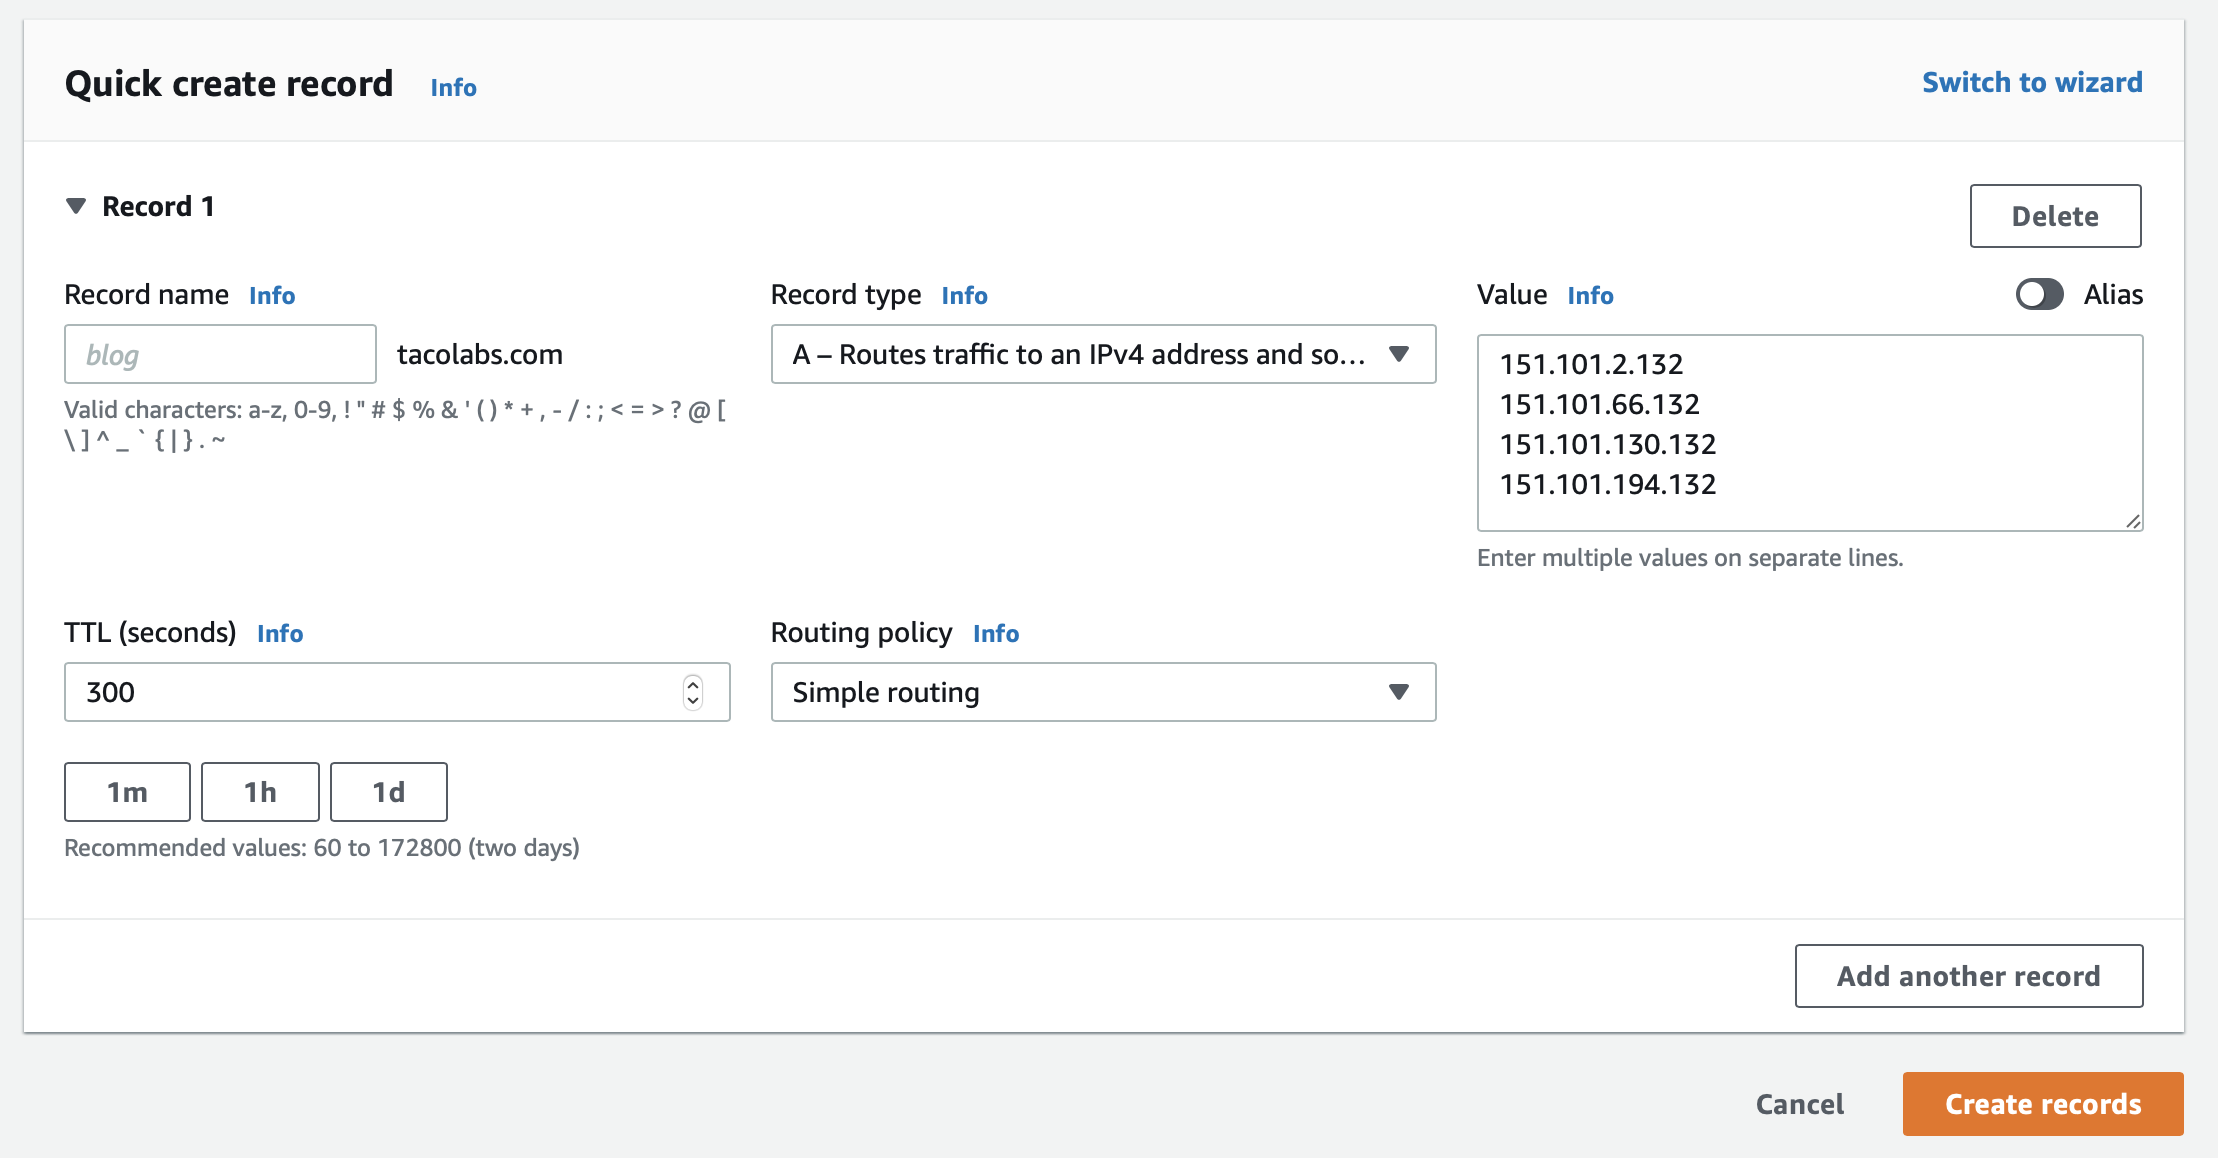
Our Fastly service is set up to handle the redirect. Now we need to add a DNS record for tacolabs.com. Recall that the TLS page had a details section that also displayed anycast IP addresses for DNS A records. We'll use those anycast IP addresses to create a new DNS A record in Route 53 for tacolabs.com, as shown below.
After the DNS record has propagated, we can use curl to test that our redirect is working. We should see that tacolabs.com is redirected to www.tacolabs.com, as shown below.
$ curl -sLD - http://tacolabs.com -o /dev/null -w '%{url_effective}'HTTP/1.1 301 Moved PermanentlyServer: VarnishRetry-After: 0cache-control: max-age=86400Location: http://www.tacolabs.com/Content-Length: 0Accept-Ranges: bytesDate: Mon, 18 Oct 2021 19:25:46 GMTVia: 1.1 varnishConnection: closeX-Served-By: cache-den8264-DENX-Cache: HITX-Cache-Hits: 0X-Timer: S1634585146.929981,VS0,VE79
HTTP/1.1 200 OKx-amz-id-2: NXLv0EZjIymQiCtAvpbeUyXlfiKjvMBbpSOqz84U5JNOfm5ysn1c43hvahA6oKH1/t+uiJS2Xrw=x-amz-request-id: T6JEN0EXBQFXVRCFcache-control: no-store, max-age=0Last-Modified: Fri, 23 Jul 2021 21:54:38 GMTETag: "dcf9e4efa41b023a4280c8305070a1cf"Content-Type: text/htmlServer: AmazonS3Via: 1.1 varnish, 1.1 varnishContent-Length: 4469Accept-Ranges: bytesDate: Mon, 18 Oct 2021 19:25:46 GMTAge: 0Connection: keep-aliveX-Served-By: cache-mdw17341-MDW, cache-phx12427-PHXX-Cache: MISS, MISSX-Cache-Hits: 0, 0X-Timer: S1634585146.116375,VS0,VE94Vary: Accept-Encoding
Enabling HSTS and forcing TLS
We're almost finished, but as it currently stands, things still aren't quite working right. Visitors can still get to the unencrypted version of www.tacolabs.com. We need to force visitors to the encrypted version of the site at https://www.tacolabs.com.
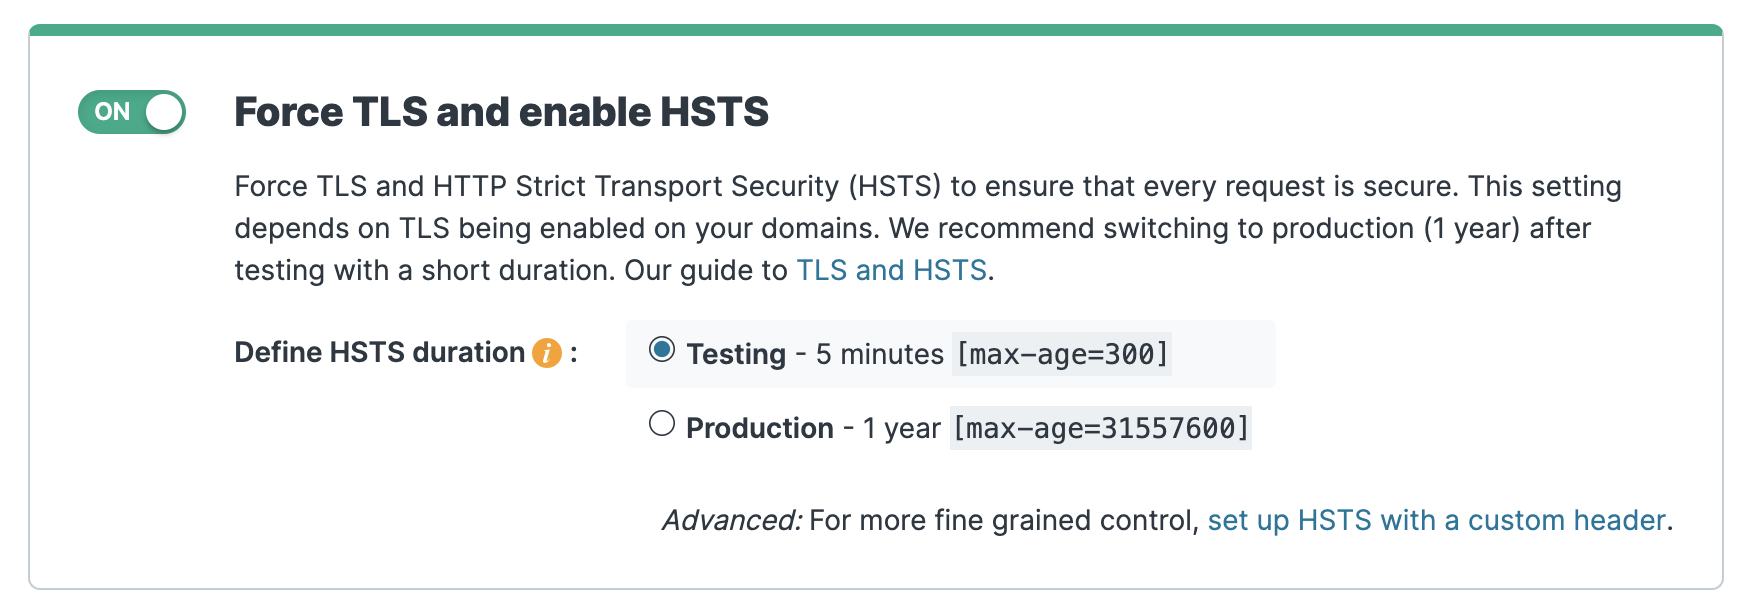
We can do that by forcing TLS and enabling HTTP Strict Transport Security (HSTS). Let's click Edit configuration to clone our service and create a new draft version. On the Settings page, click the Force TLS and enable HSTS switch to the on position, as shown below. It's a good idea to leave the HSTS duration set to the testing interval, at least to start.
Let's click Activate to activate the new version of the service configuration. Now we can check our redirect again. This time, the output from the curl command shown below shows that http://tacolabs.com redirects to https://www.tacolabs.com.
$ curl -sLD - http://tacolabs.com -o /dev/null -w '%{url_effective}'HTTP/1.1 301 Moved PermanentlyServer: VarnishRetry-After: 0cache-control: no-store, max-age=0Location: http://www.tacolabs.com/Content-Length: 0Accept-Ranges: bytesDate: Mon, 18 Oct 2021 20:38:35 GMTVia: 1.1 varnishConnection: closeX-Served-By: cache-bur17572-BURX-Cache: HITX-Cache-Hits: 0X-Timer: S1634589516.510082,VS0,VE58Strict-Transport-Security: max-age=300
HTTP/1.1 301 Moved PermanentlyServer: VarnishRetry-After: 0Location: https://www.tacolabs.com/Content-Length: 0Accept-Ranges: bytesDate: Mon, 18 Oct 2021 20:38:35 GMTVia: 1.1 varnishConnection: closeX-Served-By: cache-phx12424-PHXX-Cache: HITX-Cache-Hits: 0X-Timer: S1634589516.811935,VS0,VE1Strict-Transport-Security: max-age=300
https://www.tacolabs.com/
There's one other problem we need to address: The HTTPS redirect (https://tacolabs.com to https://www.tacolabs.com) returns a certificate mismatch error. To resolve that, we'll need to follow the instructions in the previous section and add another TLS certificate for the apex domain (tacolabs.com). After we've done that, all of the redirects will be working.
Watching stats
Everything is set up and working now! Go ahead and give yourself a pat on the back — you've successfully set up Fastly to pull your website or application from your origin server and deliver it to your customers in the most efficient way possible.
Now comes the fun part: Watching traffic in real time. Taco Labs is a fake website that hasn't hit the big time (yet), but we can still simulate traffic with a terminal command. That will allow us to get a feel for Fastly's Observability features.
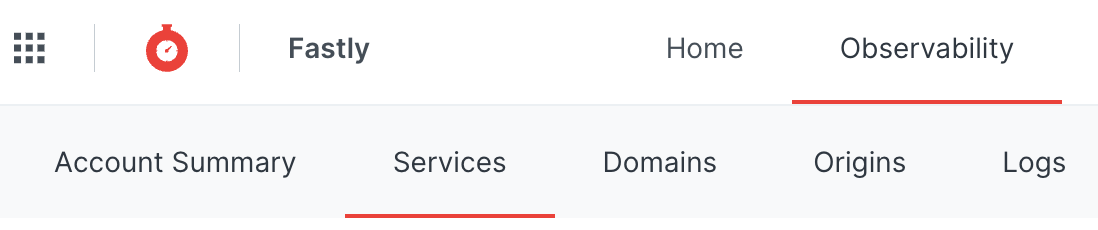
Up to this point, we've almost exclusively worked in the Deliver area of the Fastly web interface. Now we're going to click Observability and then Services to head to another part of the web interface, as shown below. The Services page displays top metrics for your website or application.
There's nothing to see here yet, so let's send some traffic to our website. We can use the freely available Apache bench command line tool with the watch command to simulate visitors:
$ watch -n 1 ab -r -n 30 -c 30 -g out.data https://www.tacolabs.com/With that command running in our terminal application, go back to the Services page and click Live. We start to see the real-time stats popping up on the Services page, as shown below.
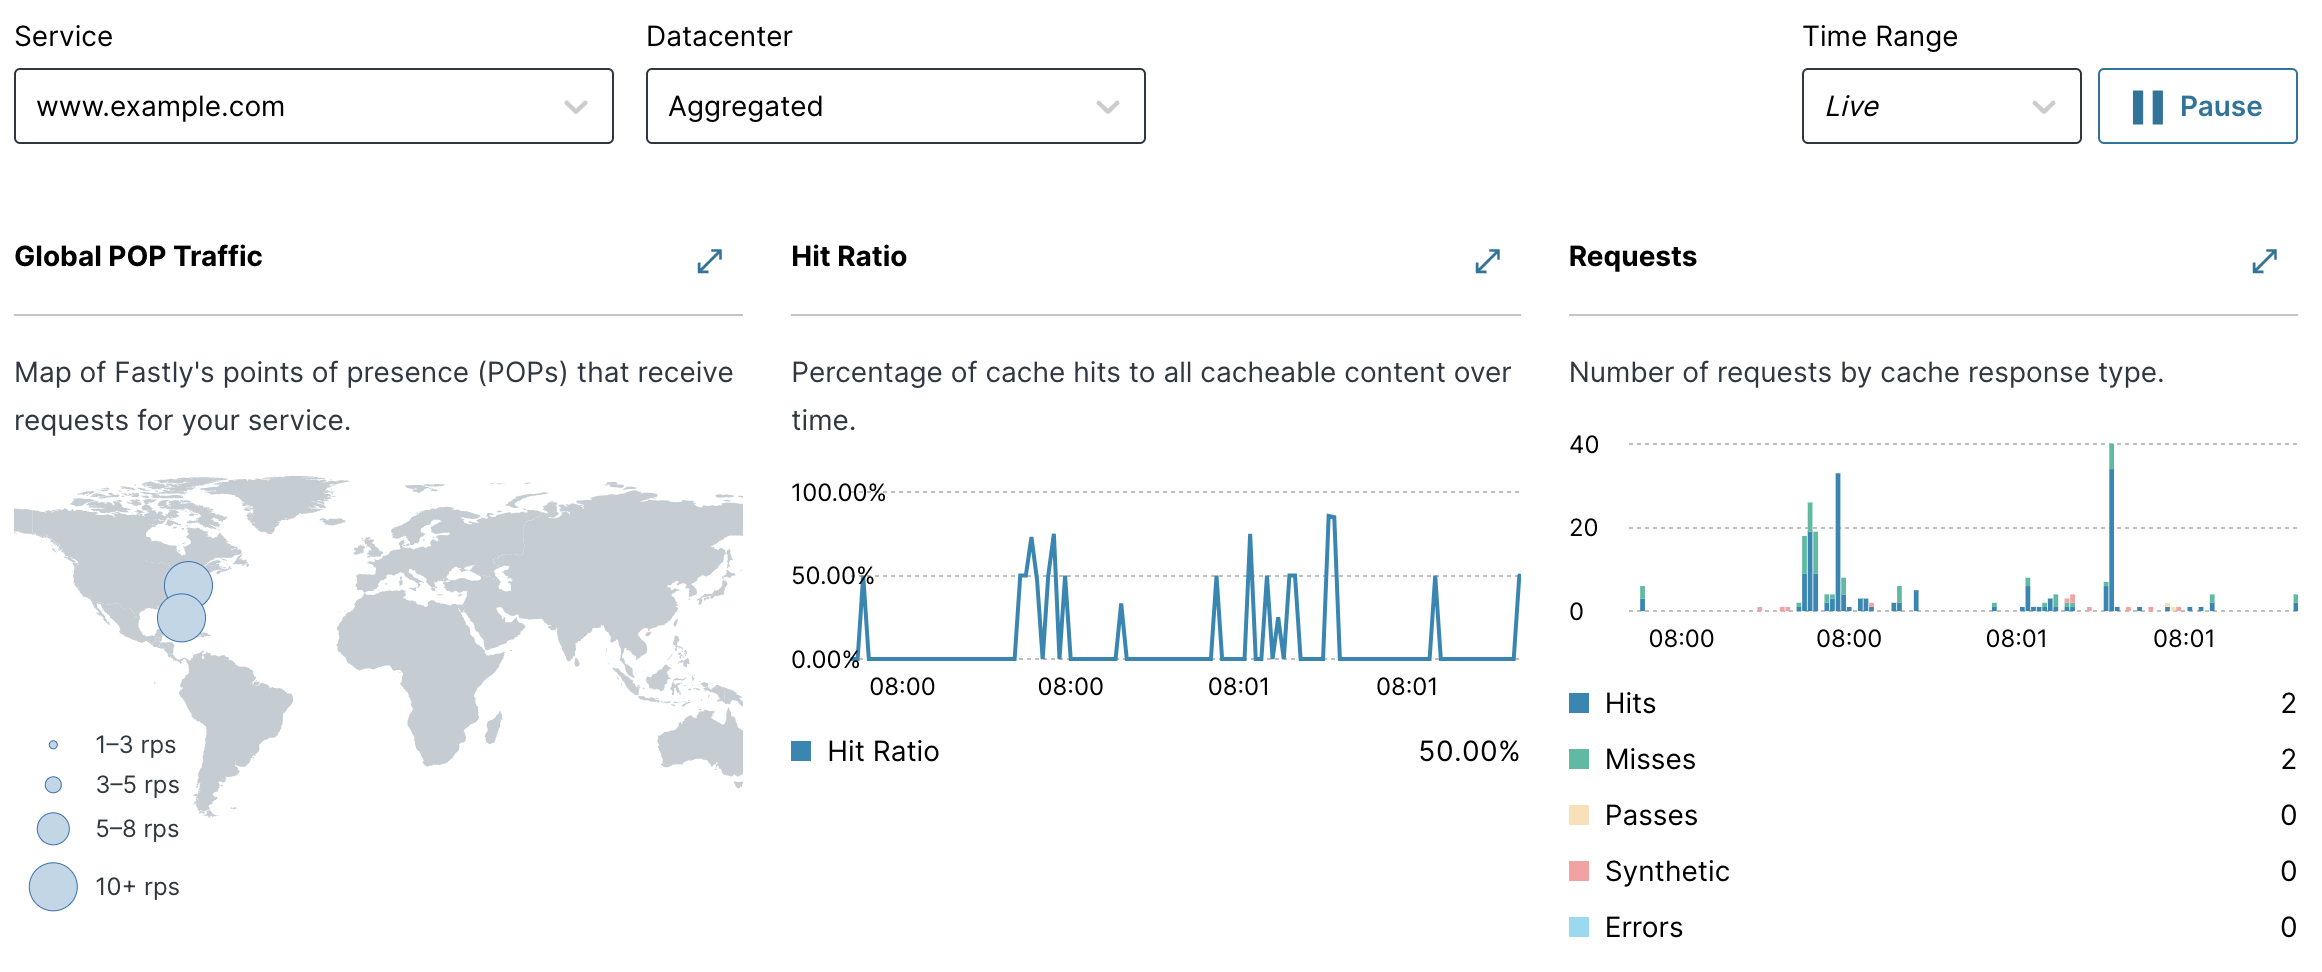
We won't waste time delving into the specifics, but know that you can use the Services page and the other Observability pages to gain a bird's eye view of the traffic to your website or application.
Checking logs
Earlier in this tutorial, we spent a lot of time setting up logging. That work is about to pay off. With production traffic ramping up on our Fastly service, we need to watch the logs to make sure visitors aren't experiencing any errors. In a real-world scenario, you'll want to look for error status codes, lower conversion rates, and any other issues specific to your website or application that might indicate there's a problem. Think of it as proactive monitoring. We're trying to head off small, unforeseen issues before they become catastrophic problems.
We've already set up two endpoints — one for Amazon S3 and another for Papertrail. Since the Papertrail endpoint is a real-time log streaming endpoint, that's the one we'll use here. The Amazon S3 is more of a historical record that can be used to examine old events. We can see from the Papertrail interface shown below that bots are already crawling Taco Labs, and there are some errors related to missing images.
As discussed previously, it's a good idea to filter your logs to find the events you're really interested in. For example, you could filter out all of the entries with HTTP status code 200. That way, you'd only see the errors.
Checking cache using the web interface
We've been using curl throughout this tutorial to check how Fastly is caching our website. Now let's try using the web interface.
Looking under Service summary, we'll see Check cache. We can click this and then enter a URL that contains one of the domains we've specified in the web interface. The tool shows how an object is being cached throughout the Fastly network, as shown below.
As you can see, the cache checking tool in the web interface provides more information than curl. This should be one of the first tools you use when troubleshooting caching issues with your website.
