
4. Adding features to our serverless application
Now that we've successfully chained our Compute service to our VCL service, we can start modifying our serverless application to add features.
Setting response headers
In Introduction to Fastly's CDN, we set the surrogate-control and cache-control headers to assist with caching. Those are still present in our VCL service, and we're going to leave those intact since our VCL service is handling all of the caching in our service chain. But it's worth exploring how we can set response headers using our serverless application, if only as an academic exercise.
We can add a new header in our JavaScript code. For the purposes of this example, we'll create a fictional x-tacos header that has no effect on the client, but still appears in the response. We'll add some emoji tacos in the header's value to make things fun!
Using your text editor, open the src/index.js file in the taco-labs-compute directory. Delete the existing content, copy and paste the following code into the file, and then save it.
/// <reference types="@fastly/js-compute" />
const handler = async (event) => { // get the request from the client const req = event.request
 const backendResponse = await fetch(req, {   backend: "vcl-origin",   cacheOverride: new CacheOverride("pass") });
 // Add headers to the response back to the client backendResponse.headers.append("x-tacos", "🌮🌮🌮")
 // send the backend response to the client return backendResponse;}
addEventListener("fetch", event => event.respondWith(handler(event)));
This code is slightly different from our previous iteration. For one thing, we've modified the function to allow for asynchronous behavior. We've also better organized the code to change how the response to the client is structured. The request will be retrieved from the client, the object will be retrieved from our cache — either our VCL service or, if the object isn't in cache, our origin server — and then the header will be appended to the response and sent back to the client.
Now we can publish our changes by entering the following command in our terminal application:
$ fastly compute publish --version latestThis command builds and deploys our serverless application, and it activates a new version of our service configuration. Now we can check the headers by using the following curl command:
$ curl -svo /dev/null -H "Fastly-Debug:1" https://namely-modern-mosquito.edgecompute.app/tacos/The output should look like this:
< HTTP/2 200< x-amz-id-2: 0rBWx0c4DlzpxTLV57w41/Y/TyxFgZJ+nX+i+sthFy9wxsjf5973cHetB8DxQ3f0oO66YLcMU18=< x-amz-request-id: 8PSH694YR3FMG5W0< last-modified: Tue, 31 Jan 2023 17:36:47 GMT< etag: "3c4d27191cfa47eedbe2a0ac06954a97"< content-type: text/html< server: AmazonS3< via: 1.1 varnish, 1.1 varnish, 1.1 varnish< cache-control: no-store, max-age=0< surrogate-control: max-age=31557600< accept-ranges: bytes< age: 70424< strict-transport-security: max-age=300< x-tacos: 🌮🌮🌮< date: Fri, 10 Nov 2023 23:39:56 GMT< fastly-debug-path: (D cache-bur-kbur8200032-BUR 1676652619) (F cache-bur-kbur8200032-BUR 1676652619) (D cache-bur-kbur8200032-BUR 1676652619) (F cache-bur-kbur8200056-BUR 1676582196) (D cache-chi-klot8100072-CHI 1676582195) (F cache-chi-klot8100142-CHI 1676582195)< fastly-debug-ttl: (M cache-bur-kbur8200032-BUR - - 70424) (H cache-bur-kbur8200032-BUR - - 70424) (M cache-chi-klot8100072-CHI - - 0)< fastly-debug-digest: 086cce689b77f680b0791868af574924c9252c43cb592d410909c434cdfd5c53< x-served-by: cache-bur-kbur8200032-BUR< x-cache: MISS, HIT, MISS< x-cache-hits: 0, 1, 0< x-timer: S1676652619.315891,VS0,VE7< vary: Accept-Encoding< content-length: 4320We can see the x-tacos header in the output. Our changes worked! We can also see the surrogate-control and cache-control headers, so we know that those are still being provided by our VCL service.
For more information about adding or changing headers using Compute applications, refer to this code sample.
Creating a custom 404 response
In Introduction to Fastly's CDN, we created a custom 404 page using the Fastly web interface. If a client requested a web page that wasn't on our origin, Fastly would respond with our custom 404 page. That still happens now, too — since our Compute service is chained to our VCL service, clients see that custom 404 page if they request a page that doesn't exist. But, as with response headers, we can update our serverless application to return a custom 404 response.
For the purposes of this example, we'll create a very simple response (“This is our custom Compute 404 page“) that will be displayed in the client's web browser when they request a page that doesn't exist.
Using your text editor, open the src/index.js file in the taco-labs-compute directory. Delete the existing content, copy and paste the following code into the file, and then save it.
/// <reference types="@fastly/js-compute" />
const handler = async (event) => { // get the request from the client const req = event.request
 const backendResponse = await fetch(req, {   backend: "vcl-origin",   cacheOverride: new CacheOverride("pass") });
 // Handle 404s with a custom response if (backendResponse.status == 404) {   return new Response("This is our custom Compute 404 page", {     status: 404,   }); }
 // If status is not 404, send the backend response to the client if (backendResponse.status != 404) {   // Add headers to the response back to the client   backendResponse.headers.append("x-tacos", "🌮🌮🌮")   return backendResponse; }}
addEventListener("fetch", event => event.respondWith(handler(event)));
We've refactored our code to handle two types of status codes: 404, and everything else. If our backend returns a 404 status code, our application will return the custom 404 response to the client. If the status code is not 404, we add the x-tacos response header and return the entire backend response to the client.
We can publish the changes by entering the following command in our terminal application:
$ fastly compute publish --version latestAs before, this command builds and deploys our serverless application and activates a new version of our service configuration. Now we can check to see if the custom 404 response is working by entering the URL of a non-existent page in our web browser, like https://namely-modern-mosquito.edgecompute.app/asdf. The custom 404 response should appear.
At this point, we could use the web interface to remove the custom 404 page from our VCL service, but it's not necessary. Our serverless application will return the new custom 404 response regardless of what the VCL service or S3 bucket returns.
Responding to 404s with a web page
We just modified our serverless application to respond to 404 errors with a custom response. That response was only a plain text response, however. How would we respond to a 404 error with a custom HTML web page?
There are two ways of going about this. We could include HTML in the body of our index.js file. That's not ideal for a couple of reasons, mainly because it would clutter up the file. A cleaner solution would be adding a new HTML file containing the HTML content of our 404 response and then using the includeBytes() function in our index.js file to include the HTML file in our response to 404 errors.
Using your text editor, open the src/index.js file in the taco-labs-compute directory. Delete the existing content, copy and paste the following code into the file, and then save it.
/// <reference types="@fastly/js-compute" />
import { includeBytes } from "fastly:experimental";
// Load a static file as a Uint8Array at compile time.// File path is relative to root of project, not to this fileconst notfoundPage = includeBytes("./src/not-found.html");
const handler = async (event) => { // get the request from the client const req = event.request
 const backendResponse = await fetch(req, {   backend: "vcl-origin",   cacheOverride: new CacheOverride("pass") });
 // Handle 404s with a custom response if (backendResponse.status == 404) {   return new Response(notfoundPage, {     status: 404,   }); }
 // If status is not 404, send the backend response to the client if (backendResponse.status != 404) {   // Add headers to the response back to the client   backendResponse.headers.append("x-tacos", "🌮🌮🌮")   return backendResponse; }}
addEventListener("fetch", event => event.respondWith(handler(event)));
We've updated our code to add a new line at the top of the file to import the includeBytes() function. We've also added a line to load a new static HTML file (not-found.html), which we'll create in just a moment. Finally, we've updated the response for 404s to include the new static HTML file.
Now let's create the not-found.html HTML file in the src directory. Copy and paste the following code into the file, and then save it.
<!DOCTYPE html><html lang="en"> <head> <title>404 not found</title> </head> <body> <h1>404 Not Found</h1> <p>Sorry! We couldn't find that content. Please try again.</p> <p>This is a custom 404 response embedded in our Compute application.</p> </body></html>Everything should be set. We can publish the changes by entering the following command in our terminal application:
$ fastly compute publish --version latestNow we can check to see if the custom 404 page is working by entering the URL of a non-existent page in our web browser, like https://namely-modern-mosquito.edgecompute.app/asdf. Our custom 404 page should appear.
Creating a custom robots.txt file
Search engines use robots.txt files to figure out what content they can and can't index on a website. In Introduction to Fastly's CDN, we created a custom robots.txt page using the Fastly web interface. If a bot requested /robots.txt, Fastly would respond with our custom robots.txt page. That still happens now, too — since our Compute service is chained to our VCL service, the robots.txt file is still returned.
Now that we know how to add custom files to our serverless application and return them in response to requests, we can update our serverless application to return a custom robots.txt response. Our original robots.txt file contained the following content:
User-agent: *Disallow: /For the purposes of this example, we'll update the content of the robots.txt file to allow content in the /tacos directory to be indexed:
User-agent: *Disallow: /Allow: /tacos/Open the src/index.js file in the taco-labs-compute directory, delete the existing content, copy and paste the following code into the file, and then save it.
/// <reference types="@fastly/js-compute" />
import { includeBytes } from "fastly:experimental";
// Load static files as a Uint8Array at compile time.// File path is relative to root of project, not to this fileconst notfoundPage = includeBytes("./src/not-found.html");const robotsPage = includeBytes("./src/robots.txt");
const handler = async (event) => { // get the request from the client const req = event.request const reqURL = new URL(req.url)
 const backendResponse = await fetch(req, {   backend: "vcl-origin",   cacheOverride: new CacheOverride("pass") });
 // Handle 404s with a custom response if (backendResponse.status == 404) {   return new Response(notfoundPage, {     status: 404,   }); }
 // Return robots.txt with a custom response if (reqURL.pathname.endsWith("/robots.txt")) {   return new Response(robotsPage, {     status: 200,   }); }
 // If status is not 404, send the backend response to the client if (backendResponse.status != 404) {   // Add headers to the response back to the client   backendResponse.headers.append("x-tacos", "🌮🌮🌮")   return backendResponse; }}
addEventListener("fetch", event => event.respondWith(handler(event)));
We've updated our code to load a new plaintext file (robots.txt), which we'll create in just a moment. We've also added a conditional to respond with the robots.txt file when bots request a URL ending in /robots.txt.
Now let's create the robots.txt file in the src directory. Copy and paste the following code into the file, and then save it.
User-agent: *Disallow: /Allow: /tacos/That should be it. We can publish the changes by entering the following command in our terminal application:
$ fastly compute publish --version latestNow we can check to see if the custom robots.txt is working by entering https://namely-modern-mosquito.edgecompute.app/robots.txt in our web browser. The text of our custom robots.txt page should appear.
Adding redirects
When we remove content or rename a file on the Taco Labs website, we should redirect the old URL to the new one. This helps inform search engines that the old link is no longer available and that the new link should be indexed instead. In Introduction to Fastly's CDN, we used VCL snippets to redirect URLs. Now we can add redirects using our serverless application in conjunction with config store, a feature that stores key-value pairs and makes them available to Compute services.
You can interact with Config Store using the Fastly API or the web interface. We'll start by creating a new config store using the curl command to interact with the Fastly API. Enter the following command in your terminal application, replacing YOUR_FASTLY_TOKEN with the API token you created earlier:
$ curl -i -X POST "https://api.fastly.com/resources/stores/config" -H "Fastly-Key: YOUR_FASTLY_TOKEN" -H "Content-Type: application/json" -H "Accept: application/json" -d '{"name":"redirects"}'We should see the following response:
HTTP/2 200status: 200 OKcache-control: no-storecontent-type: application/jsonfastly-ratelimit-remaining: 982fastly-ratelimit-reset: 1677106800accept-ranges: bytesvia: 1.1 varnish, 1.1 varnishdate: Wed, 22 Feb 2023 22:40:55 GMTx-served-by: cache-control-cp-aws-us-east-2-prod-4-CONTROL-AWS-UE2, cache-bur-kbur8200116-BURx-cache: MISS, MISSx-cache-hits: 0, 0x-timer: S1677105656.843135,VS0,VE136vary: Accept-Encodingstrict-transport-security: max-age=31536000content-length: 144
{"name":"redirects","id":"abcdefgh12345","created_at":"2023-02-22T22:40:55Z","updated_at":"2023-02-22T22:40:55Z","deleted_at":null}
We'll use the web interface to link the config store to our Compute service and add the first redirect key-value pair. Log in to the Fastly web interface, click the Resources tab, and then select Config stores. You'll see the redirects config store, as shown below.
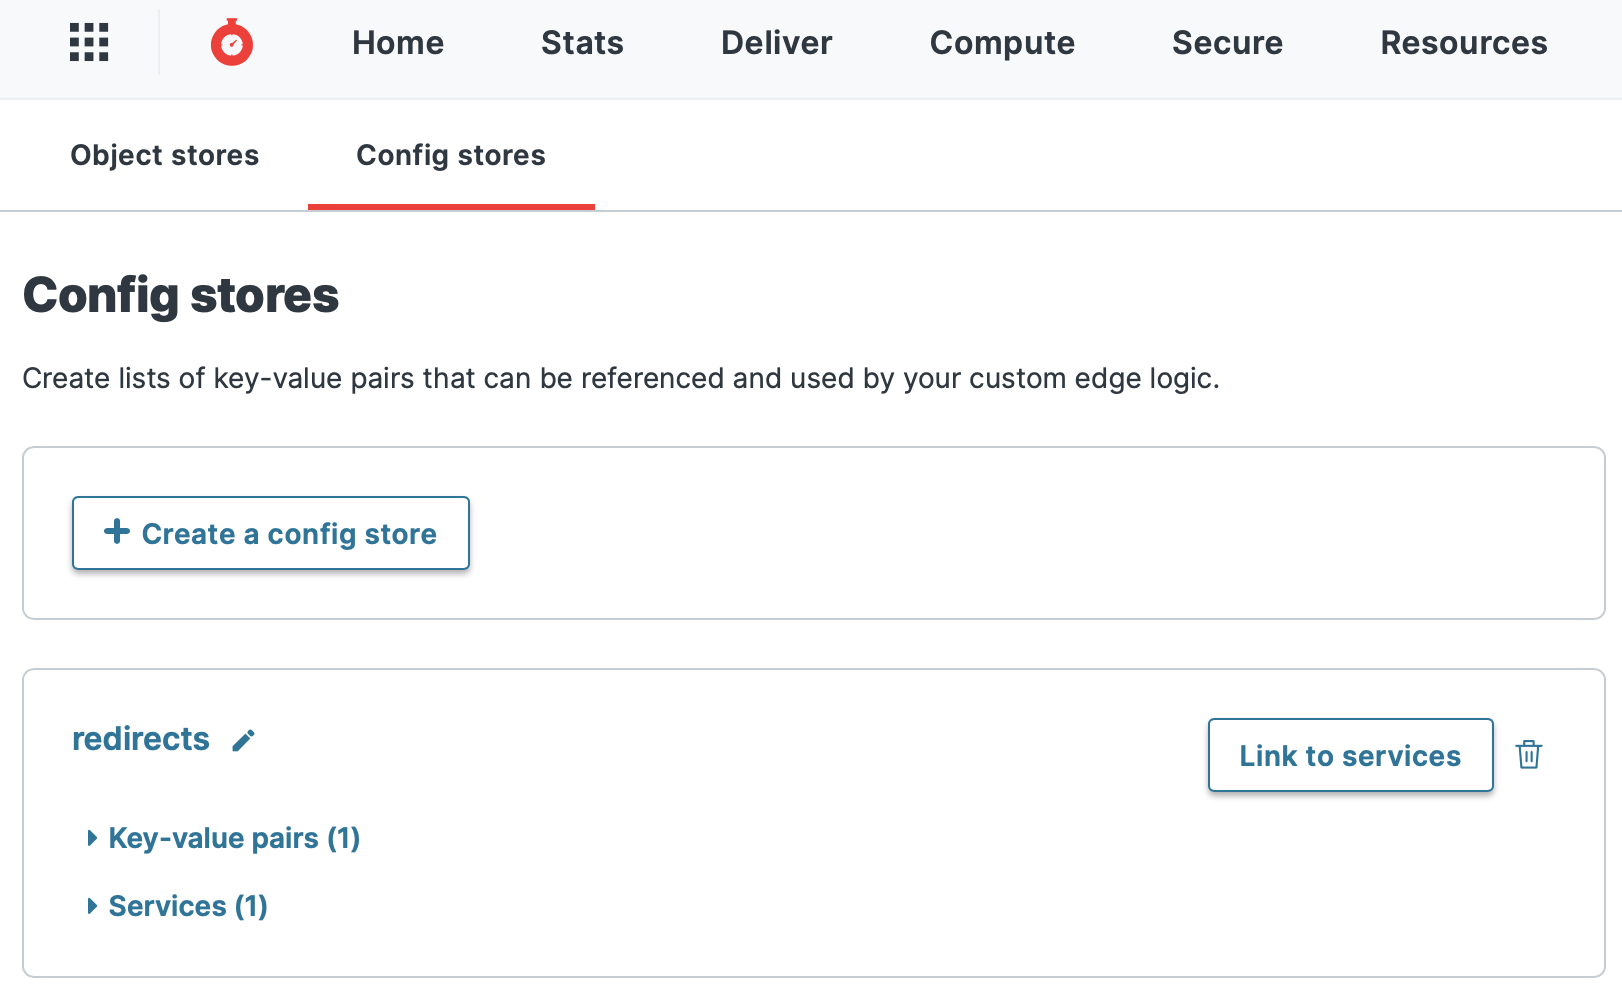
We need to link the config store to our Compute service so it can access the information in the config store. Click the Link to services button, select your Compute service, and click the Next button. Then click the Link and activate button to activate a new version of your service configuration and link the config store to the service.
Now we can add our first redirect. Let's pretend that Taco Labs is removing a web page for a failed initiative for taco kits and redirecting it to the taco page. We'll redirect /taco-kit to /tacos. We can use the web interface to add the key-value pair for the redirect, as shown below. The old URL is the key, and the new URL is the value.
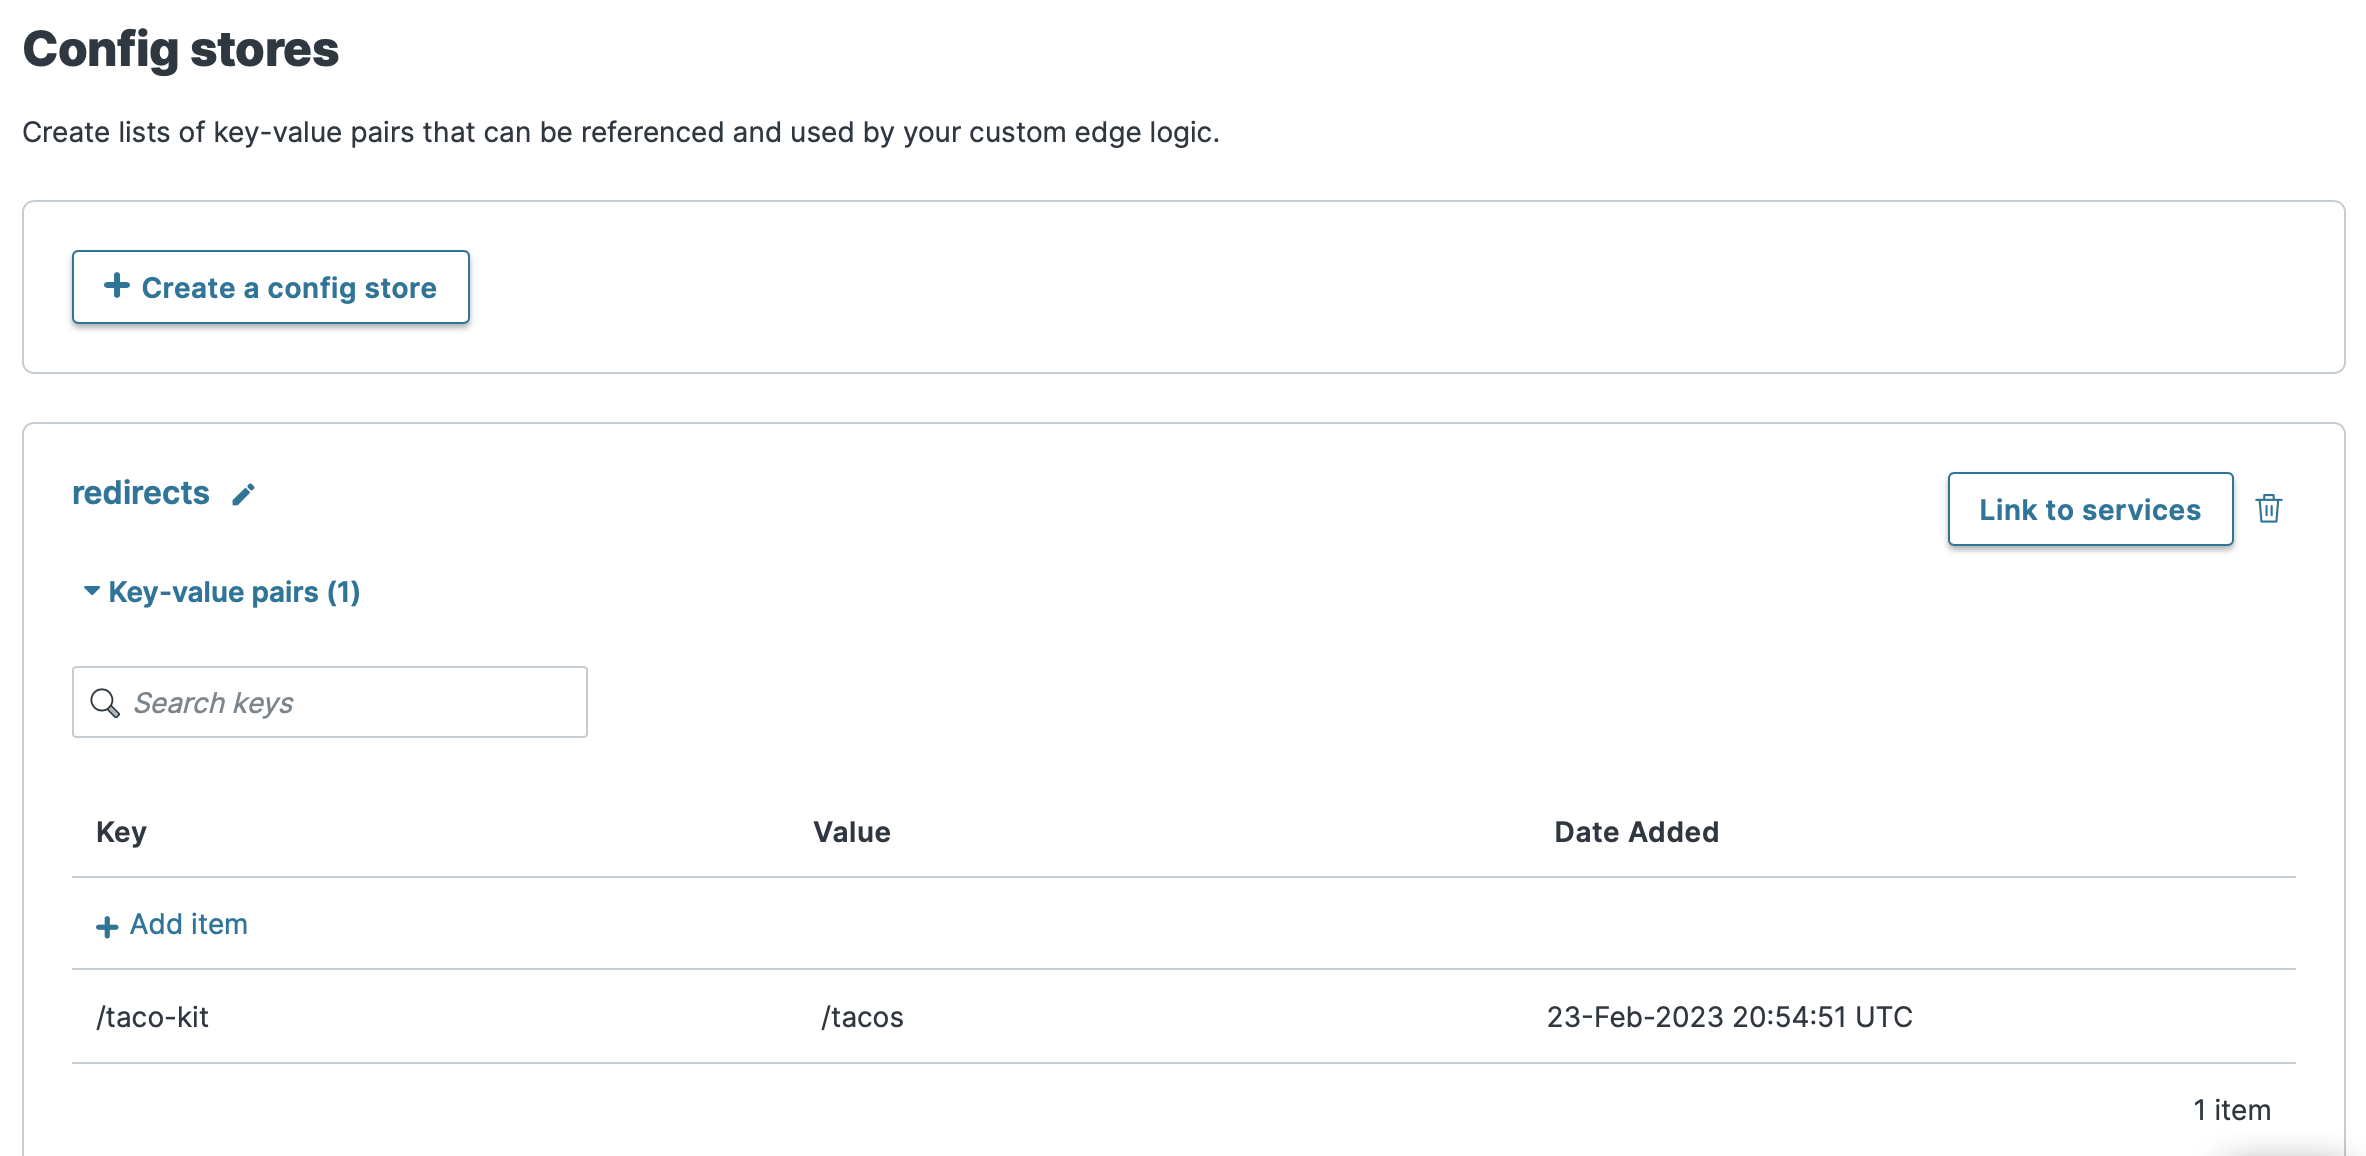
TIP: Config stores are versionless, so when you save the key-value pair, it's made available to your Compute service immediately — no service configuration activation is needed.
With the config store and redirect successfully created and attached to our Compute service, we can turn our attention to our serverless application. Open the src/index.js file in the taco-labs-compute directory, delete the existing content, copy and paste the following code into the file, and then save it.
/// <reference types="@fastly/js-compute" />
import { includeBytes } from "fastly:experimental";import { ConfigStore } from "fastly:config-store";
// Load static files as a Uint8Array at compile time.// File path is relative to root of project, not to this fileconst notfoundPage = includeBytes("./src/not-found.html");const robotsPage = includeBytes("./src/robots.txt");
const handler = async (event) => { // get the request from the client const req = event.request; const reqURL = new URL(req.url); const reqPath = reqURL.pathname;
 // Check if there is a redirect for the URL requested. // If there is, redirect the client. const config = new ConfigStore('redirects'); const dest = config.get(reqPath);
 if (dest) {   return new Response("", {     status: 301,     headers: { Location: dest },   }); }
 const backendResponse = await fetch(req, {   backend: "vcl-origin",   cacheOverride: new CacheOverride("pass") });
 // Handle 404s with a custom response if (backendResponse.status == 404) {   return new Response(notfoundPage, {     status: 404,   }); }
 // Return robots.txt with a custom response if (reqURL.pathname.endsWith("/robots.txt")) {   return new Response(robotsPage, {     status: 200,   }); }
 // If status is not 404, send the backend response to the client if (backendResponse.status != 404) {   // Add headers to the response back to the client   backendResponse.headers.append("x-tacos", "🌮🌮🌮")   return backendResponse; }}
addEventListener("fetch", event => event.respondWith(handler(event)));
We've refactored the code to use the ConfigStore constructor to access our redirects config store. We've also added some variables to obtain the pathname in the request, and some conditional logic to check incoming requests against the keys in the config store. If a redirect exists for the URL requested, our application will redirect the client to the new URL.
We can publish the changes by entering the following command in our terminal application:
$ fastly compute publish --version latestNow we can check to see if the custom redirect is working by entering https://namely-modern-mosquito.edgecompute.app/taco-kit in our web browser. We should be redirected to https://namely-modern-mosquito.edgecompute.app/tacos. To add redirects in the future, we can add new key-value pairs using the web interface or the API.
Adding another domain and enabling TLS
The cheeky namely-modern-mosquito URL has served us well as we've developed our serverless application, but it's too long to print on a business card. It's time to add another domain now that we're close to moving this application to a production environment. We'll use https://compute.tacolabs.com to avoid conflicts with our other deployed websites.
The good news is that there's nothing inherently different about the process of adding a domain and enabling TLS for our serverless application. We can follow the instructions from Introduction to Fastly's CDN to generate a TLS certificate for the new domain and add the DNS records to AWS Route 53. Don't forget to add the new compute.tacolabs.com domain to your Compute service. Refer to our instructions on working with domains if you need a refresher.
TIP: In Introduction to Fastly's CDN, we configured our VCL service to handle TLS redirects for insecure HTTP requests. That's no longer necessary. Our Compute service will handle this automatically by only sending requests to our serverless application when a secure connection exists.
Configuring logging
As you learned in Introduction to Fastly's CDN, logging events and traffic is an important part of monitoring your website or application. When you're developing a serverless application, logs can be a critical part of troubleshooting errors and issues with your application on the Compute platform. And when you launch your serverless application into production, logs can provide valuable insight into how your application is performing.
Fastly provides a variety of logging options and features for Compute applications. When you're developing your application, you can view logs by previewing the application on your computer. After you upload your application to the Compute platform, you can use the log tailing feature to view real-time logs in your terminal application. And when your application is ready for the production environment, you can use Fastly's real-time log streaming feature to send logs to one or more third-party services.
Some application errors are logged automatically. You can also refactor your serverless application to customize the information written to your logs.
TIP: Since we're chaining services and we already set up log streaming for the VCL service we configured in Introduction to Fastly's CDN, we'll have two sets of logs. Our VCL service will continue sending logs to our log streaming endpoint, and our Compute service will send logs to a different log streaming endpoint. Each set of logs will contain information specific to the respective service.
Running the server locally
The easiest way to view log output during development is to preview the application locally. We did this earlier when we created our Hello world application.
When you run the fastly compute serve command, the Fastly CLI compiles your application to Wasm and starts a local server to make it available for preview on your computer. As you send your serverless application requests using a web browser or terminal application, the server will continue to run in the background. You can view the real-time log output in your terminal application.
TIP: As previously discussed, the serverless application we're creating for Taco Labs can't be previewed locally since we're chaining services.
Using log tailing
After we've deployed our serverless application to the Compute platform, we can use the log tailing feature to view our application's logs in real time. When you run the fastly log-tail command, the Fastly CLI displays log lines in your terminal application as they're received from your application hosted on the Compute platform.
For example, if we deployed our serverless application and it had a bug causing an error, we could run the fastly log-tail command in our terminal application and try to load our application in a web browser. The error output will be displayed, similar to what's shown below.
$ fastly log-tail
INFO: Managed logging enabled on service 123456789abcdefstdout | e663da7b | Log: Request:stdout | e663da7b | Log: User-Agent: Mozilla/5.0 (Macintosh; Intel Mac OS X 10_15_7) AppleWebKit/605.1.15 (KHTML, like Gecko) Version/16.3 Safari/605.1.15stderr | e663da7b | Error while running request handler: e4.body is nullstderr | e663da7b | Stack:stderr | e663da7b |   bin/index.js/</d<@<stdin>:73:48stderr | e663da7b |   bin/index.js/</<@<stdin>:81:12stderr | e663da7b |   bin/index.js/<@<stdin>:86:11
IMPORTANT: The log tailing feature isn't designed for use with production applications. If you're ready to start logging events from a serverless application deployed for production use, set up Fastly's real-time log streaming feature to send logs to one or more third-party services.
To write specific information to the log output while using the log tailing feature, we can customize our application's logs by refactoring our application. For example, if we wanted to see the request URL and the client's user-agent, we could add console.log() lines to our application, as shown below.
Open the src/index.js file in the taco-labs-compute directory, delete the existing content, copy and paste the following code into the file, and then save it.
/// <reference types="@fastly/js-compute" />
import { includeBytes } from "fastly:experimental";import { ConfigStore } from "fastly:config-store";
// Load static files as a Uint8Array at compile time.// File path is relative to root of project, not to this fileconst notfoundPage = includeBytes("./src/not-found.html");const robotsPage = includeBytes("./src/robots.txt");
const handler = async (event) => { // get the request from the client const req = event.request; const reqURL = new URL(req.url); const reqPath = reqURL.pathname;
 // Prepare logs console.log('Request: ' + reqURL); console.log('User-Agent: ' + req.headers.get('User-Agent'));
 // Check if there is a redirect for the URL requested. // If there is, redirect the client. const config = new ConfigStore('redirects'); const dest = config.get(reqPath);
 if (dest) {   return new Response("", {     status: 301,     headers: { Location: dest },   }); }
 const backendResponse = await fetch(req, {   backend: "vcl-origin",   cacheOverride: new CacheOverride("pass") });
 // Handle 404s with a custom response if (backendResponse.status == 404) {   return new Response(notfoundPage, {     status: 404,   }); }
 // Return robots.txt with a custom response if (reqURL.pathname.endsWith("/robots.txt")) {   return new Response(robotsPage, {     status: 200,   }); }
 // If status is not 404, send the backend response to the client if (backendResponse.status != 404) {   // Add headers to the response back to the client   backendResponse.headers.append("x-tacos", "🌮🌮🌮")   return backendResponse; }}
addEventListener("fetch", event => event.respondWith(handler(event)));
We can publish the changes by entering the following command in our terminal application:
$ fastly compute publish --version latestNow we can start tailing the logs by entering the following command:
$ fastly log-tailAfter viewing our serverless application in our web browser, we should see output similar to the following in our terminal application:
INFO: Managed logging enabled on service 123456789abcdefstdout | f0a802ab | Log: Request: https://compute.tacolabs.com/mix-ins/stdout | f0a802ab | Log: User-Agent: Mozilla/5.0 (Macintosh; Intel Mac OS X 10_15_7) AppleWebKit/605.1.15 (KHTML, like Gecko) Version/16.3 Safari/605.1.15stdout | 46e0e0db | Log: Request: https://compute.tacolabs.com/assets/logo.pngstdout | 46e0e0db | Log: User-Agent: Mozilla/5.0 (Macintosh; Intel Mac OS X 10_15_7) AppleWebKit/605.1.15 (KHTML, like Gecko) Version/16.3 Safari/605.1.15Our custom log entries are appearing in our terminal application!
Setting up a log streaming endpoint
Fastly's real-time log streaming feature allows you to send logs to one or more third-party services. As with the VCL service we created in Introduction to Fastly's CDN, you can configure a log streaming endpoint in the Fastly web interface. We'll set up a logging endpoint for Papertrail.
As our application was configured in the previous section, it will send logs to your terminal application while running the log tailing feature, but it won't send the logs to a log streaming endpoint. To do that, we'll need to refactor our application to import the Logger() constructor and write lines to our logs, as shown below. Open the src/index.js file in the taco-labs-compute directory, delete the existing content, copy and paste the following code into the file, and then save it.
/// <reference types="@fastly/js-compute" />import { Logger } from "fastly:logger";import { includeBytes } from "fastly:experimental";import { ConfigStore } from "fastly:config-store";
// Load static files as a Uint8Array at compile time.// File path is relative to root of project, not to this fileconst notfoundPage = includeBytes("./src/not-found.html");const robotsPage = includeBytes("./src/robots.txt");
const handler = async (event) => { // get the request from the client const req = event.request; const reqURL = new URL(req.url); const reqPath = reqURL.pathname;
 // Prepare logs const logger = new Logger("tacolog"); logger.log('Request: ' + reqURL); logger.log('User-Agent: ' + req.headers.get('User-Agent'));
 // Check if there is a redirect for the URL requested. // If there is, redirect the client. const config = new ConfigStore('redirects'); const dest = config.get(reqPath);
 if (dest) {   return new Response("", {     status: 301,     headers: { Location: dest },   }); }
 const backendResponse = await fetch(req, {   backend: "vcl-origin",   cacheOverride: new CacheOverride("pass") });
 // Handle 404s with a custom response if (backendResponse.status == 404) {   return new Response(notfoundPage, {     status: 404,   }); }
 // Return robots.txt with a custom response if (reqURL.pathname.endsWith("/robots.txt")) {   return new Response(robotsPage, {     status: 200,   }); }
 // If status is not 404, send the backend response to the client if (backendResponse.status != 404) {   // Add headers to the response back to the client   backendResponse.headers.append("x-tacos", "🌮🌮🌮")   return backendResponse; }}
addEventListener("fetch", event => event.respondWith(handler(event)));
We can publish the changes by entering the following command in our terminal application:
$ fastly compute publish --version latestNow we'll see our custom log entries in Papertrail, as shown below.

Using version control
Since our serverless application consists of text files, it's a perfect candidate for version control. Using a version control system like git has numerous advantages. We could use git to track revisions to our serverless application, store it in a centralized location to share it with team members, and implement a formal development and review process to add features and fix bugs.
We've uploaded the serverless application used in this tutorial to GitHub. You can review the entire application on the GitHub website.
Setting up continuous deployment
Fastly has developed several Compute workflows for GitHub Actions, a continuous integration and deployment system integrated with GitHub that allows developers to test, build, and deploy applications to third-party systems. You can use these workflows to push your serverless application to the Compute platform when certain actions are performed, like after a pull request has been merged.
We'll use the following GitHub Action for our serverless application:
name: Deploy Taco Labs Serverless Applicationon:  push:    branches: [fastly-compute]
jobs:  deploy:    runs-on: ubuntu-latest    steps:    - uses: actions/checkout@v3
    - name: Install project dependencies      run: npm install
    - name: Deploy to Compute      uses: fastly/compute-actions@v5      env:        FASTLY_API_TOKEN: ${{ secrets.FASTLY_API_TOKEN }}
This workflow will automatically deploy our application to the Compute platform after every push to the fastly-compute branch.
