
- English
- 日本語
Working with domains
Last updated 2024-07-22
This guide describes how to take the public name for your website or application and add it to Fastly where you can associate it with a Fastly service. You can add, edit, or remove domains from your service at any time.
TIP
You can also work with domains using the Fastly API
Before you begin
Before you create your first domain, be sure you understand how domains are used with Fastly and domain creation limits. You'll also need to understand the Fastly web interface controls before using them to work with domains.
Creating a domain for the first time
Follow the steps below to add a domain to your service for the first time:
- Log in to the Fastly control panel.
- From the Home page, select the appropriate service. You can use the search box to search by ID, name, or domain.
- Click Edit configuration and then select the option to clone the active version.
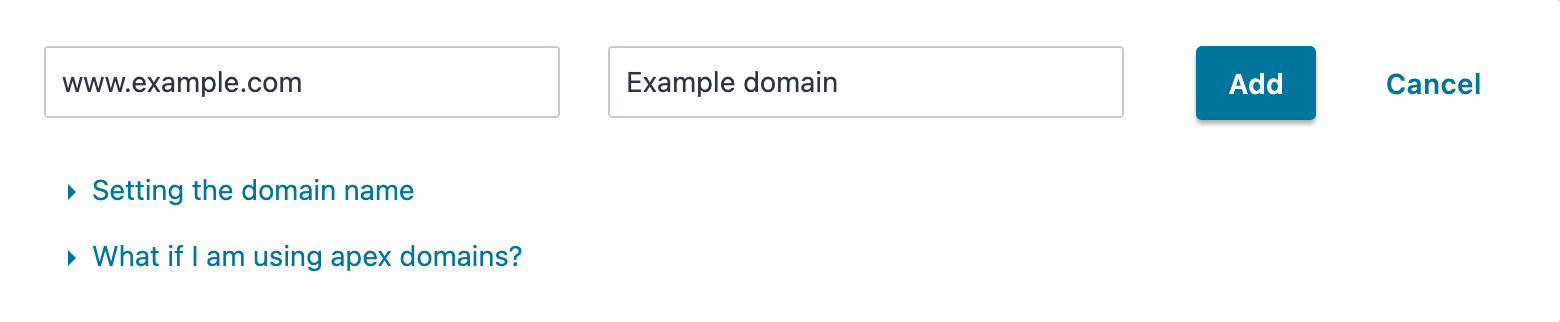
Fill out the domain creation fields as follows:
- In the Domain Name field, enter the public domain you want users to visit.
TIP
We recommend using a subdomain such as
wwwwhen you publish links to your website and redirecting your apex domain to the subdomain (e.g., redirecting the apex domainexample.comto the subdomainwww.example.com). You can include both versions in your service and configure your service to handle the redirect for you by setting up aCNAMErecord for the subdomain andArecords for the apex domain in your DNS settings. - (Optional) In the Comment field, enter a comment that describes the domain.
- In the Domain Name field, enter the public domain you want users to visit.
Click the Add button. Your new domain appears in the list of domains.
- Click Activate to deploy your configuration changes.
Once you create a domain, you'll want to test it before adding a CNAME DNS record for your domain name to begin routing traffic through Fastly.
Creating additional domains
Follow the steps below to add additional domains to your service:
- Log in to the Fastly control panel.
- From the Home page, select the appropriate service. You can use the search box to search by ID, name, or domain.
- Click Edit configuration and then select the option to clone the active version.
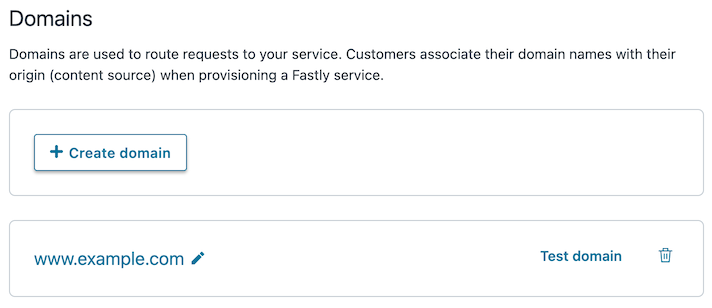
Click Create domain.
Fill out the domain creation fields as follows:
- In the Domain Name field, enter the public domain you want users to visit.
- (Optional) In the Comment field, enter a comment that describes the domain.
Click Add. Your new domain appears in the list of domains.
- Click Activate to deploy your configuration changes.
Once you create a domain, you'll want to test it before adding a CNAME DNS record for your domain name to begin routing traffic through Fastly.
Testing a domain
After you activate your service configuration, but before you change your DNS entries to send your domain to our servers, you can check to see how your service is pulled through our network. Testing your domain can help you identify DNS issues or problems with your Fastly configuration.
You can test your domain using a link in the web interface by following the steps below. Alternatively, you can test domains using command line utilities.
To use the web interface to test your domain:
- Log in to the Fastly control panel.
- From the Home page, select the appropriate service. You can use the search box to search by ID, name, or domain.
- Click Edit configuration and then select the option to clone the active version.
Click Test domain next to the domain you want to test.
Verify that your website appears in a new tab in your web browser.
Deleting a domain
Follow the steps below to delete a domain from your service:
- On the Domains page, click the trash
 next to the domain you want to delete.
 - Click Confirm and delete to confirm you want to delete your domain.
- Click Activate to deploy your configuration changes.
IMPORTANT
To minimize the risk of unauthorized use of your domains, we strongly recommend modifying or deleting any DNS CNAME records pointing to the Fastly hostname associated with the deleted domain. Follow the instructions on your DNS provider's website.
What's next
When you're ready to route production traffic through Fastly, update your domain's CNAME record to begin routing client traffic through Fastly services instead of directly to your origin.
You may also want to learn more about working with hosts and working with health checks as you continue to refine versions of your service configurations.
Do not use this form to send sensitive information. If you need assistance, contact support. This form is protected by reCAPTCHA and the Google Privacy Policy and Terms of Service apply.
