
- English
- 日本語
Checking multiple backends for a single request
Last updated 2017-05-23
Using a restart is a good option to check multiple backends for a single request. This can be created using a cache setting rule and request headers.
Create a new cache setting rule
Follow these steps to create a cache restart within vcl_fetch.
- Log in to the Fastly web interface.
- From the Home page, select the appropriate service. You can use the search box to search by ID, name, or domain.
- Click Edit configuration and then select the option to clone the active version.
- Click Settings.
Click Create cache setting.
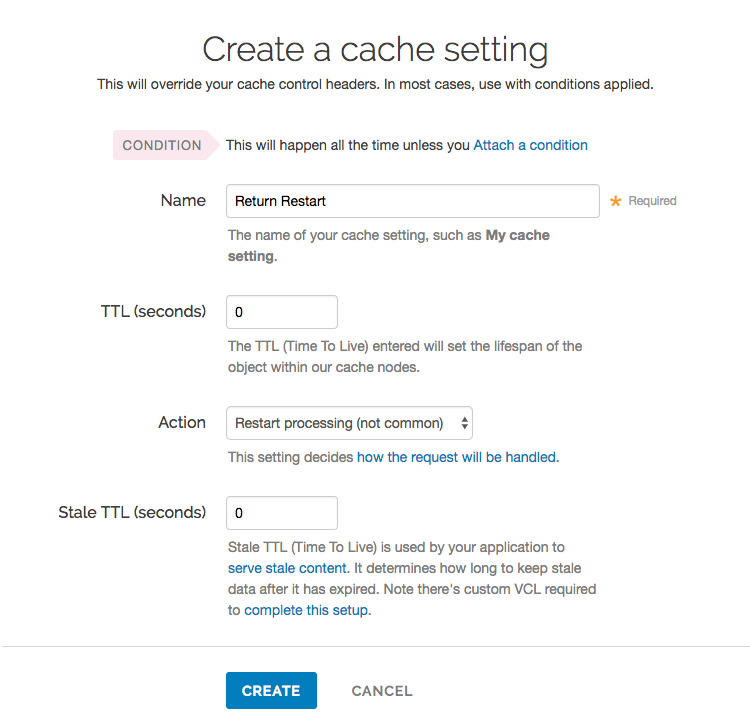
Fill out the Create a cache setting fields as follows:
- In the Name field, enter
Return Restart(or any meaningful, preferred name). - In the TTL (seconds) field, enter
0. - From the Action menu, select Restart processing.
- In the Stale TTL (seconds) field, enter
0.
- In the Name field, enter
Click Create.
On the Settings page, click Attach a condition next to the cache setting you just created.
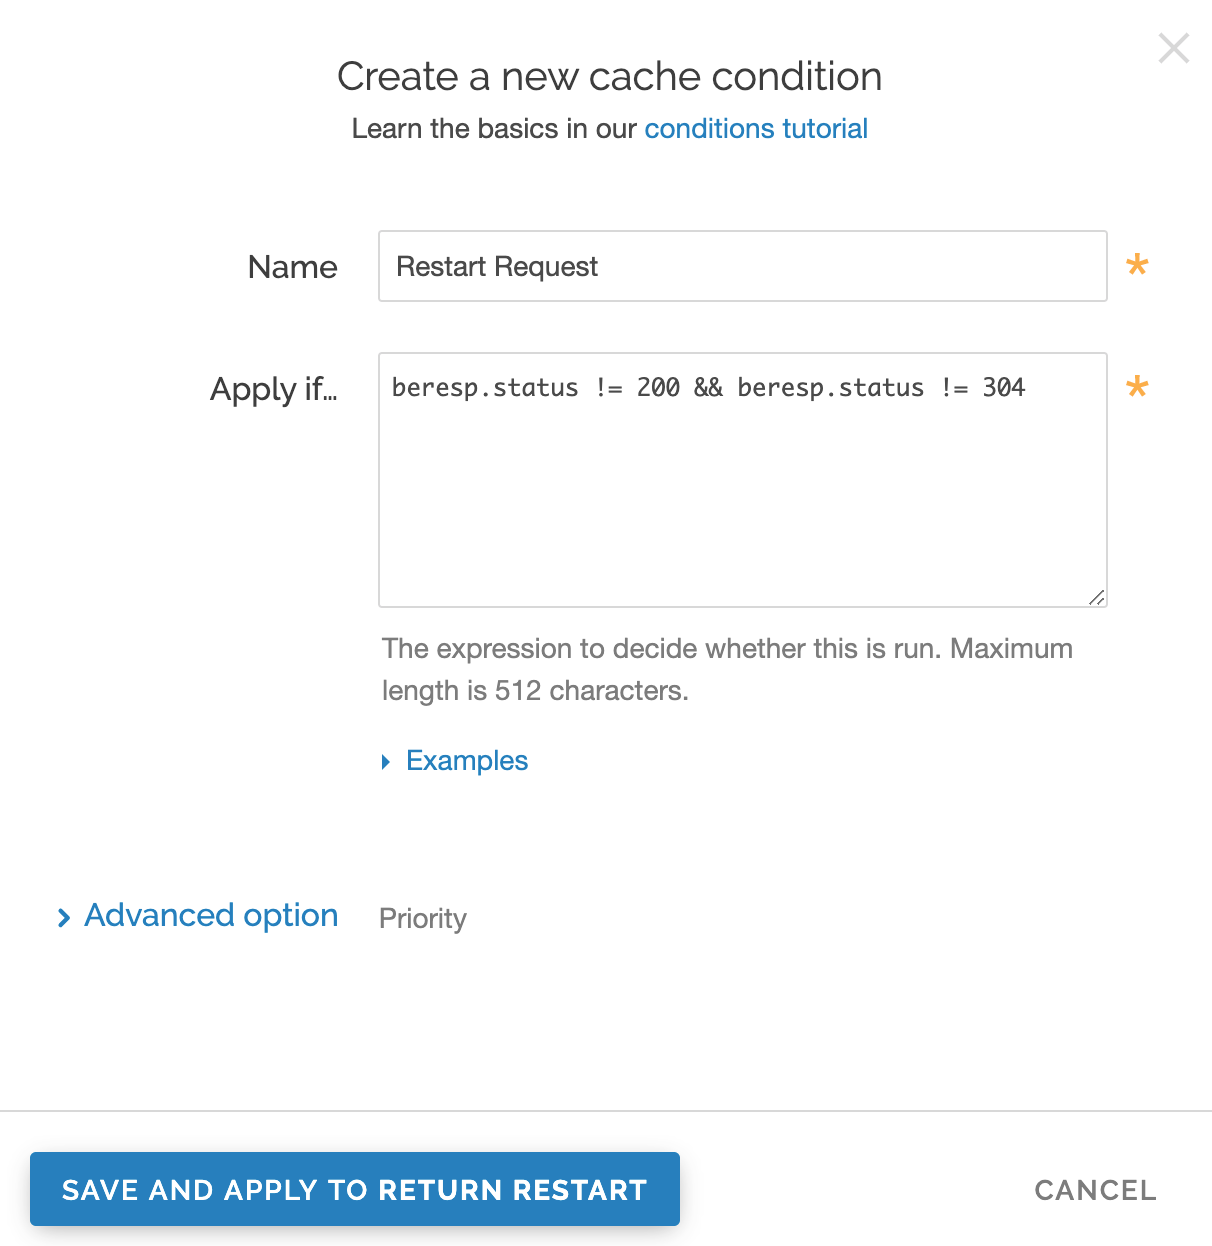
Fill out the Create a new cache condition fields as follows:
- In the Name field, enter
Restart Request(or any meaningful, preferred name). - In the Apply if field, enter
beresp.status != 200 && beresp.status != 304.
- In the Name field, enter
Click Save and apply to create the condition.
Create new request headers
Follow these steps to create a request header within vcl_recv.
- Click Content.
Click Create header.
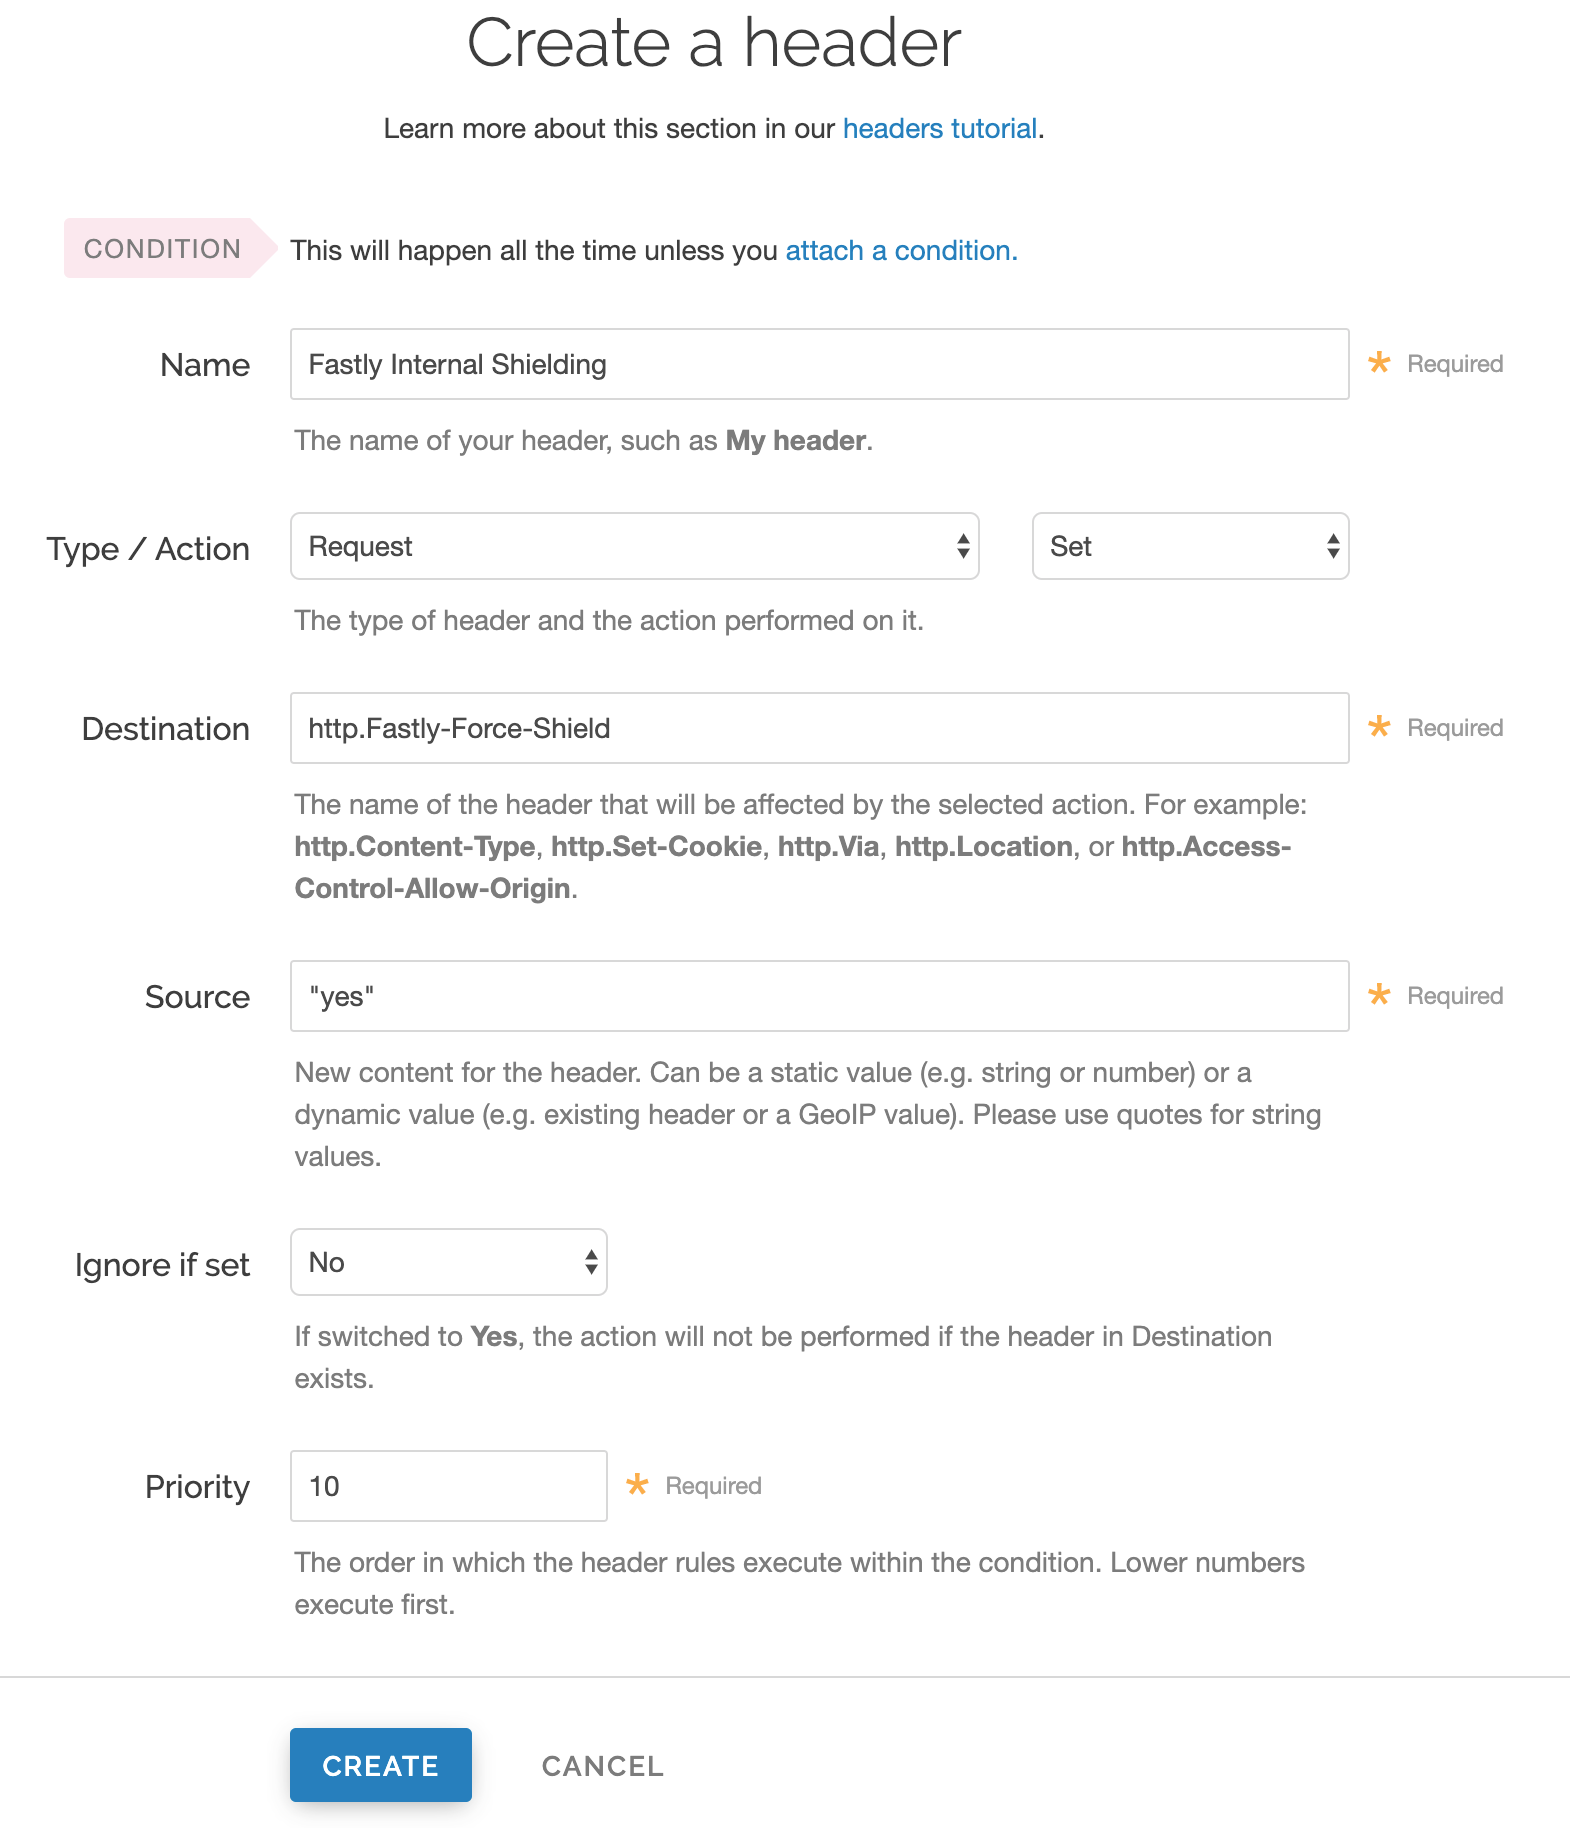
Fill out the Create a new header fields as follows:
- In the Name field, enter
Fastly Internal Shielding(or any meaningful, preferred name). - From the Type menu, select Request, and from the Action menu, select Set.
- In the Destination field, enter
http.Fastly-Force-Shield. - In the Source field, enter
"yes". - From the Ignore if set menu, select No.
- In the Priority field, enter
10.
- In the Name field, enter
Click Create.
Click Create header to create another header to switch to the next backend.

Fill out the Create a header fields as follows:
- In the Name field, enter
Second Backend(or any meaningful, preferred name). - From the Type menu, select Request, and from the Action menu, select Set.
- In the Destination field, enter
backend. - In the Source field, enter
Second_Backend(this should match the name of your other backend). - From the Ignore if set menu, select No.
- In the Priority field, enter
11.
- In the Name field, enter
Click Create. The new header appears on the Content page.
Create new header conditions
Follow these steps to create conditions for the headers.
On the Content page, click Attach a condition next to one of the headers you just created.
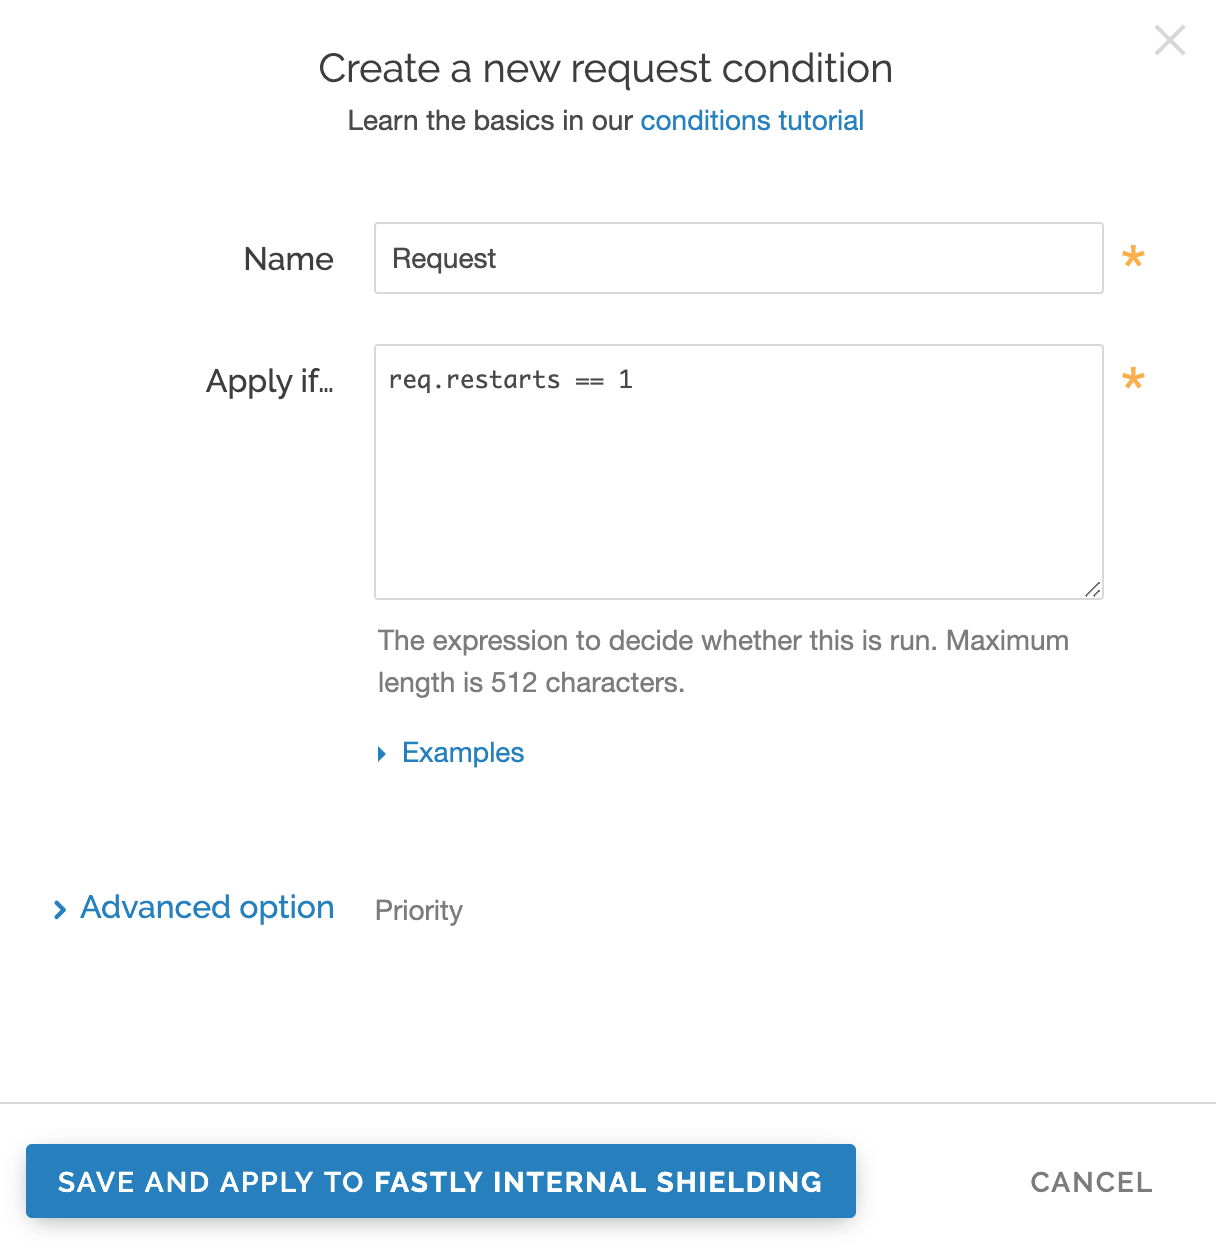
Fill out the Create a new request condition fields as follows:
- In the Name field, enter
Req.request(or any meaningful, preferred name). - In the Apply if field, enter
req.restarts == 1.
- In the Name field, enter
Click Save and apply to. The condition appears on the Content page.
Repeat steps 1-3 for the other header.
- Click Activate to deploy your configuration changes.
Do not use this form to send sensitive information. If you need assistance, contact support. This form is protected by reCAPTCHA and the Google Privacy Policy and Terms of Service apply.
