
- English
- 日本語
Responses tutorial
Last updated 2018-08-16
Fastly allows you to create custom HTTP responses that are served directly from the cache without storing the page on a server. Responses are commonly used to serve small static assets that seldom change and maintenance pages that are served when origins are unavailable. This tutorial shows you how to create your own responses.
NOTE
We assume that you already know how to edit and deploy configurations using the Fastly control panel. If you are not familiar with basic editing using the application, see our help guides to learn more.
Creating a quick response
Fastly provides features that allow you to quickly enable and configure responses for a robots.txt file and 404 and 503 errors. For more information, see our guides on creating and customizing a robots.txt file and creating error pages with custom responses.
Creating an advanced response
You can create an advanced response to specify the HTTP status code, MIME type, and content of the response. An advanced response has three basic attributes:
- Status - An HTTP status code to include in the header of the response
- Response - The content to be served when delivering the response
- Description - A human readable identifier for the response
By setting these three attributes and adding a condition to the response, you can very quickly get one up and running on your service. To create an advance response, follow the steps below:
- Log in to the Fastly control panel.
- From the Home page, select the appropriate service. You can use the search box to search by ID, name, or domain.
- Click Edit configuration and then select the option to clone the active version.
- Click Content.
Click Set up advanced response.
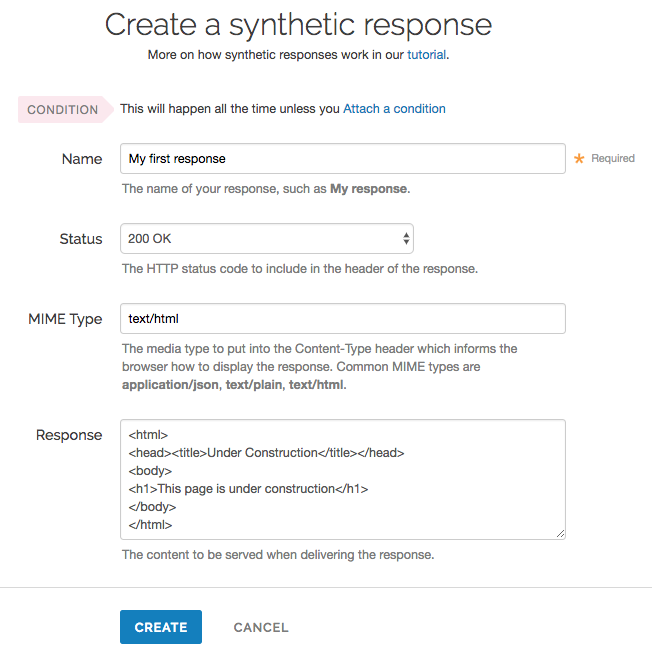
Fill out the Create a synthetic response fields as follows:
- In the Name field, enter a human-readable name for the response (e.g.,
My first response). - From the Status menu, select the appropriate status (e.g.,
200 OK). - In the MIME Type field, enter the content type of the response (e.g.,
text/html). - In the Response field, enter the response you want to appear when the conditions are met.
- In the Name field, enter a human-readable name for the response (e.g.,
Click Create to create your custom response.
Your new response appears in the list of responses.
Adding conditions
To add a condition, follow the steps below:
Click Attach condition to the right of the new response.
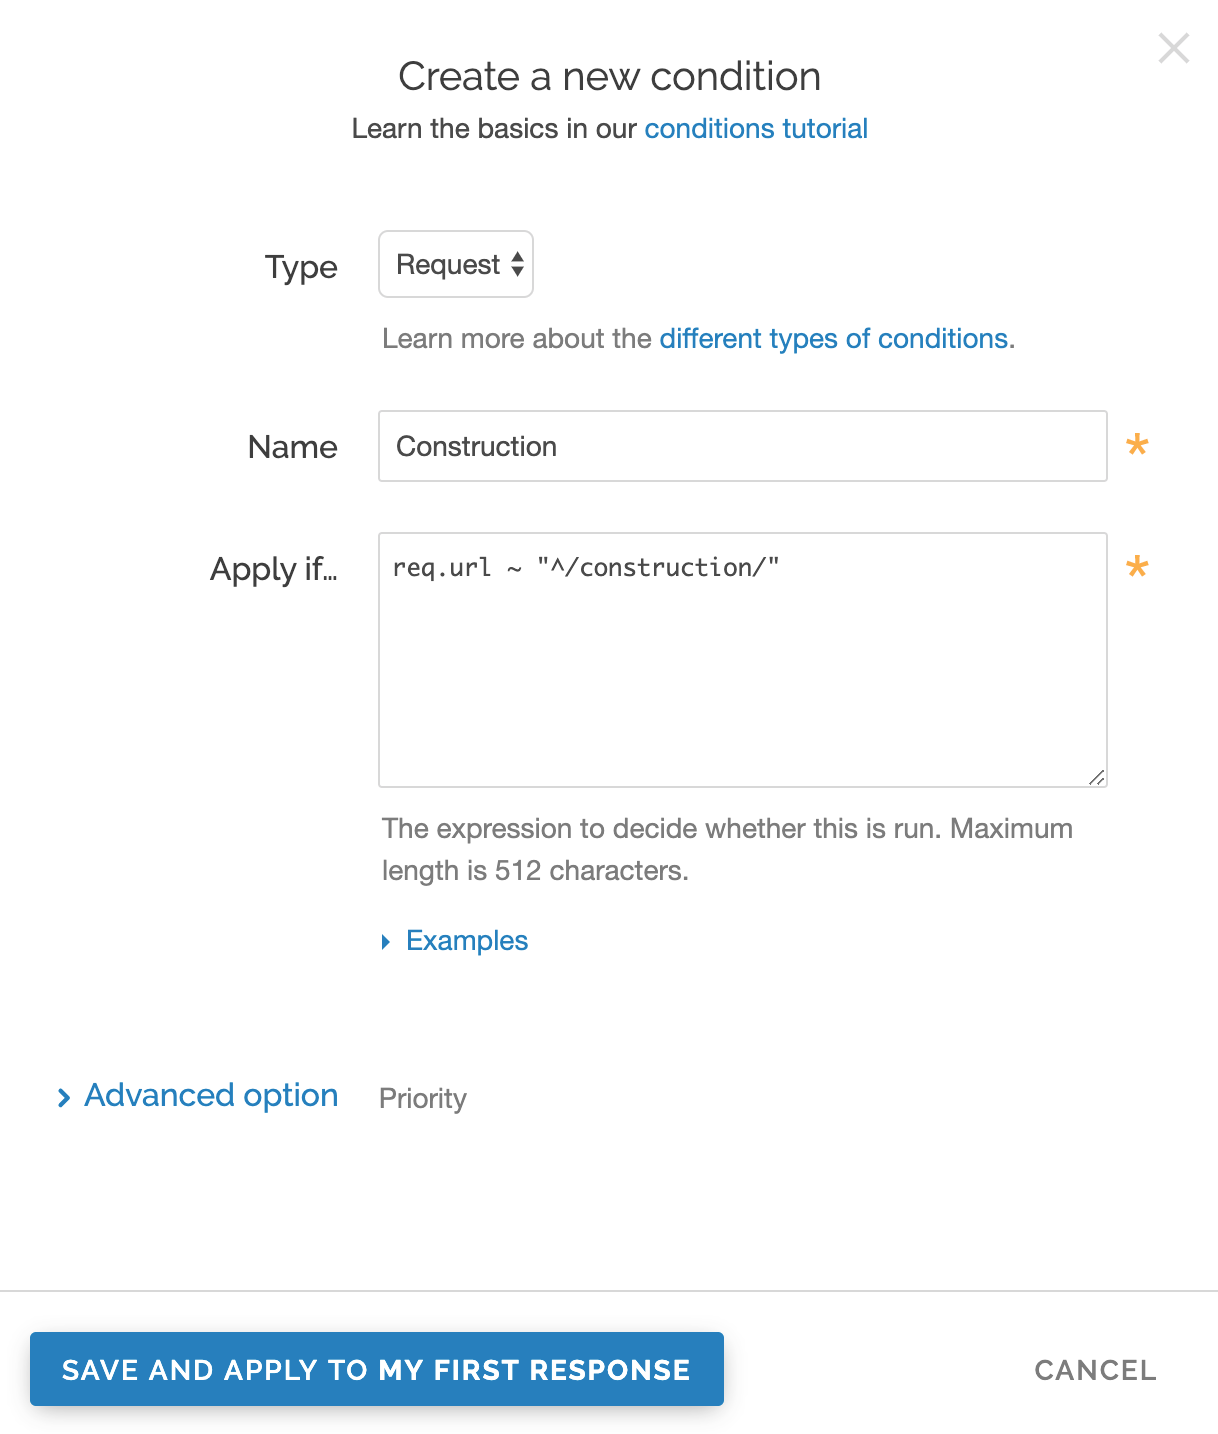
Fill out the Create a new condition fields as follows:
- From the Type menu, select the type of condition you want to create.
- In the Name field, enter a human-readable name for the condition so that it can be easily identified in the future.
- In the Apply if field, enter the condition under which the new response occurs. The condition should take the following format:
req.url ~ "^/construction/"equals the request condition you're creating the response for. - In the Priority field, enter a priority if needed. Condition priorities are only needed in "interesting" cases, and can usually be left at the default "10" for all response conditions.
Click Save and apply to.
- Click Activate to deploy your configuration changes.
Fastly now serves your custom response page when the condition is met.
Do not use this form to send sensitive information. If you need assistance, contact support. This form is protected by reCAPTCHA and the Google Privacy Policy and Terms of Service apply.
