
- English
- 日本語
Creating error pages with custom responses
Last updated 2022-04-07
The default error responses served by Fastly can be jarring for your users, especially when using Fastly for consumer applications. To mitigate this, consider configuring your service to present them with a custom page or a synthetic response when Fastly receives an error code from your origin.
Fastly offers two quick configuration options for creating 404 and 503 error pages directly in the Fastly control panel, but you can also use create custom error pages for other status codes. If you're working with large blocks of content when styling your error pages, consider creating custom responses using VCL snippets instead.
TIP
Instead of an error message, Fastly can optionally serve stale content when there is a problem with your origin server. For more information, check out our guide on serving stale content.
Creating error pages for 404 and 503 errors
To create error pages with custom responses for 404 and 503 errors, follow the steps below:
- Log in to the Fastly control panel.
- From the Home page, select the appropriate service. You can use the search box to search by ID, name, or domain.
- Click Edit configuration and then select the option to clone the active version.
- Click Content.
To create error pages with custom responses for 404 and 503 errors, click the 404 page and 503 page switches.
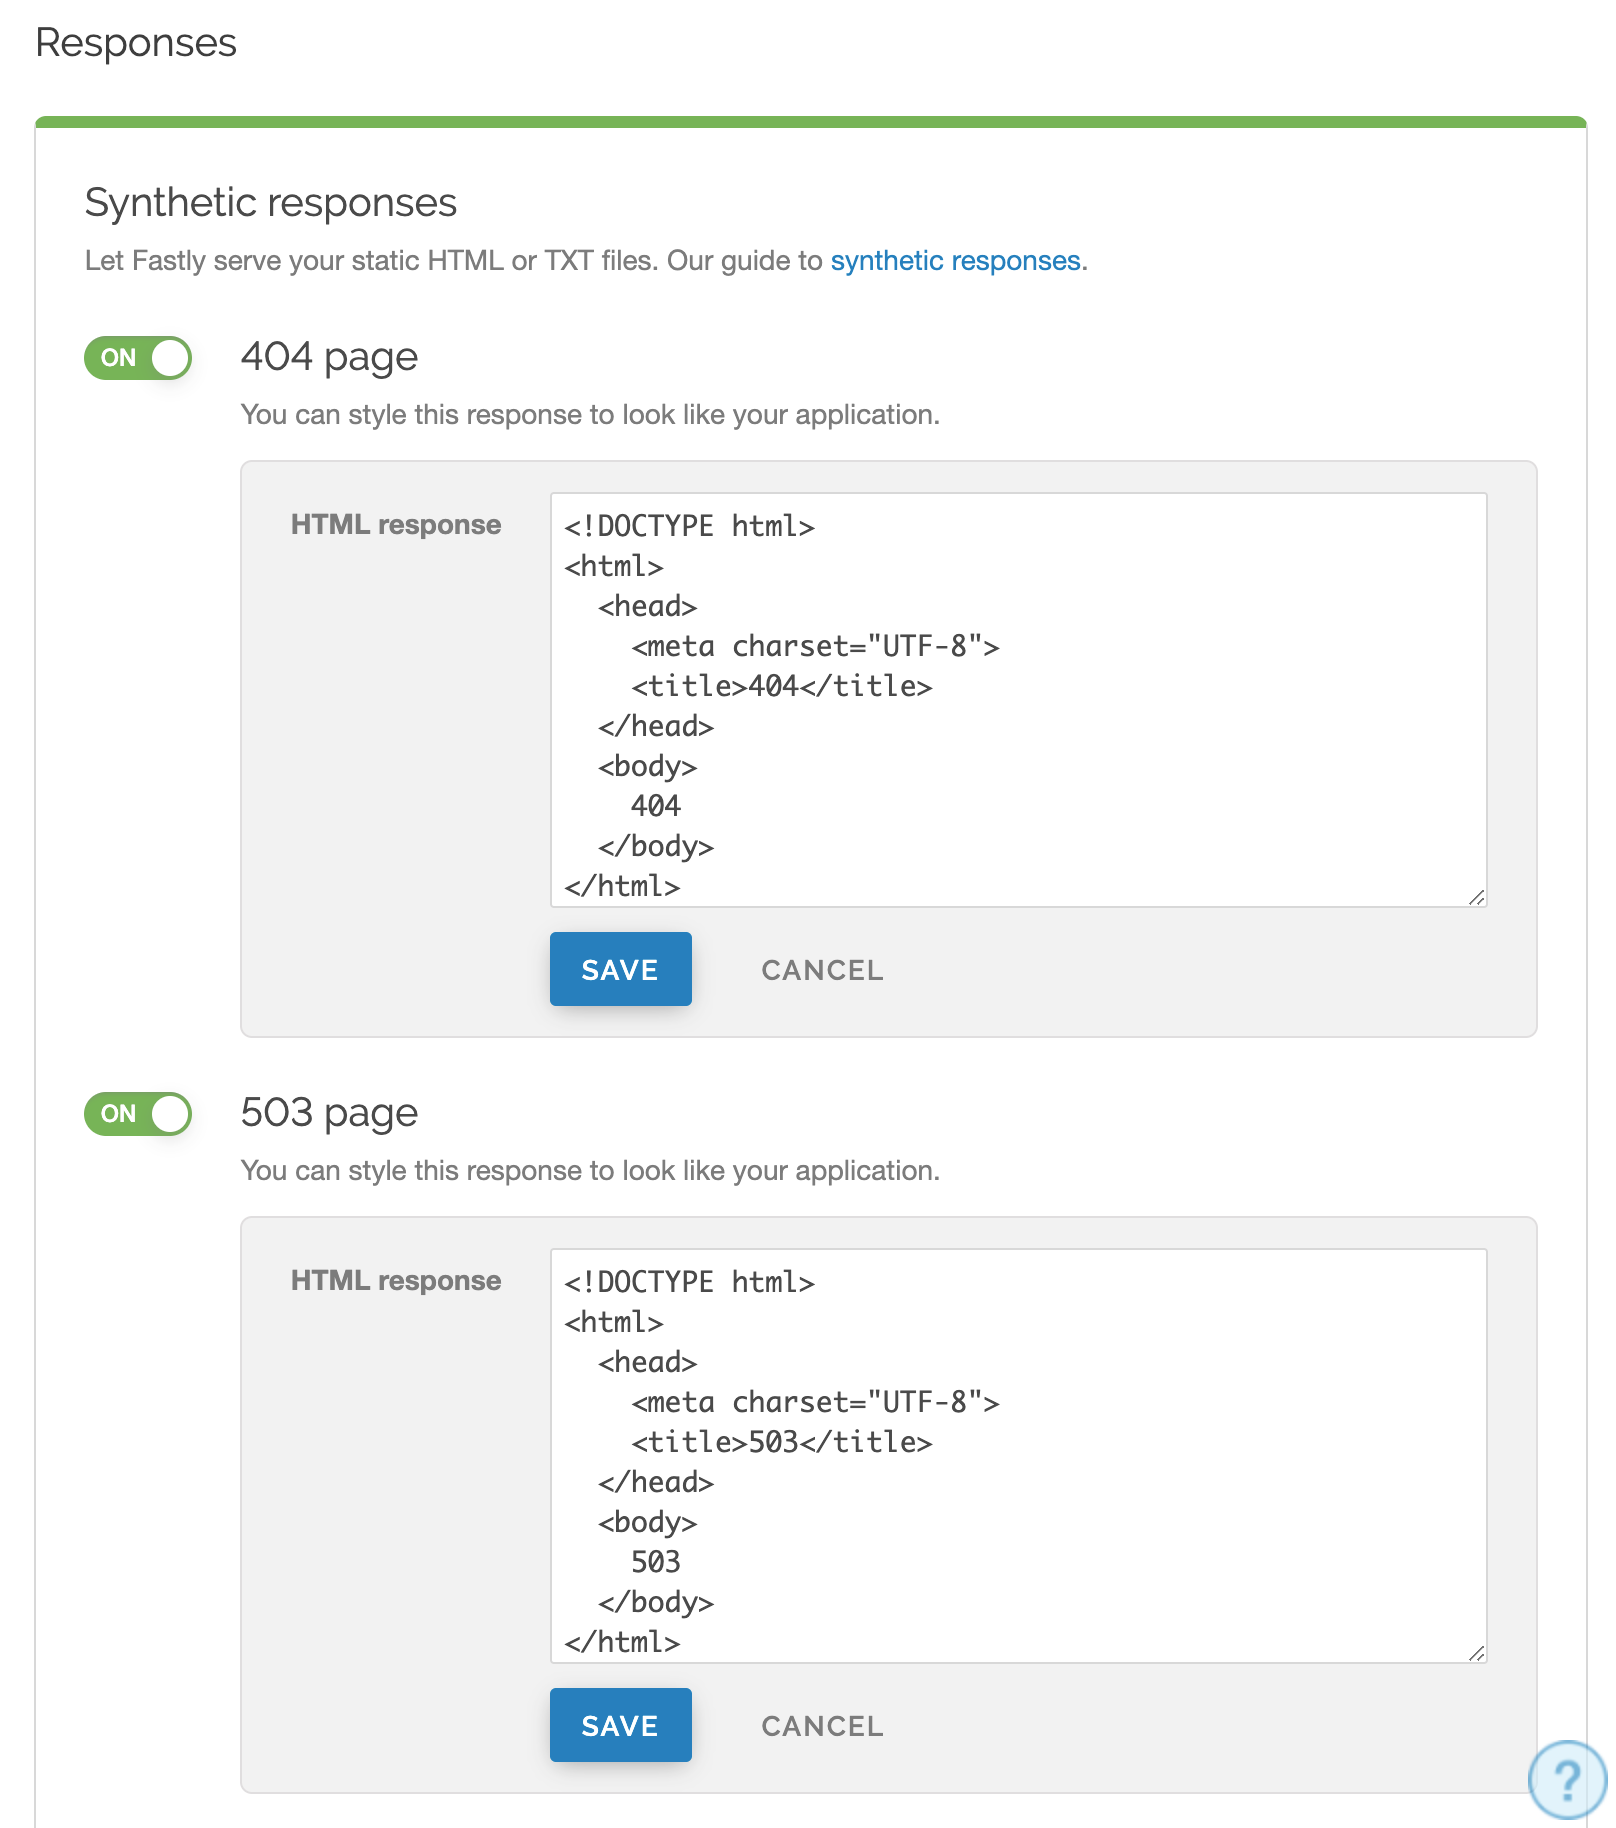
In the HTML response fields, customize the response for the 404 and 503 error pages.
Click Save to save the responses.
- Click Activate to deploy your configuration changes.
Creating error pages for other status codes
You can also create error pages for other HTTP status codes. We provide example HTML, but you can use any HTML you see fit. The response object will require that you use a condition in order for a custom error page to be served, otherwise a generic error page will be served.
To create and configure an error page for an HTTP status code other than 404 or 503, follow the steps below to create the custom response and the condition under which it should be applied using the Fastly control panel:
- Log in to the Fastly control panel.
- From the Home page, select the appropriate service. You can use the search box to search by ID, name, or domain.
- Click Edit configuration and then select the option to clone the active version.
- Click Content.
Click Set up advanced response.
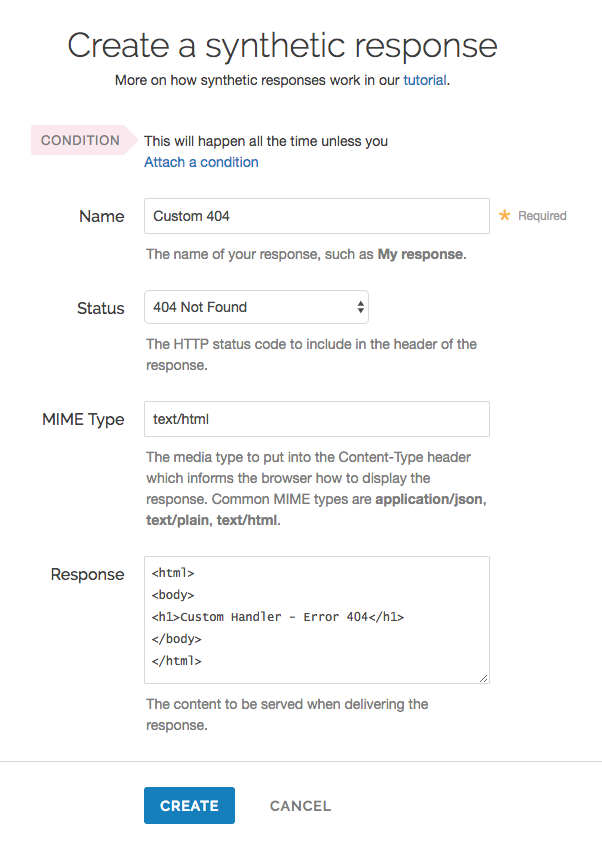
Fill out the Create a synthetic response fields as follows:
- In the Name field, enter a name for the response you're creating (e.g.,
Custom 404). - From the Status menu, select the appropriate status (e.g.,
404 Not Found). - In the MIME Type field, specify the Content-Type of the response (e.g.,
text/html). - In the Response field, enter the content to be served when delivering a response.
- In the Name field, enter a name for the response you're creating (e.g.,
Click Create.
Click the Attach a condition link to the right of the name of your new response.
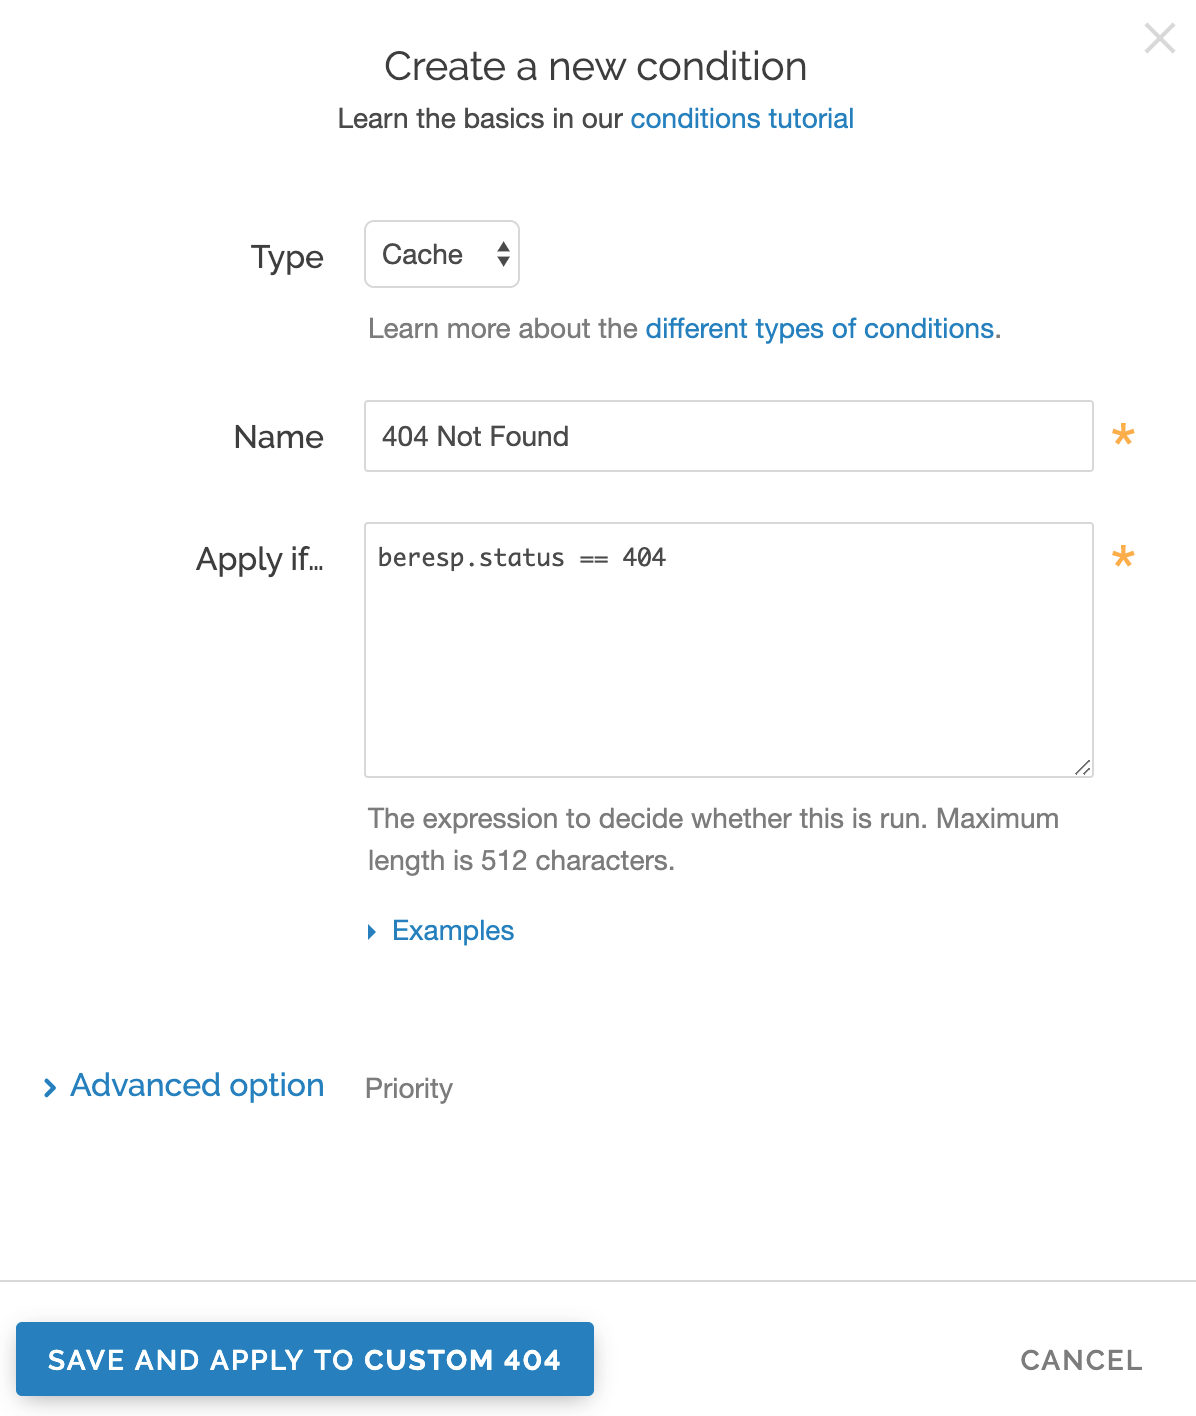
Fill out the Create a new condition fields as follows:
From the Type menu, select the type of condition you're creating (e.g.,
Cache).In the Name field, enter a name for the condition you're creating (e.g.,
404 Not Found).In the Apply if field, enter the condition under which the new response occurs in the following format:
beresp.status == ###where
###equals the status condition you're creating the response for. For example, using the value ofberesp.status == 404in the Apply if field here tells Fastly to use this response object whenever origin servers return a 404 status. (See the Conditions guides for more detailed information on conditions.)
Click Save and apply to.
- Click Activate to deploy your configuration changes. Fastly will now serve your custom HTML error page when required.
Creating custom responses using VCL Snippets
To create the custom response using VCL Snippets, create two separate snippets: one to trigger the condition for an internal Fastly error and the second to create the response to that error.
Create a VCL Snippet for a condition
- Log in to the Fastly control panel.
- From the Home page, select the appropriate service. You can use the search box to search by ID, name, or domain.
- Click Edit configuration and then select the option to clone the active version.
Click VCL Snippets.
Click Create Snippet.
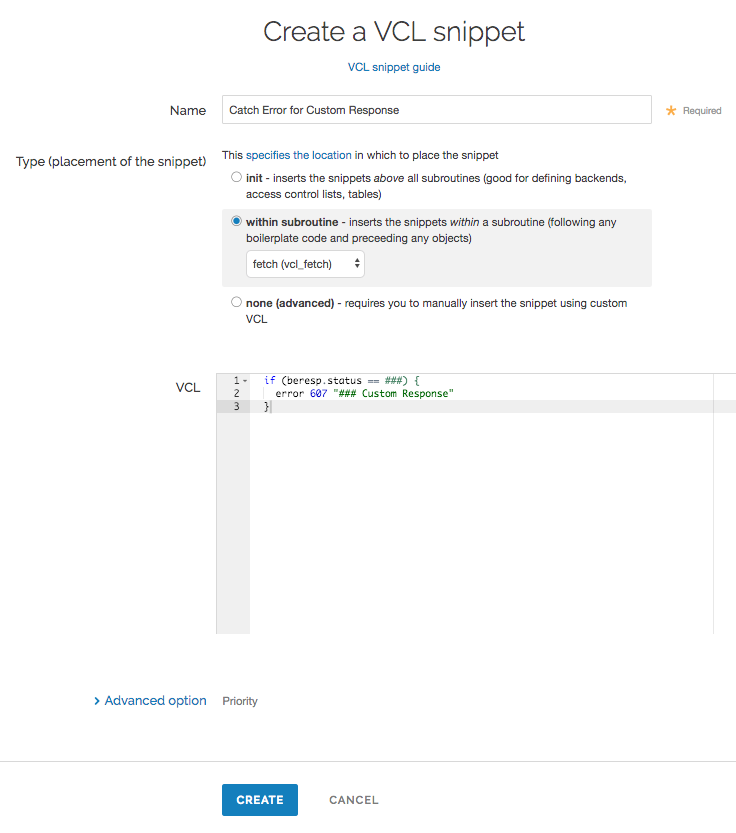
In the Name field, enter an appropriate name (e.g.,
Catch Error for Custom Response).From the Type controls, select within subroutine.
From the Select subroutine menu, select fetch (
vcl_fetch).In the VCL field, add the following condition:
123if (beresp.status == ###) {error 600 "### Custom Response"}where
###is the status condition you're creating the response for. The error code used here,600, is a random number that doesn't conflict with standard HTTP error codes. Consider using custom error code numbers in the 600’s or 700’s to avoid confusion.Click Create to create the snippet.
Create a VCL Snippet for a synthetic response
Click VCL Snippets.
Click Create Snippet.
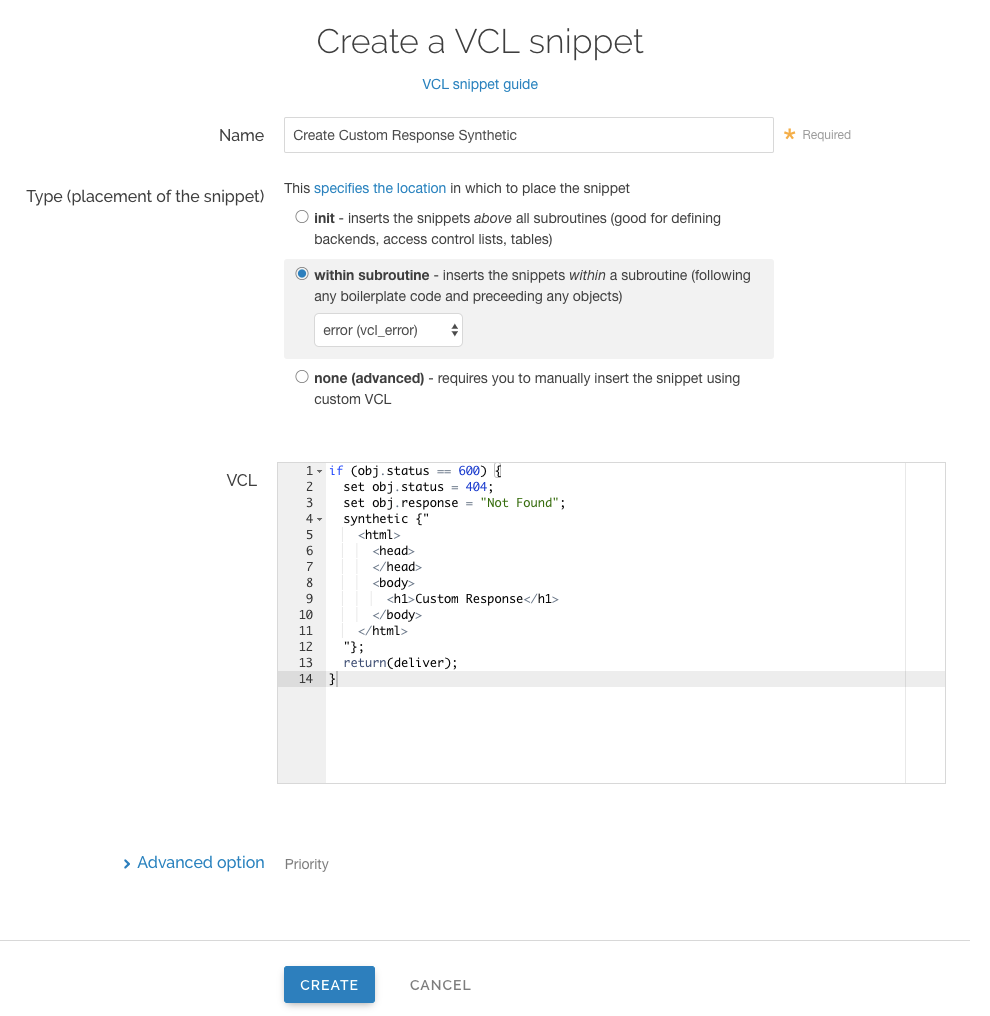
In the Name field, enter an appropriate name (e.g.,
Create Custom Response Synthetic).From the Type controls, select within subroutine.
From the Select subroutine menu, select error (
vcl_error).In the VCL field, add the following condition:
1234567891011121314if (obj.status == 600) {set obj.status = 404;set obj.response = "Not Found";synthetic {"<html><head></head><body><h1>Custom Response</h1></body></html>"};return(deliver);}replacing
Custom Responsewith your custom, synthetic response. This VCL tells Fastly to respond with your custom response if a request for an object meets the condition you created invcl_fetch.NOTE
Synthetic responses don't have a character limit, but including them in the custom VCL file may push that file over its size limit.
Click Create to create the snippet.
- Click Activate to deploy your configuration changes.
Do not use this form to send sensitive information. If you need assistance, contact support. This form is protected by reCAPTCHA and the Google Privacy Policy and Terms of Service apply.
