- English
- 日本語
Working with hosts
Last updated 2023-05-25
A host, also referred to as a backend or origin, is a web server or cloud service that contains the content of your website or application. For example, a host could be a physical or virtual web server, an application running on a platform as a service, a serverless function running on a serverless platform, or even a static storage bucket.
Before Fastly can cache your content, you must add a host to your Fastly service configuration by specifying its hostname or IP address. When Fastly receives a request from a user, we fetch the objects from your host and return the response to the user.
NOTE
To learn more about configuring third-party services for use as hosts, refer to our integration guides and our developer documentation on integrating with backend technologies.
Before you begin
Be sure you learn about the web interface controls and how to work with services before you start working with your hosts.
Adding a host
To add a host to your Fastly service configuration, follow the steps below:
- Log in to the Fastly web interface.
- From the Home page, select the appropriate service. You can use the search box to search by ID, name, or domain. You can also click Compute services or CDN services to access a list of services by type.
- Click Edit configuration and then select the option to clone the active version.
- Click Origins.
Click Create a host.

Fill out the Hosts field by entering the hostname or IP address of your origin server. Entering a hostname automatically enables Transport Layer Security (TLS) and assigns port 443. Entering an IP address disables TLS and assigns port 80.
Click Add to add your host.
Editing a host
After you've created your host, you can edit the settings by following the steps below:
In the Hosts area, click the pencil next to the Host you want to edit.

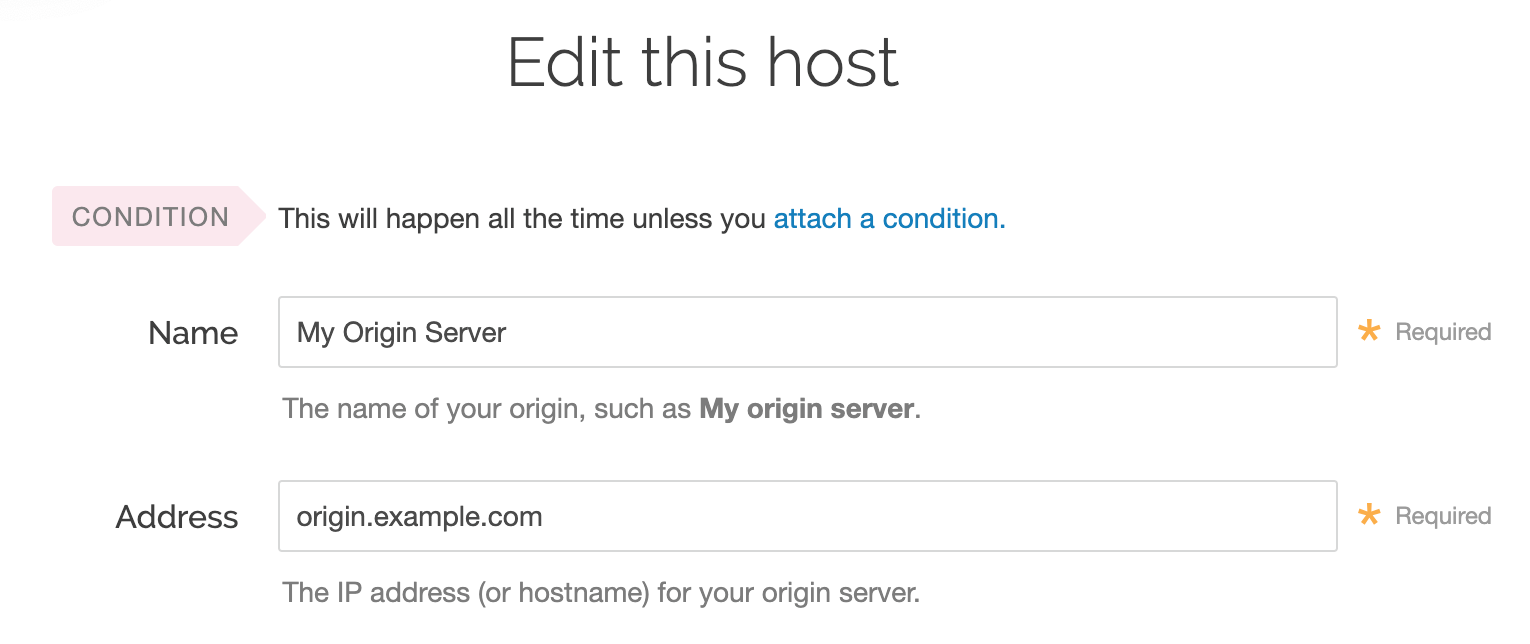
Fill out the Edit this host fields as follows:
In the Name field, enter the name of your server (for example,
My Origin Server). This name is displayed in the Fastly web interface.In the Address field, enter the IP address (or hostname) of your origin server.
See Understanding the difference between certificate hostname and SNI hostname values for more information about hostnames.

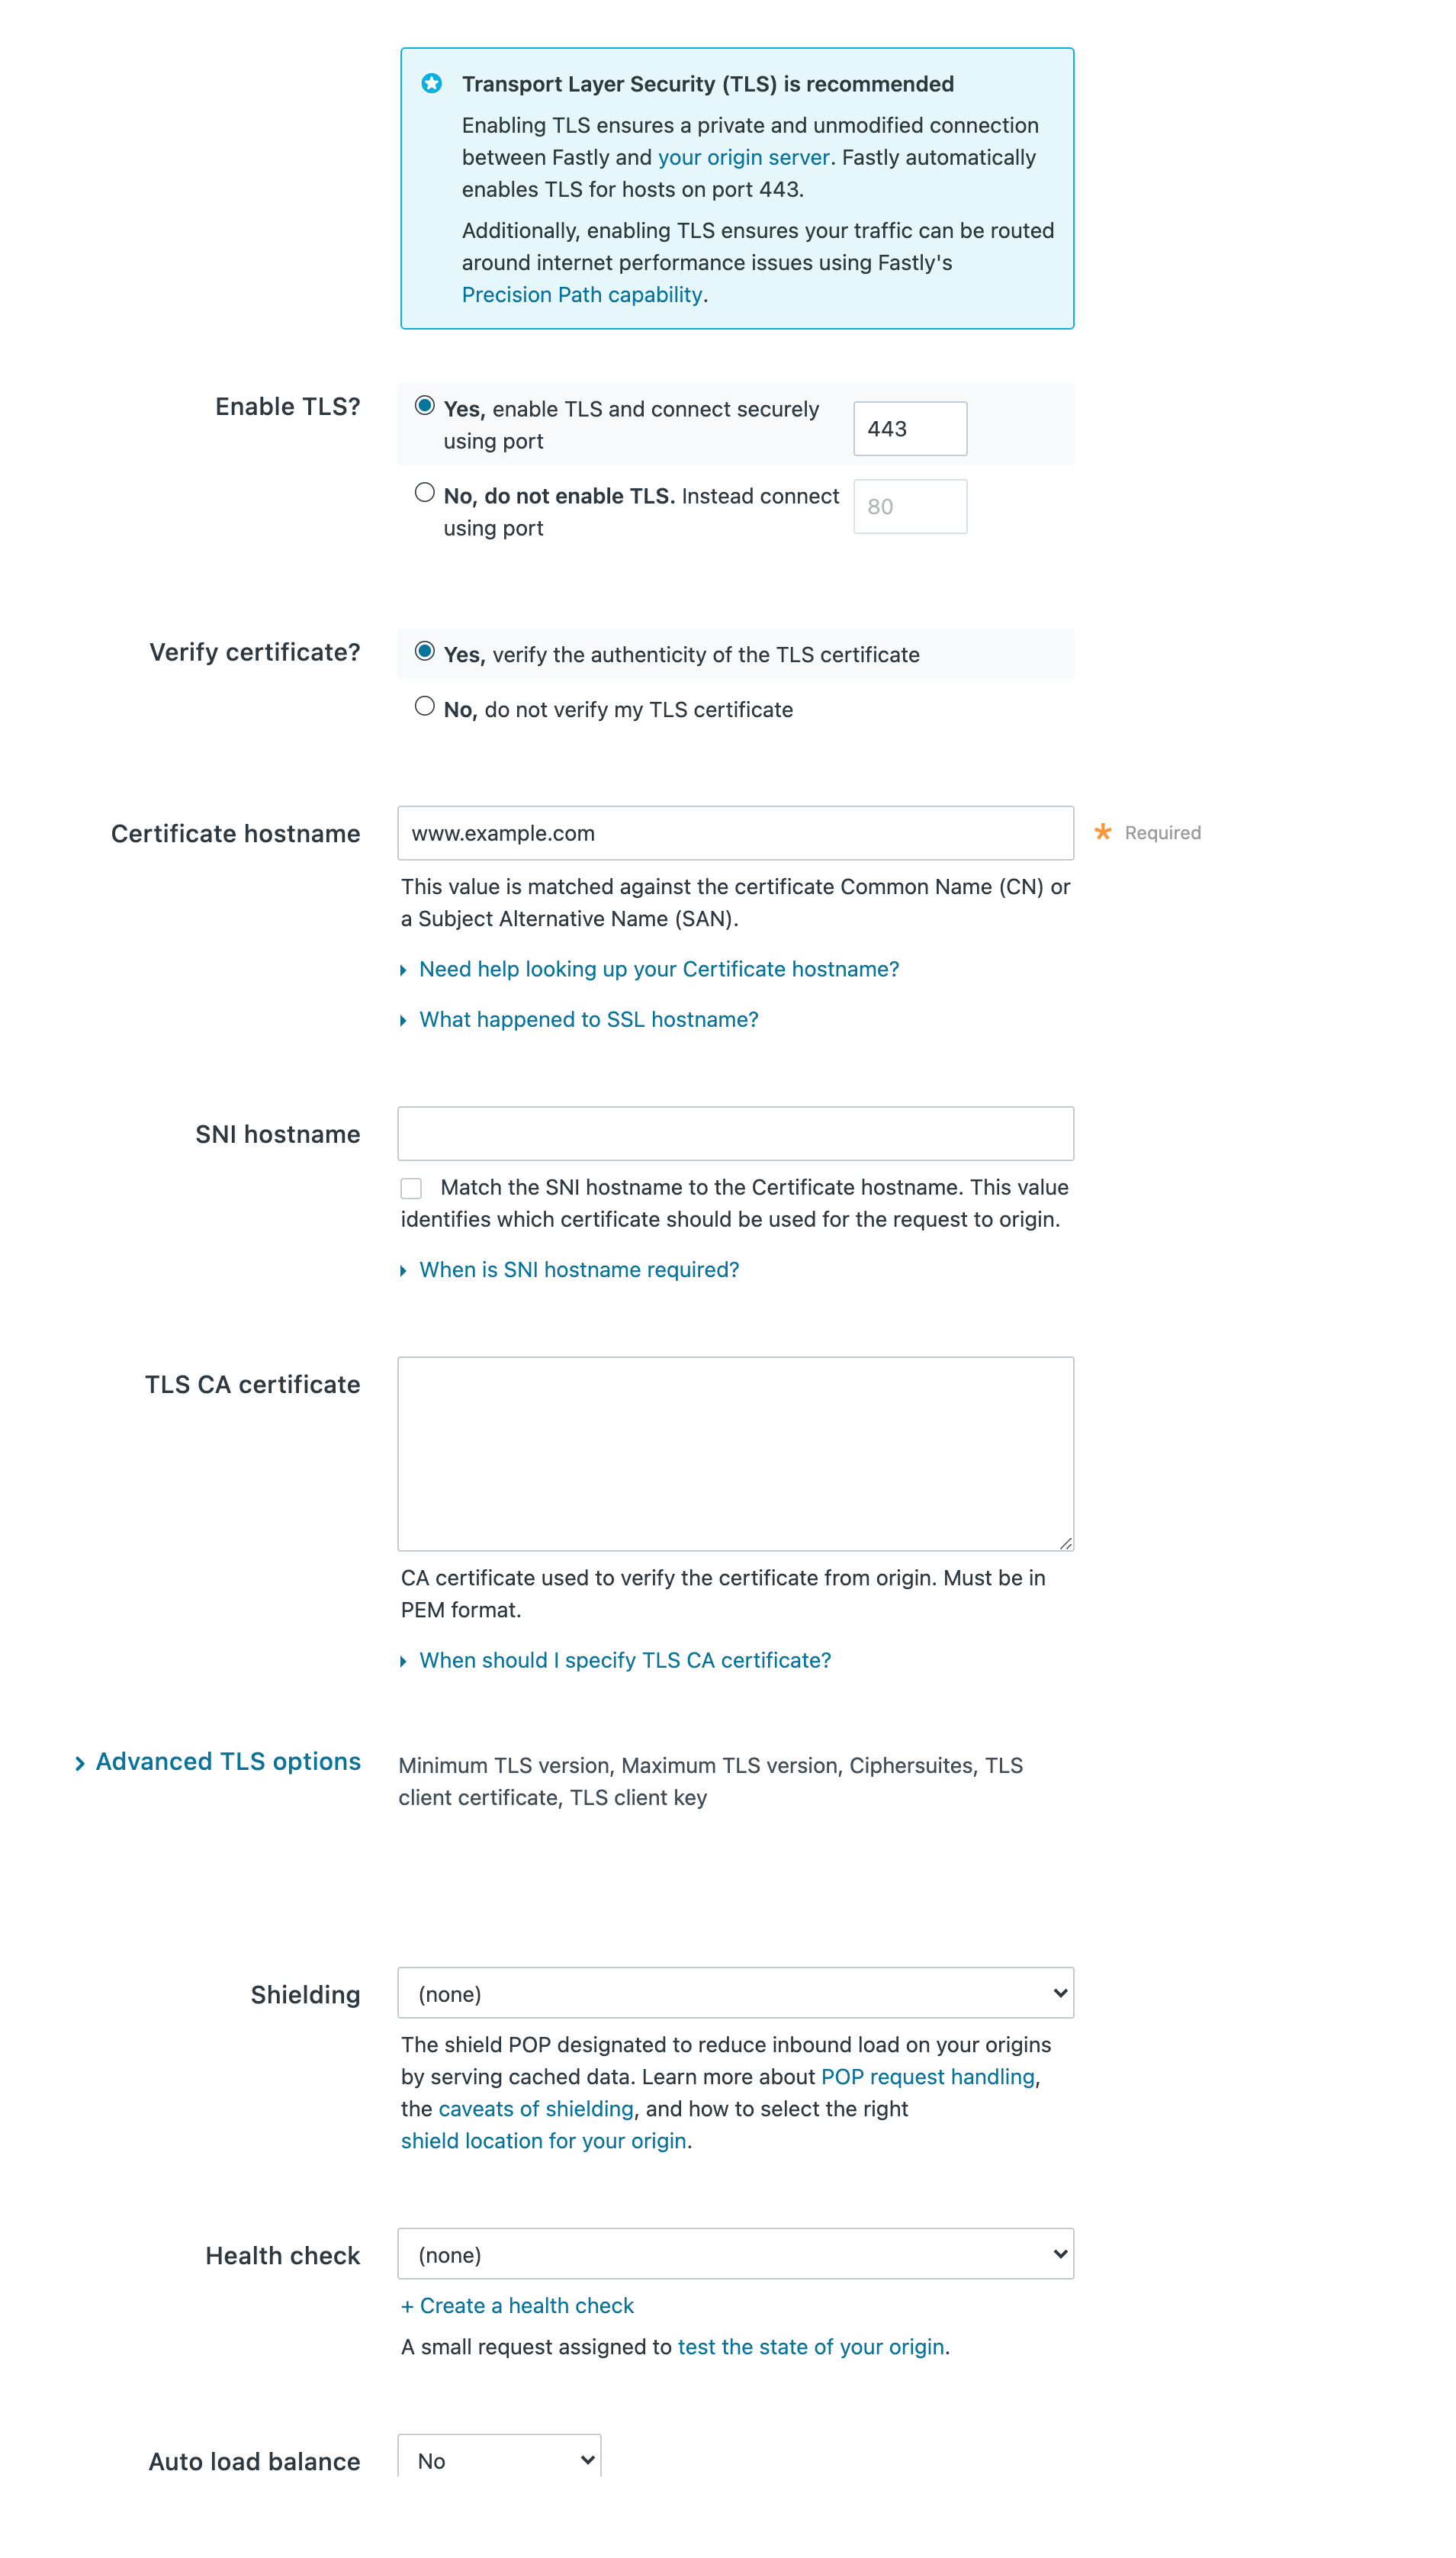
Configure the Transport Layer Security (TLS) settings as follows:
From the Enable TLS? options, leave the default set to Yes if you want to enable TLS to secure the connection between Fastly and your origin. To enable TLS, a valid SSL certificate must be installed on your origin server and port 443 (or the specified port) must be open in the firewall. You can select No if you do not want to use TLS.
From the Verify certificate? options, leave default set to Yes if you want to verify the authenticity of the TLS certificate. Selecting No means the certificate will not be verified.
WARNING
Not verifying the certificate has serious security implications, including vulnerability to man-in-the-middle attacks. Consider uploading a CA certificate instead of disabling certificate validation.
In the Certificate hostname field, enter the hostname associated with your TLS certificate. This value is matched against the certificate common name (CN) or a subject alternate name (SAN) depending on the certificate you were issued.
(Optional) In the SNI hostname field, enter the hostname of a different certificate to be used for the request to origin if you are using Server Name Indication (SNI) to put multiple certificates on your origin. Alternatively, select the checkbox to match the SNI hostname to the Certificate hostname. This information also gets sent to the server in the TLS handshake. See our guidance on understanding the difference between certificate hostname and SNI hostname values for additional details.
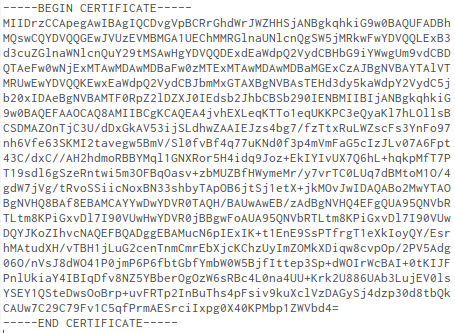
(Optional) In the TLS CA certificate field, provide a certificate in PEM format if you're using a certificate that is either self-signed or signed by a certification authority (CA) not commonly recognized by major browsers. The PEM format looks like this:

To apply advanced TLS options, click Advanced TLS options and decide which of the optional fields to specify, if any. For more information about these settings, see Advanced TLS options.
Configure the remaining Create a host settings as follows:
(Optional) From the Shielding menu, select a POP to enable the shielding feature. For more information, see our guide on shielding.
(Optional) From the Health check menu, select a health check for this origin server. For more information, see our guide on working with health checks.
(Optional) From the Auto load balance menu, select Yes to enable load balancing for this origin server. For more information, see our guide on load balancing.
If you enabled load balancing, enter a weight in the Weight field.
(Optional) In the Override host field, enter the hostname of your override Host header based on the origin you’re using. The value in this field will take precedence over anything you've set using the global override host configuration. To see example Host headers for third-party services, refer to our developer documentation on overriding the Host header.
NOTE
To override the incoming Host header on your origin using your Fastly service, refer to the Specifying the override host guide.
Click Advanced options and decide which of the optional fields to change, if any:
- (Optional) In the Maximum connections field, enter the maximum number of connections for your backend. The default limit is 200 connections per cache node to protect your origins from being overloaded.
- (Optional) In the Connection timeout field, enter how long, in milliseconds, to wait for a connection timeout. The default is 1000 milliseconds.
- (Optional) In the First byte timeout field, enter how long, in milliseconds, to wait for a first byte timeout. The default is 15000 milliseconds.
- (Optional) In the Between bytes timeout field, enter how long, in milliseconds, to wait between bytes. The default is 10000 milliseconds.
Click Update. The new override host appears under the Show all details field of the Override host section and a code block is added to the origin definition in your VCL that will look similar to the following:
1Backend F_Host_1 {2 .host = "..."; # IP or hostname3 .host_header = "example.com";4 .always_use_host_header = true;5 ...6}- Click Activate to deploy your configuration changes.
Advanced TLS options
If you enabled TLS for the connection between Fastly and your host, you can configure optional settings by clicking the Advanced TLS options link.
Specifying acceptable TLS protocol versions
If your origin server supports modern TLS protocol versions, you can customize the TLS protocols Fastly will use to connect to it by setting a Minimum TLS Version and Maximum TLS Version. We recommend setting both to the most up-to-date TLS protocol, currently 1.3, if your origin supports it.
Use the openssl command to verify your origin supports a given TLS protocol version. For example:
$ openssl s_client -connect origin.example.com:443 -tls1_3Replace -tls1_3 with tls1_2, tls1_1 and tls1_0 to test other protocol versions. Fastly does not support SSLv2 or SSLv3.
IMPORTANT
In line with security best practices, Fastly recommends enabling servers with version 1.3 of the TLS protocol by default. For backend connections from our edge nodes to customer origins, Fastly supports TLS 1.3, 1.2, 1.1, and 1.0 depending on the versions of the protocol in use on the origin server. Fastly will continue to support TLS 1.0 based on the ServerHello message as described in RFC 5246 if the server selects TLS 1.0 as the highest supported version.
Specifying acceptable TLS cipher suites
Fastly supports configuring the OpenSSL cipher suites used when connecting to your origin server. This allows you to turn specific cipher suites on or off based on security properties and origin server support. The Ciphersuites setting accepts an OpenSSL formatted cipher list. We recommend using the strongest cipher suite your origin will support as detailed by the Mozilla SSL Configuration Generator.
Use the openssl command to verify your origin supports a given cipher suite. For example:
$ openssl s_client -connect origin.example.com:443 -tls1_2 -cipher ECDHE-RSA-AES128-GCM-SHA256Replace -cipher ECDHE-RSA-AES128-GCM-SHA256 with the cipher suite to test.
Specifying a TLS client certificate and key
To ensure TLS connections to your origin come from Fastly and aren't random, anonymous requests, set your origin to verify the client using a client certificate. Simply paste the certificate and private key in PEM form into the TLS client certificate text box.
IMPORTANT
The private key must not be encrypted with a passphrase.
Then configure your backend to require client certificates and verify them against the CA cert they were signed with. Here are some ways of doing that:
Fastly also supports securing your connection to origin with mutual TLS (mTLS).
Understanding the difference between certificate hostname and SNI hostname values
The following explains the difference between a certificate and SNI hostname value:
The certificate hostname (ssl_cert_hostname). This hostname validates the certificate at origin. It is always required. This value should match the certificate common name (CN) or an available subject alternate name (SAN). It displays as ssl_cert_hostname in VCL. This doesn't affect the SNI certification. You can set this value in Certificate hostname field.
The SNI hostname (ssl_sni_hostname). This hostname determines which certificate should be used for the TLS handshake. SNI is generally only required when your origin is using shared hosting, such as Amazon S3, or when you use multiple certificates at your origin. SNI allows the origin server to know which certificate to use for the connection. This value displays as ssl_sni_hostname in VCL. This doesn't affect the certificate validation.
The table below shows you what happens when you set the Certificate and SNI hostname values in the TLS settings:
| If Certificate hostname contains... | and SNI hostname contains... | then the Certificate Validation value will be... | and the SNI value will be... |
|---|---|---|---|
www.example.com | nothing | www.example.com | nothing |
www.example.com | www.example.org | www.example.com | www.example.org |
About the ssl_hostname value (deprecated). The ssl_hostname value has been deprecated and replaced with ssl_cert_hostname and ssl_sni_hostname. Use these two values instead.
IMPORTANT
If you use an IP address for your .host value (i.e., by not entering a value in your certificate hostname), this will generate an error where the certificate hostname specified in your service's origin TLS settings doesn't match either the Common Name (CN) or available Subject Alternate Names (SANs).
Using a wildcard certificate
If you're using a wildcard certificate, you can use any SNI hostname that matches the wildcard certificate. The SNI hostname must be a fully-qualified domain name (FQDN), per RFC 6066.
The table below shows a variety of possible combinations of certificate and SNI hostnames that could be used with a wildcard certificate for *.example.com:
| Certificate hostname | SNI hostname |
|---|---|
www.example.com | www.example.com |
live.example.com | live.example.com |
*.example.com | www.example.com |
If you set the certificate hostname to *.example.com, Fastly will treat it as a literal.
What's next
Learn more about working with domains and working with health checks as you continue to refine versions of your service configurations.
Do not use this form to send sensitive information. If you need assistance, contact support. This form is protected by reCAPTCHA and the Google Privacy Policy and Terms of Service apply.