
- English
- 日本語
Enabling API caching
Last updated 2023-08-02
Application Programming Interfaces (APIs) allow you to retrieve data from a variety of web services. Fastly makes it possible for you to cache your API so you can accelerate the performance of your service-oriented architecture. It optimizes your API's performance by efficiently handling traffic bursts and reducing latency.
An example
Let's look at an example to learn how API caching works. Imagine we're an online magazine with articles on which users can make comments. Each article can have many comments, and each comment is created by exactly one user.

We'll design a RESTful API specification and use it to manipulate and retrieve comments:
GET /comment- Returns a list of all commentsGET /comment/:id- Returns a comment with the given IDPOST /comment- Creates a new commentPUT /comment/:id- Updates a comment with the given IDDELETE /comment/:id- Deletes a comment with the given ID
The create, read, update, and delete (CRUD) methods ensure the API can perform its basic operations, but they don't expose the relational aspect of the data. To do so, you would add a couple of relational endpoints:
GET /articles/:article_id/comments- Get a list of comments for a given articleGET /user/:user_id/comments- Get all comments for a given user
Endpoints like these allow programmers to get the information they need to do things like render the HTML page for an article, or display comments on a user's profile page. While there are many other possible endpoints we could construct, this set should suffice for the purposes of this guide. Let's assume that the API has been programmed to use an Object-Relational Mapper (ORM), such as ActiveRecord, when interacting with the database.
Determining which API endpoints to cache
Start by identifying the URLs you want to cache. We recommend splitting the specification endpoints into two groups.
The first group, called accessors, retrieves or accesses the comment data. These are the endpoints you want to cache using Fastly. Using the example, four endpoints match this description:
GET /commentGET /comment/:idGET /article/:article_id/commentsGET /user/:user_id/comments
The second group, called mutators, changes or mutates the comment data. These endpoints are always dynamic, and are therefore uncacheable. Using the example, three endpoints match this description:
POST /commentPUT /comment/:idDELETE /comment/:id
You should see a pattern emerging. Because the example API is RESTful, we can use a simple rule to identify the accessor and mutator endpoints: GET endpoints can be cached, but PUT, POST, and DELETE endpoints cannot.
Once you've gathered this information, you're ready to program the API to configure PURGE requests.
Configuring PURGE requests
Don't be tempted to point at the PUT, POST, and DELETE endpoints as the place where data is modified. In most modern APIs, these endpoints represent an interface to the actual model code responsible for handling the database modifications.
In the example, we assumed that we'd be using an ORM to perform the actual database work. Most ORMs allow programmers to set special callbacks on models that will fire when certain actions have been performed (e.g., before or after validation, or after creating a new record).
For purging, we are interested in whether a model has saved information to the database — whether it's a new record, an update to an existing record, or the deleting of a record. At this point, we'd add a callback that tells the API to send a PURGE request to Fastly for each of the cacheable endpoints.
For an ActiveRecord comments model, you could do something like this:
123456789101112require 'fastly'
class Comment < ActiveRecord::Base fastly = Fastly.new(api_key: 'FASTLY_API_TOKEN')
after_save do fastly.purge "/comment" fastly.purge "/comment/#{self.id}" fastly.purge "/article/#{self.article_id}/comments" fastly.purge "/user/#{self.user_id}/comments" endendKeep two things in mind when creating the callback:
- The purge code should be triggered after the information has been saved to the database, otherwise a race condition could be created where Fastly fetches the data from the origin server before the data has been saved to the database. This would cache the old data instead of the new data.
- These URLs are being purged because they have content that changes when a comment is changed.
With the model code in place, the API is now ready to be cached.
Setting up Fastly
The final step to enabling API caching involves setting up Fastly. You'll need to:
In addition, you can optionally create rules that tell Fastly how to work with the specific elements that are exclusive to your API.
NOTE
By default, Fastly will not cache PUT, POST, and DELETE requests.
Creating a new service
Follow the instructions for creating a new service. You'll add specific details about your API server when you fill out the Create a new service fields:
- In the Name field, enter a name for this service that helps you identify it's related to caching your API information (e.g.,
My API Service). - In the Domain field, enter the domain name associated with your API (e.g.,
api.example.com). - In the Address field, enter the IP address or hostname of your API server.
Adding the domain
Follow these instructions to add the API's domain name to your Fastly service:
- Click Edit configuration and then select the option to clone the active version.
Click Create domain.
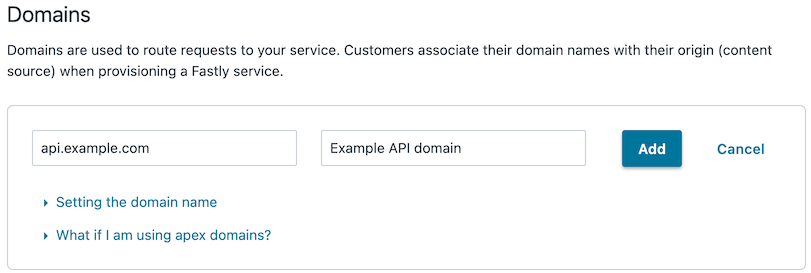
Fill out the Create a domain fields as follows:
- In the Domain Name field, enter the domain name for the API.
- In the Comment field, enter an optional comment that describes your domain.
Click Create. Your API's domain name appears in the list of domains.
Adding the origin server
Follow the instructions for working with hosts. You'll add specific details about your API server when you fill out the Create a host fields:
- In the Name field, enter a name for the origin server that helps you identify it's related to caching your API information.
- In the Address field, enter the IP address (or hostname) of the API server.
Do not use this form to send sensitive information. If you need assistance, contact support. This form is protected by reCAPTCHA and the Google Privacy Policy and Terms of Service apply.
