
- English
- 日本語
Forcing an HTTPS redirect
Last updated 2024-07-22
If you only want to allow HTTPS connections on your site, you can use Fastly to force unencrypted requests to the Transport Layer Security (TLS) protocol. When you force TLS, any unencrypted request to your website returns a 301 Moved Permanently response which redirects to the TLS equivalent. For example, a request for http://www.example.com redirects to https://www.example.com.
Because requests can still happen over HTTP first, even if you force a TLS redirect, you can also use Fastly to enable HTTP Strict Transport Security (HSTS). Once enabled, HSTS forces the browser to redirect to the HTTPS URL (typically with a status code 307) as long as the URL has previously been visited.
Fastly provides a setting that allows you to force TLS and enable HSTS at the same time. Alternatively, for more control, you can manually force a TLS redirect then enable HSTS.
Prerequisites
These instructions assume that you've set up TLS service with Fastly.
Forcing TLS and enabling HSTS
To force TLS and enable HSTS at the same time using a service configuration, follow these steps.
NOTE
Services activated using a previous version of the Force TLS controls may temporarily display an additional, older testing duration. Once you select the recommended new testing duration, this older option will disappear.
- Log in to the Fastly control panel.
- From the Home page, select the appropriate service. You can use the search box to search by ID, name, or domain.
- Click Edit configuration and then select the option to clone the active version.
- Click Settings.
NOTE
If you have Force TLS enabled for any request settings without a condition, conflicts in the VCL logic may occur. Delete the existing request setting or modify it to add a condition.
Click the Force TLS and enable HSTS switch to force TLS and enable HSTS for the service.
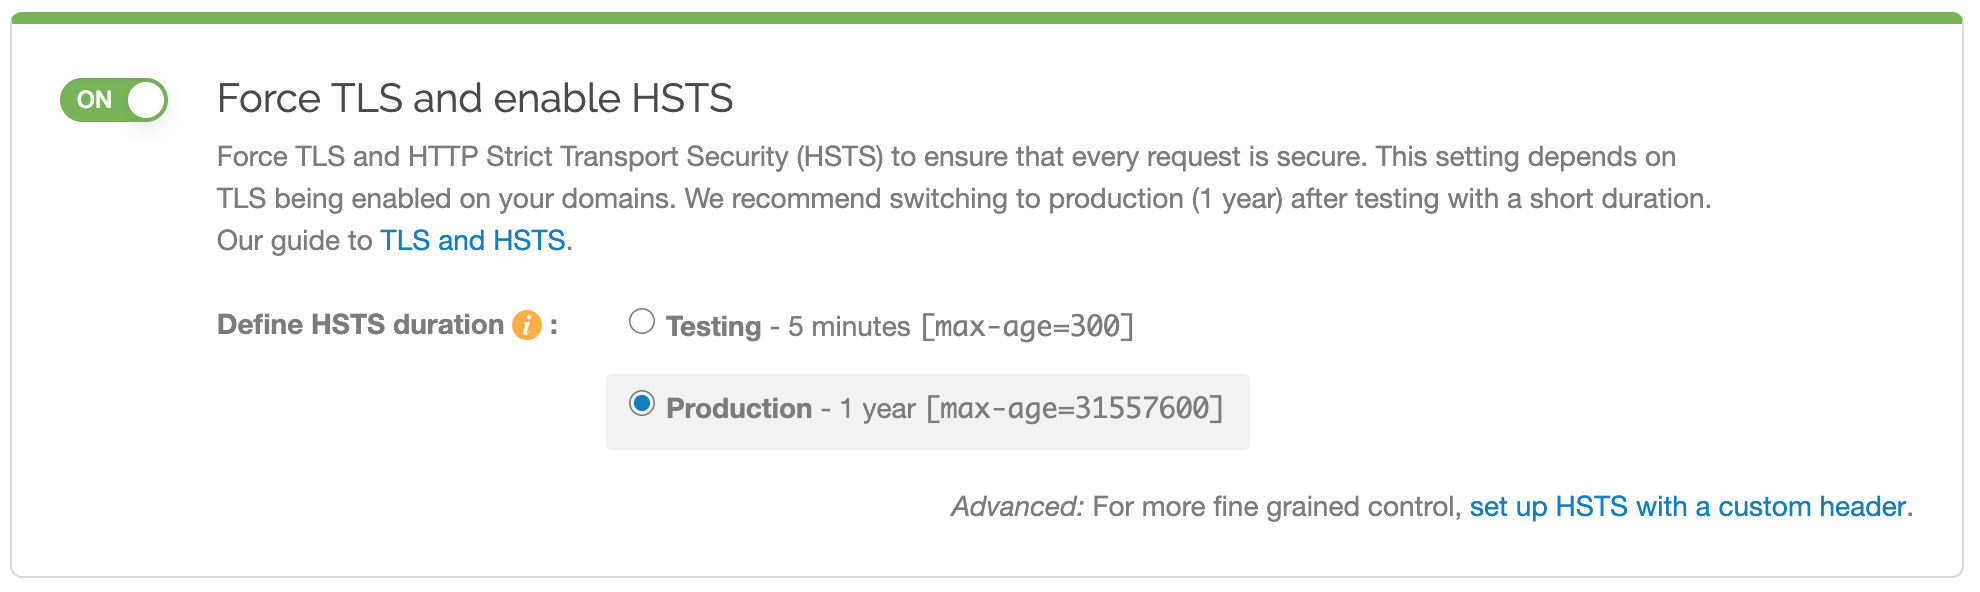
The request setting for forcing TLS and the header for enabling HSTS will automatically be created for you.
- Click Activate to deploy your configuration changes.
WARNING
You may experience problems if you enable this setting along with the global override host setting. Instead of enabling the global override host setting, create a new request setting and specify the override host in the advanced options.
Manually forcing an HTTPS redirect
To manually force an HTTPS redirect, you must create a request setting that forces TLS and add a header that enables HSTS.
Forcing TLS
To manually force TLS, create a new request setting as follows:
- Log in to the Fastly control panel.
- From the Home page, select the appropriate service. You can use the search box to search by ID, name, or domain.
- Click Edit configuration and then select the option to clone the active version.
- Click Settings.
Click Create request setting.
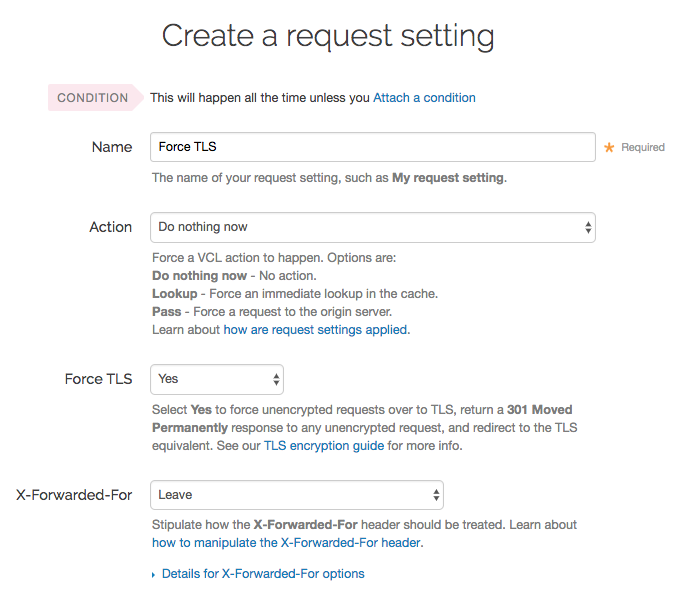
Fill out the Create a request setting fields as follows:
- In the Name field, enter a human-readable name for the request setting. This name is displayed in the Fastly web interface.
- From the Force TLS menu, select Yes.
Click Create to save your request setting changes.
- Click Activate to deploy your configuration changes.
Enabling HSTS
After manually forcing a TLS redirect, enable HSTS by adding a new header as follows:
- Click Content.
Click Create header.
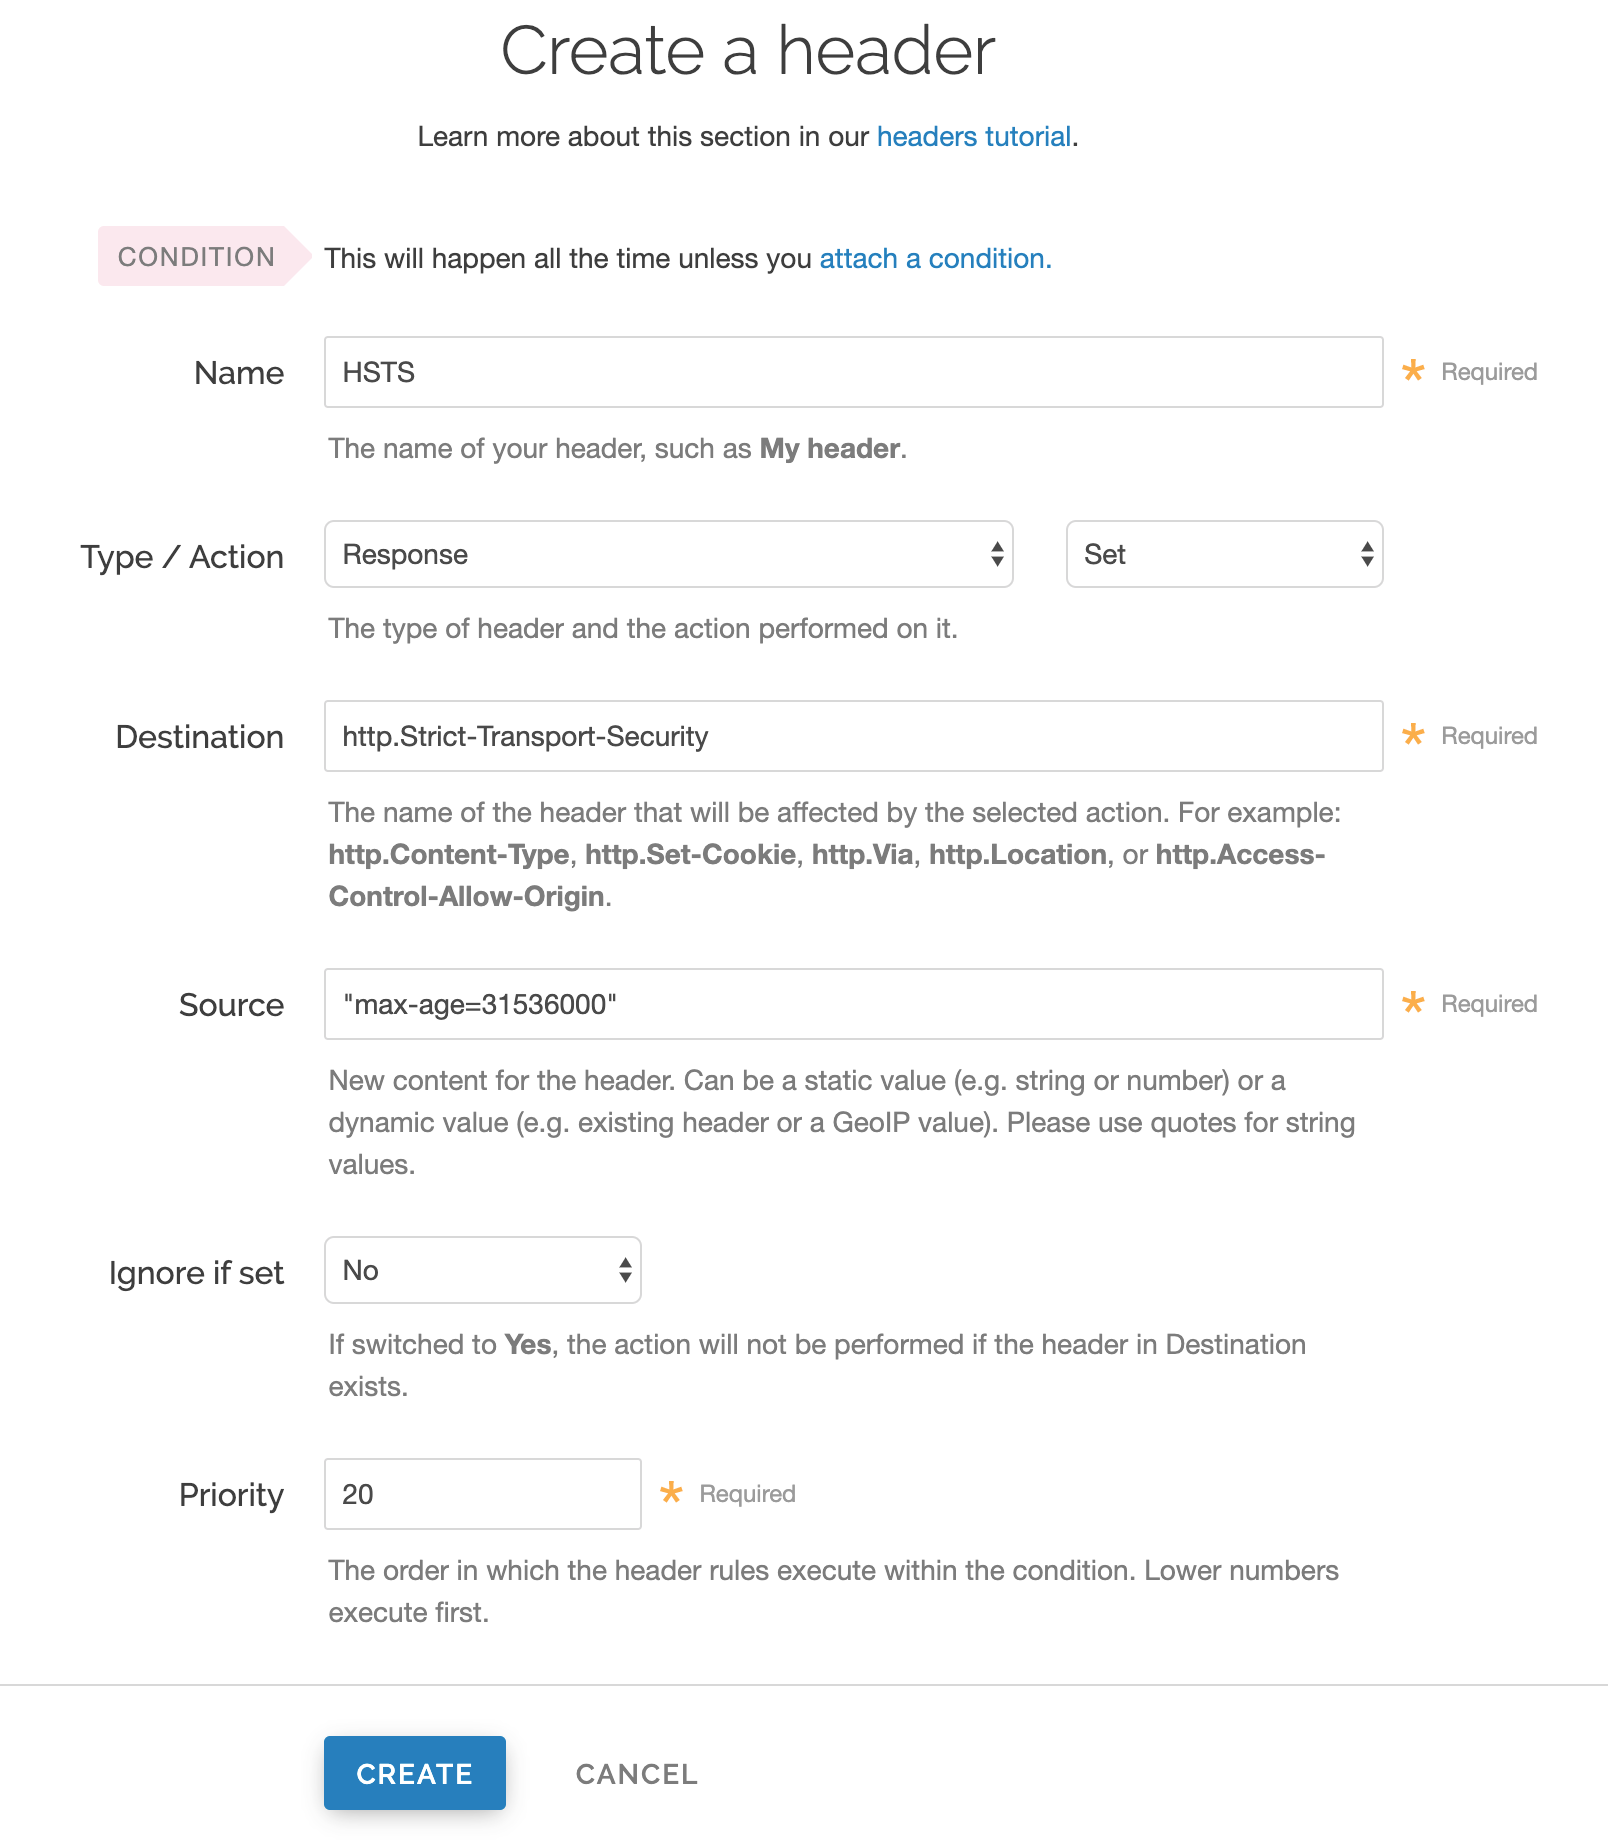
Fill out the Create a header fields as follows:
- In the Name field, enter a human-readable name, such as
HSTS. This name is displayed in the Fastly web interface. - From the Type menu, select Response, and from the Action menu select Set.
- In the Destination field, enter
http.Strict-Transport-Security. - In the Source field, enter
"max-age=<max age in seconds>". For example,"max-age=31536000". As described below,max-ageis required and two additional HSTS options can be specified. - Leave the Ignore if set menu and the Priority field set to their defaults (or set them as appropriate for your service).
- In the Name field, enter a human-readable name, such as
Click Create.
- Click Activate to deploy your configuration changes.
HSTS options
If you manually configured the HSTS header, you can specify additional HSTS options.
HSTS requires the max-age directive be set in order to function properly. It specifies how long in seconds to remember that the current domain should only be contacted over HTTPS. The example shown above sets max-age to one year (31536000 seconds = 1 year). You may want to experiment using a smaller value than what is shown.
Two additional options can be specified with the HSTS response header:
includeSubdomains- This token applies HSTS to all of your site's subdomains. Before you include it, be certain none of your subdomains require functionality on HTTP in a browser. Ensure your TLS certificate is a wildcard or has certificate coverage for all subdomain possibilities.IMPORTANT
All subdomains will be unreachable on HTTP by browsers that have seen the HSTS header once
includeSubdomainsis enabled.preload- This token allows you to submit your domain for inclusion in a preloaded HSTS list that is built into several major browsers. Although the token is not part of the HSTS specification, including it in the header is a prerequisite for submitting to this preloaded list.WARNING
Don't request browser preload inclusion unless you're sure that you can support HTTPS for the long term. Inclusion in the HSTS Preload List cannot be undone easily. See https://hstspreload.org/ for submission instructions and more information.
Combining all of these options together in the Source field would look like this:
"Strict-Transport-Security: max-age=<max age in seconds>; includeSubDomains; preload"To disable HSTS for whatever reason, simply set the max-age to 0 on an HTTPS connection.
NOTE
The HSTS Preload List is managed by a third party, not by Fastly. Consult https://hstspreload.org/ for more information.
Do not use this form to send sensitive information. If you need assistance, contact support. This form is protected by reCAPTCHA and the Google Privacy Policy and Terms of Service apply.
