
- English
- 日本語
Start here (CDN)
Last updated 2025-03-31
Welcome! This guide helps new users like you get started with Fastly's Full-Site Delivery as quickly as possible.
Delivering your website through a CDN like Fastly gives your users a faster and more reliable experience. The server hosting your content (your origin) may be far away from your users, causing latency when they visit your site. Fastly caches your content closer to users and delivers it to them directly instead of having to fetch it from the origin every time you have a visitor. By reducing data transfer from cloud storage services, caching also makes your site more efficient and scalable!
Whether you run a blog that gets a couple thousand impressions per month or an enterprise web application that receives millions of page views per day, we want to help your websites and apps perform faster, safer, and at global scale. Let's show you how to get the most out of Fastly's Edge Cloud platform.
TIP
Want to explore Fastly but don't have an existing website to use? Check out our Deliver your site through Fastly tutorial.
1. Create an account
Sign up for a Fastly account if you haven't done so already. There's no obligation and you can test up to $50 of traffic for free.
2. Set up a service
Once you create your Fastly account, you'll be prompted to set up your first service. This is where you'll enter a domain name and origin hostname.
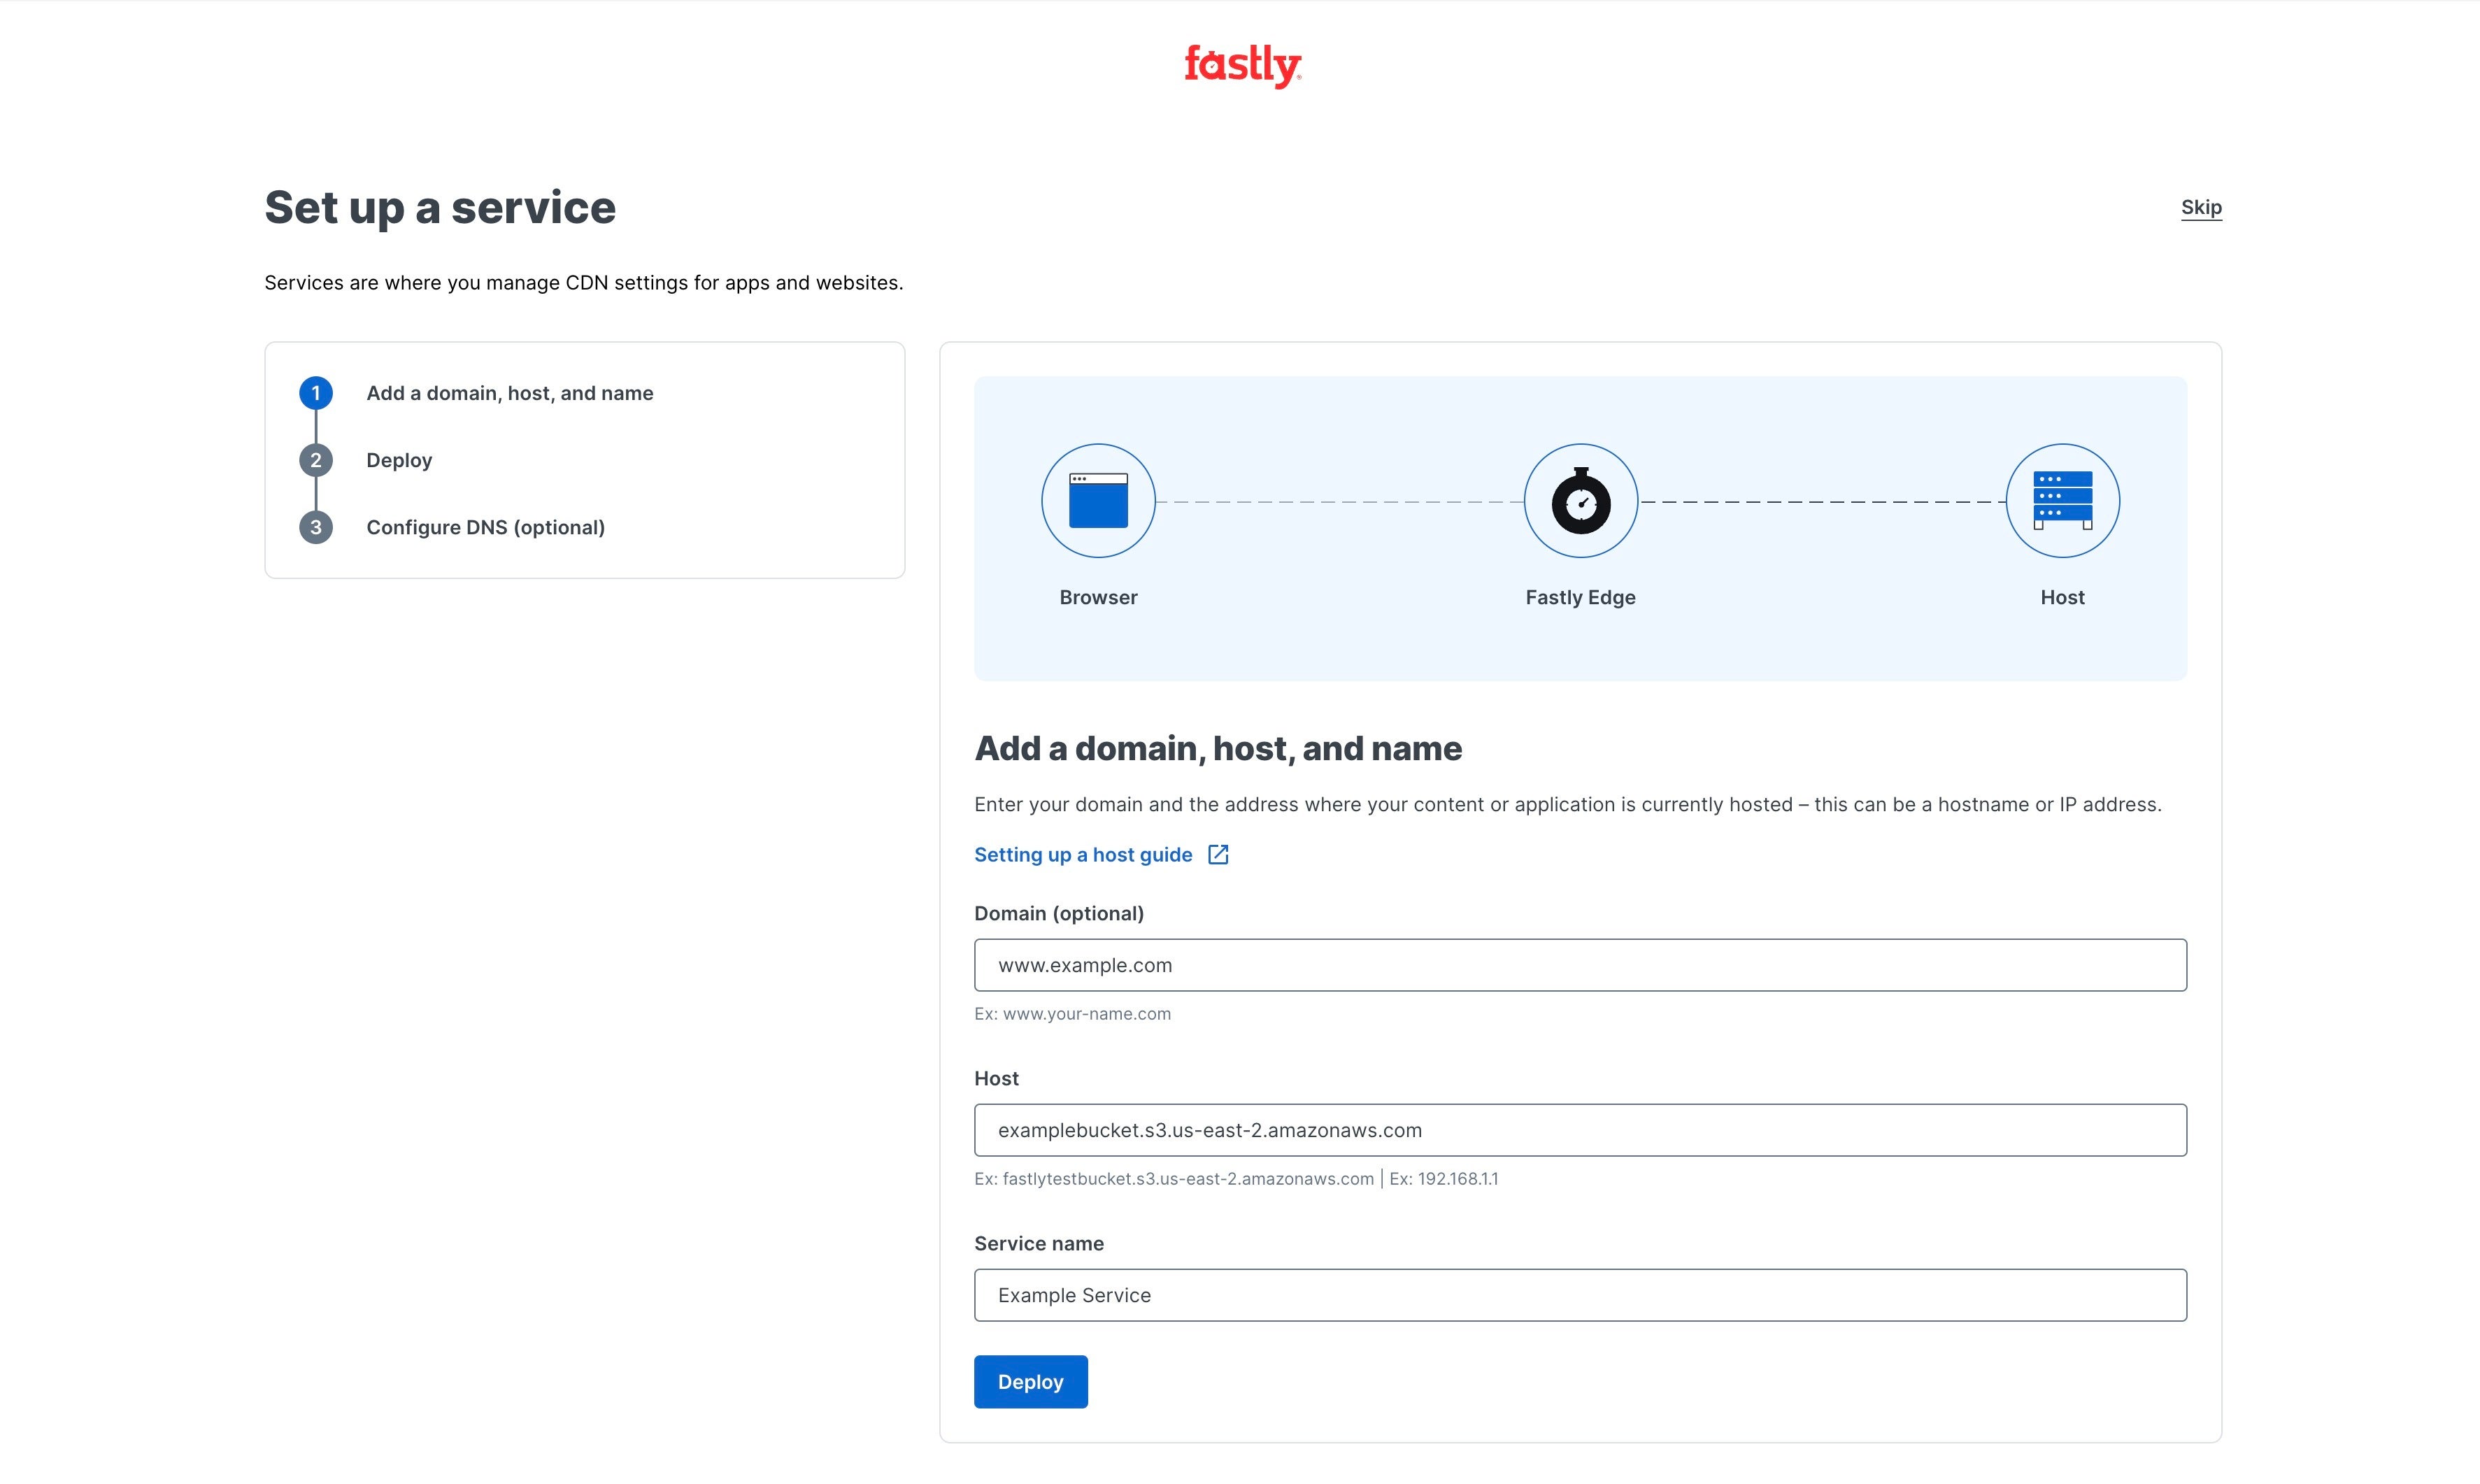
Let's look at what those items are and why they're needed:
Domain: This is what people type in a web browser to locate you (such as www.example.com). If you don't have a domain you're ready to use with Fastly, you can skip it for now. We'll automatically generate a test domain that you can use to see your website pulled through our network.
NOTE
If you're using your own domain, you'll also need the ability to edit your DNS records.
Origin hostname: This is the domain or IP address for the server where your content is hosted. It's sometimes referred to as a host or backend server. Your origin is whatever cloud service or web server that contains the content of your website or application.
If you're using a developer platform like Glitch or Amazon S3, the origin hostname will be a subdomain assigned to your project or bucket. For example,
your-new-website.glitch.meoryour-bucket.s3.us-east-2.amazonaws.com.If you bought a hosting package from a provider, your origin host may be accessible from an IP address found in your provider settings or at a subdomain you created, like
origin.your-domain.com.
The only other thing needed is to give your service a name to make it identifiable in the Fastly web interface. Once all these fields are filled out, click Deploy!
3. Deploy the service to the Fastly network
By deploying your service, Fastly caches the content stored on your origin server at our points of presence (POPs) around the world. You can watch as each POP comes online.
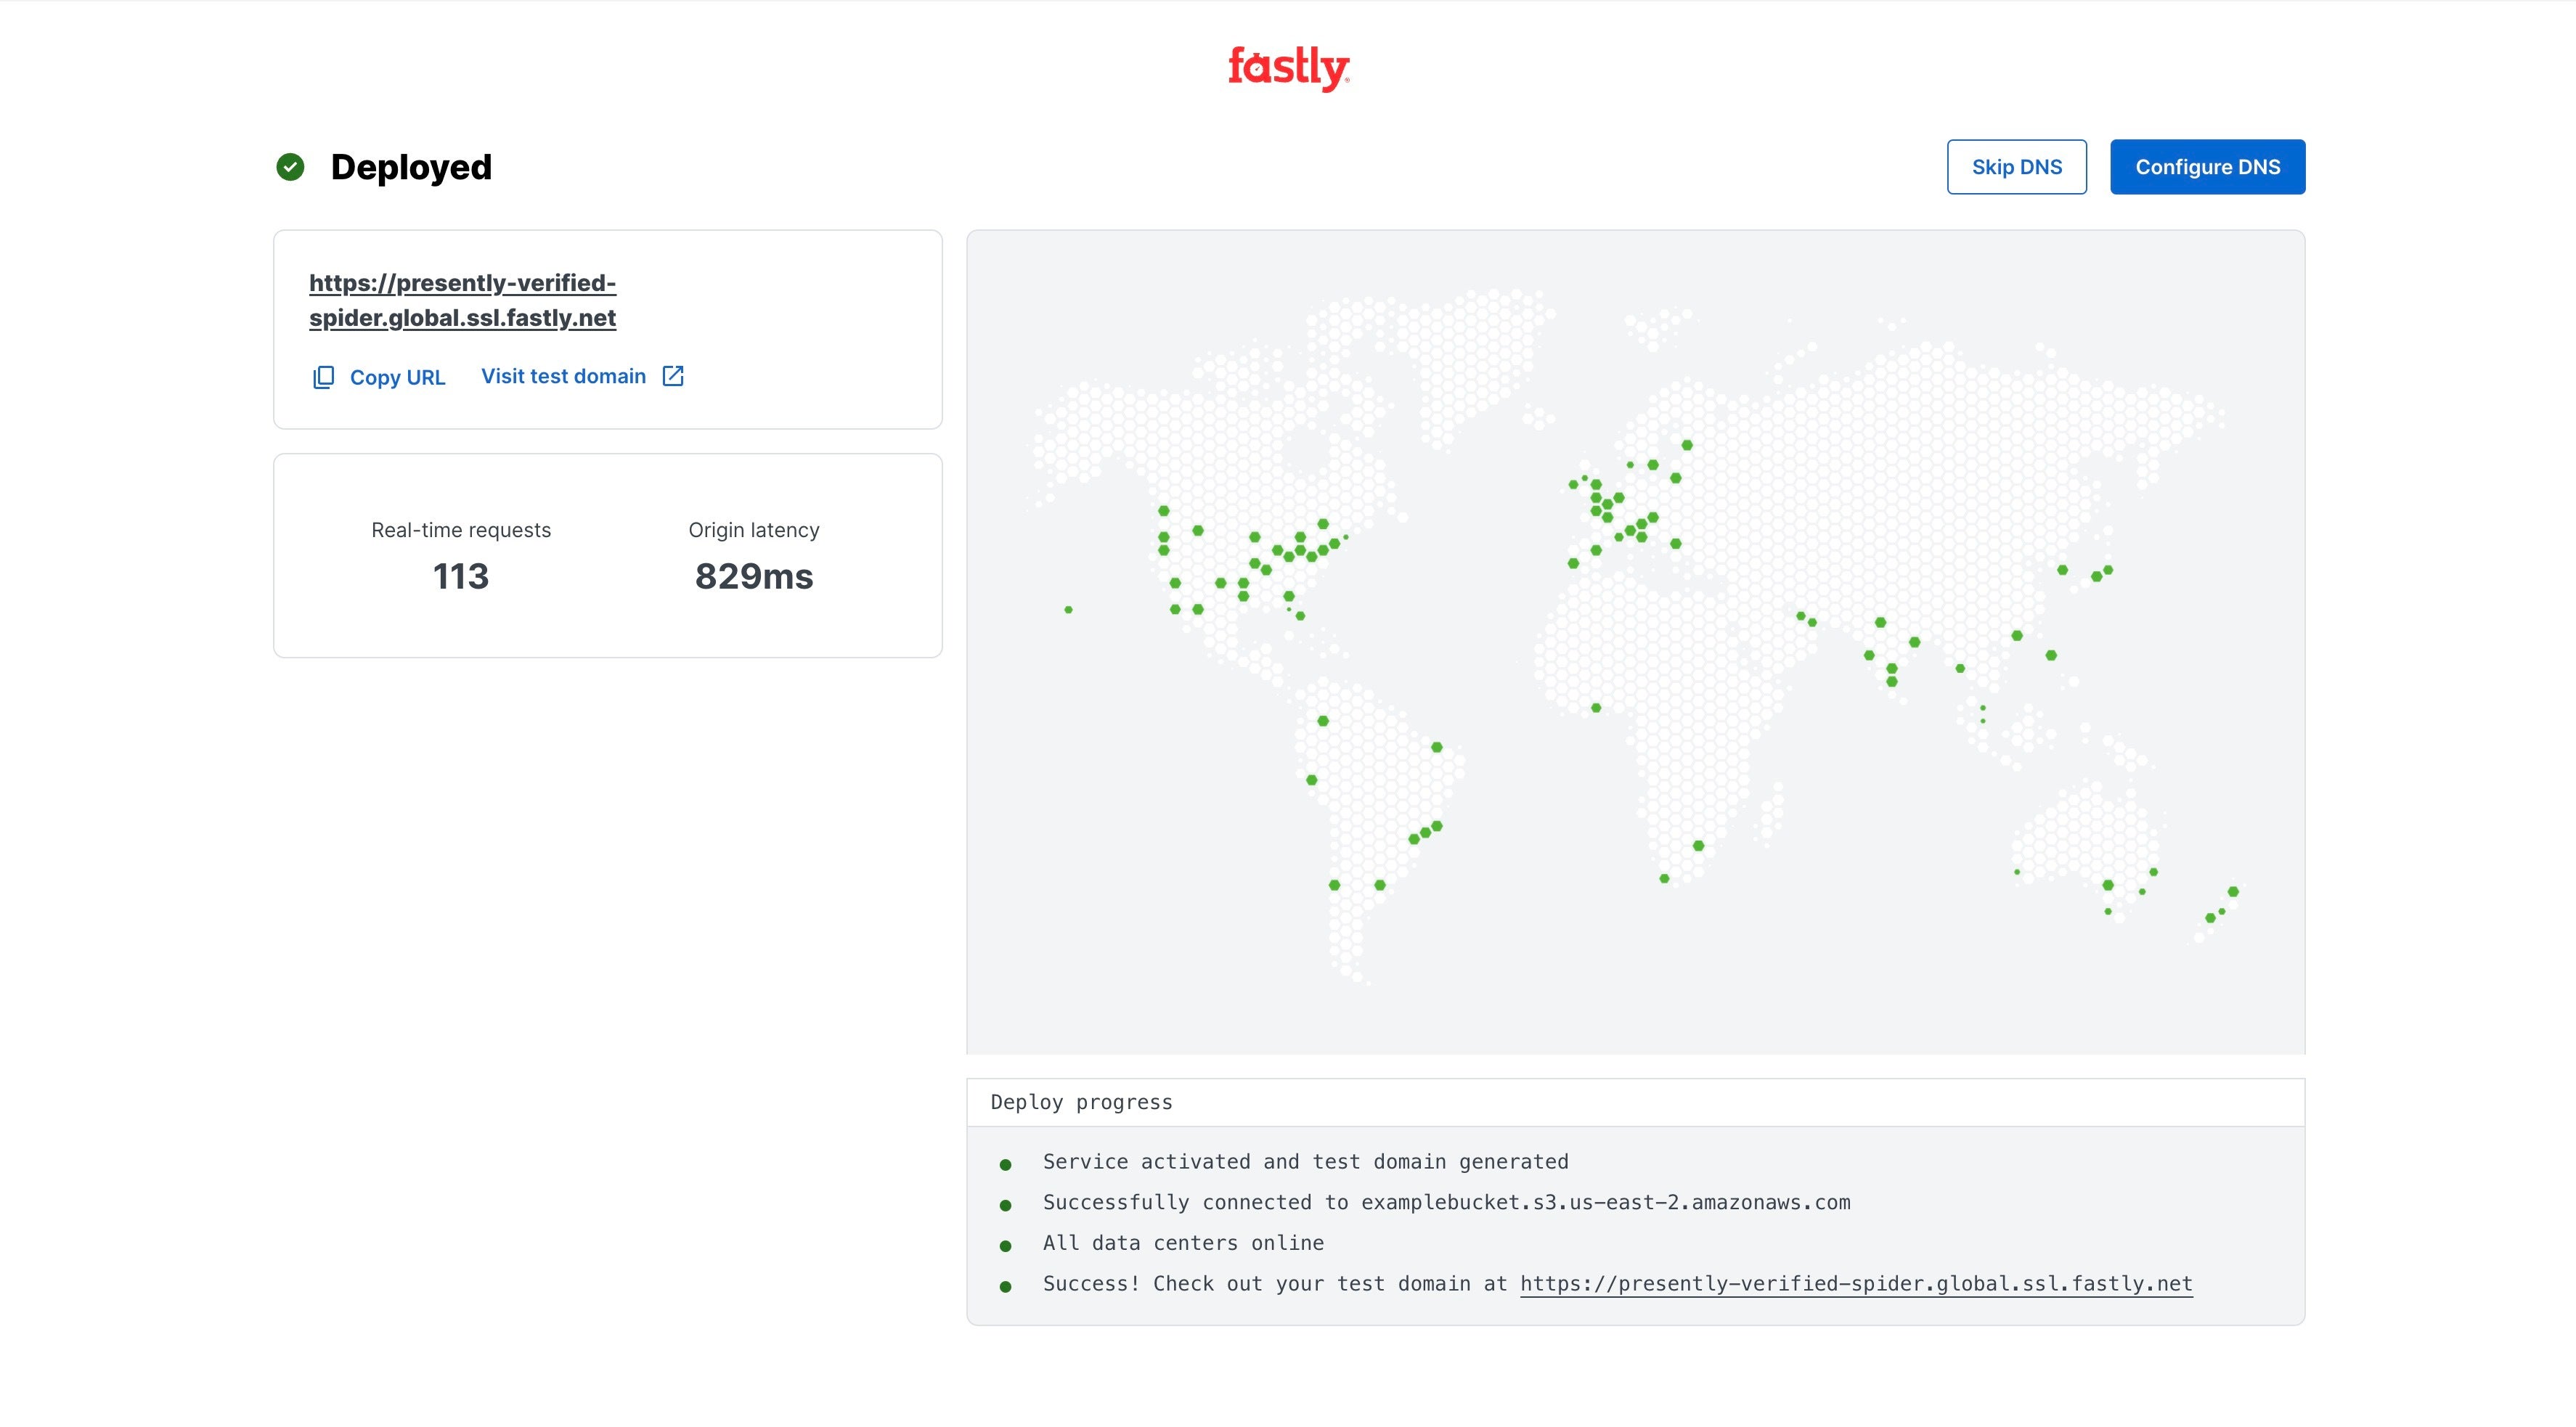
If you entered a domain name, we'll procure a Fastly-managed TLS certificate using our certification authority, Certainly, so that you can serve traffic using HTTPS.
We also provide you with a test domain so you can see exactly how your website looks pulled through our network. Click Visit test domain and verify that your website appears in a new tab in your web browser.
To get set up to send production traffic through Fastly, click Configure DNS.
4. (Optional) Configure DNS settings to route traffic to Fastly
If you entered a domain when you created your service, we'll provide you with the DNS record values you'll need to configure to route traffic to Fastly. You can also select your domain provider from the menu to get a link to detailed instructions for setting up DNS records on the provider's website.
By configuring your DNS records, you accomplish a few things:
- You prove that you are the owner of the domain.
- You authorize Fastly to deliver your site to people visiting your domain name.
- You enable traffic to be delivered via HTTPS.
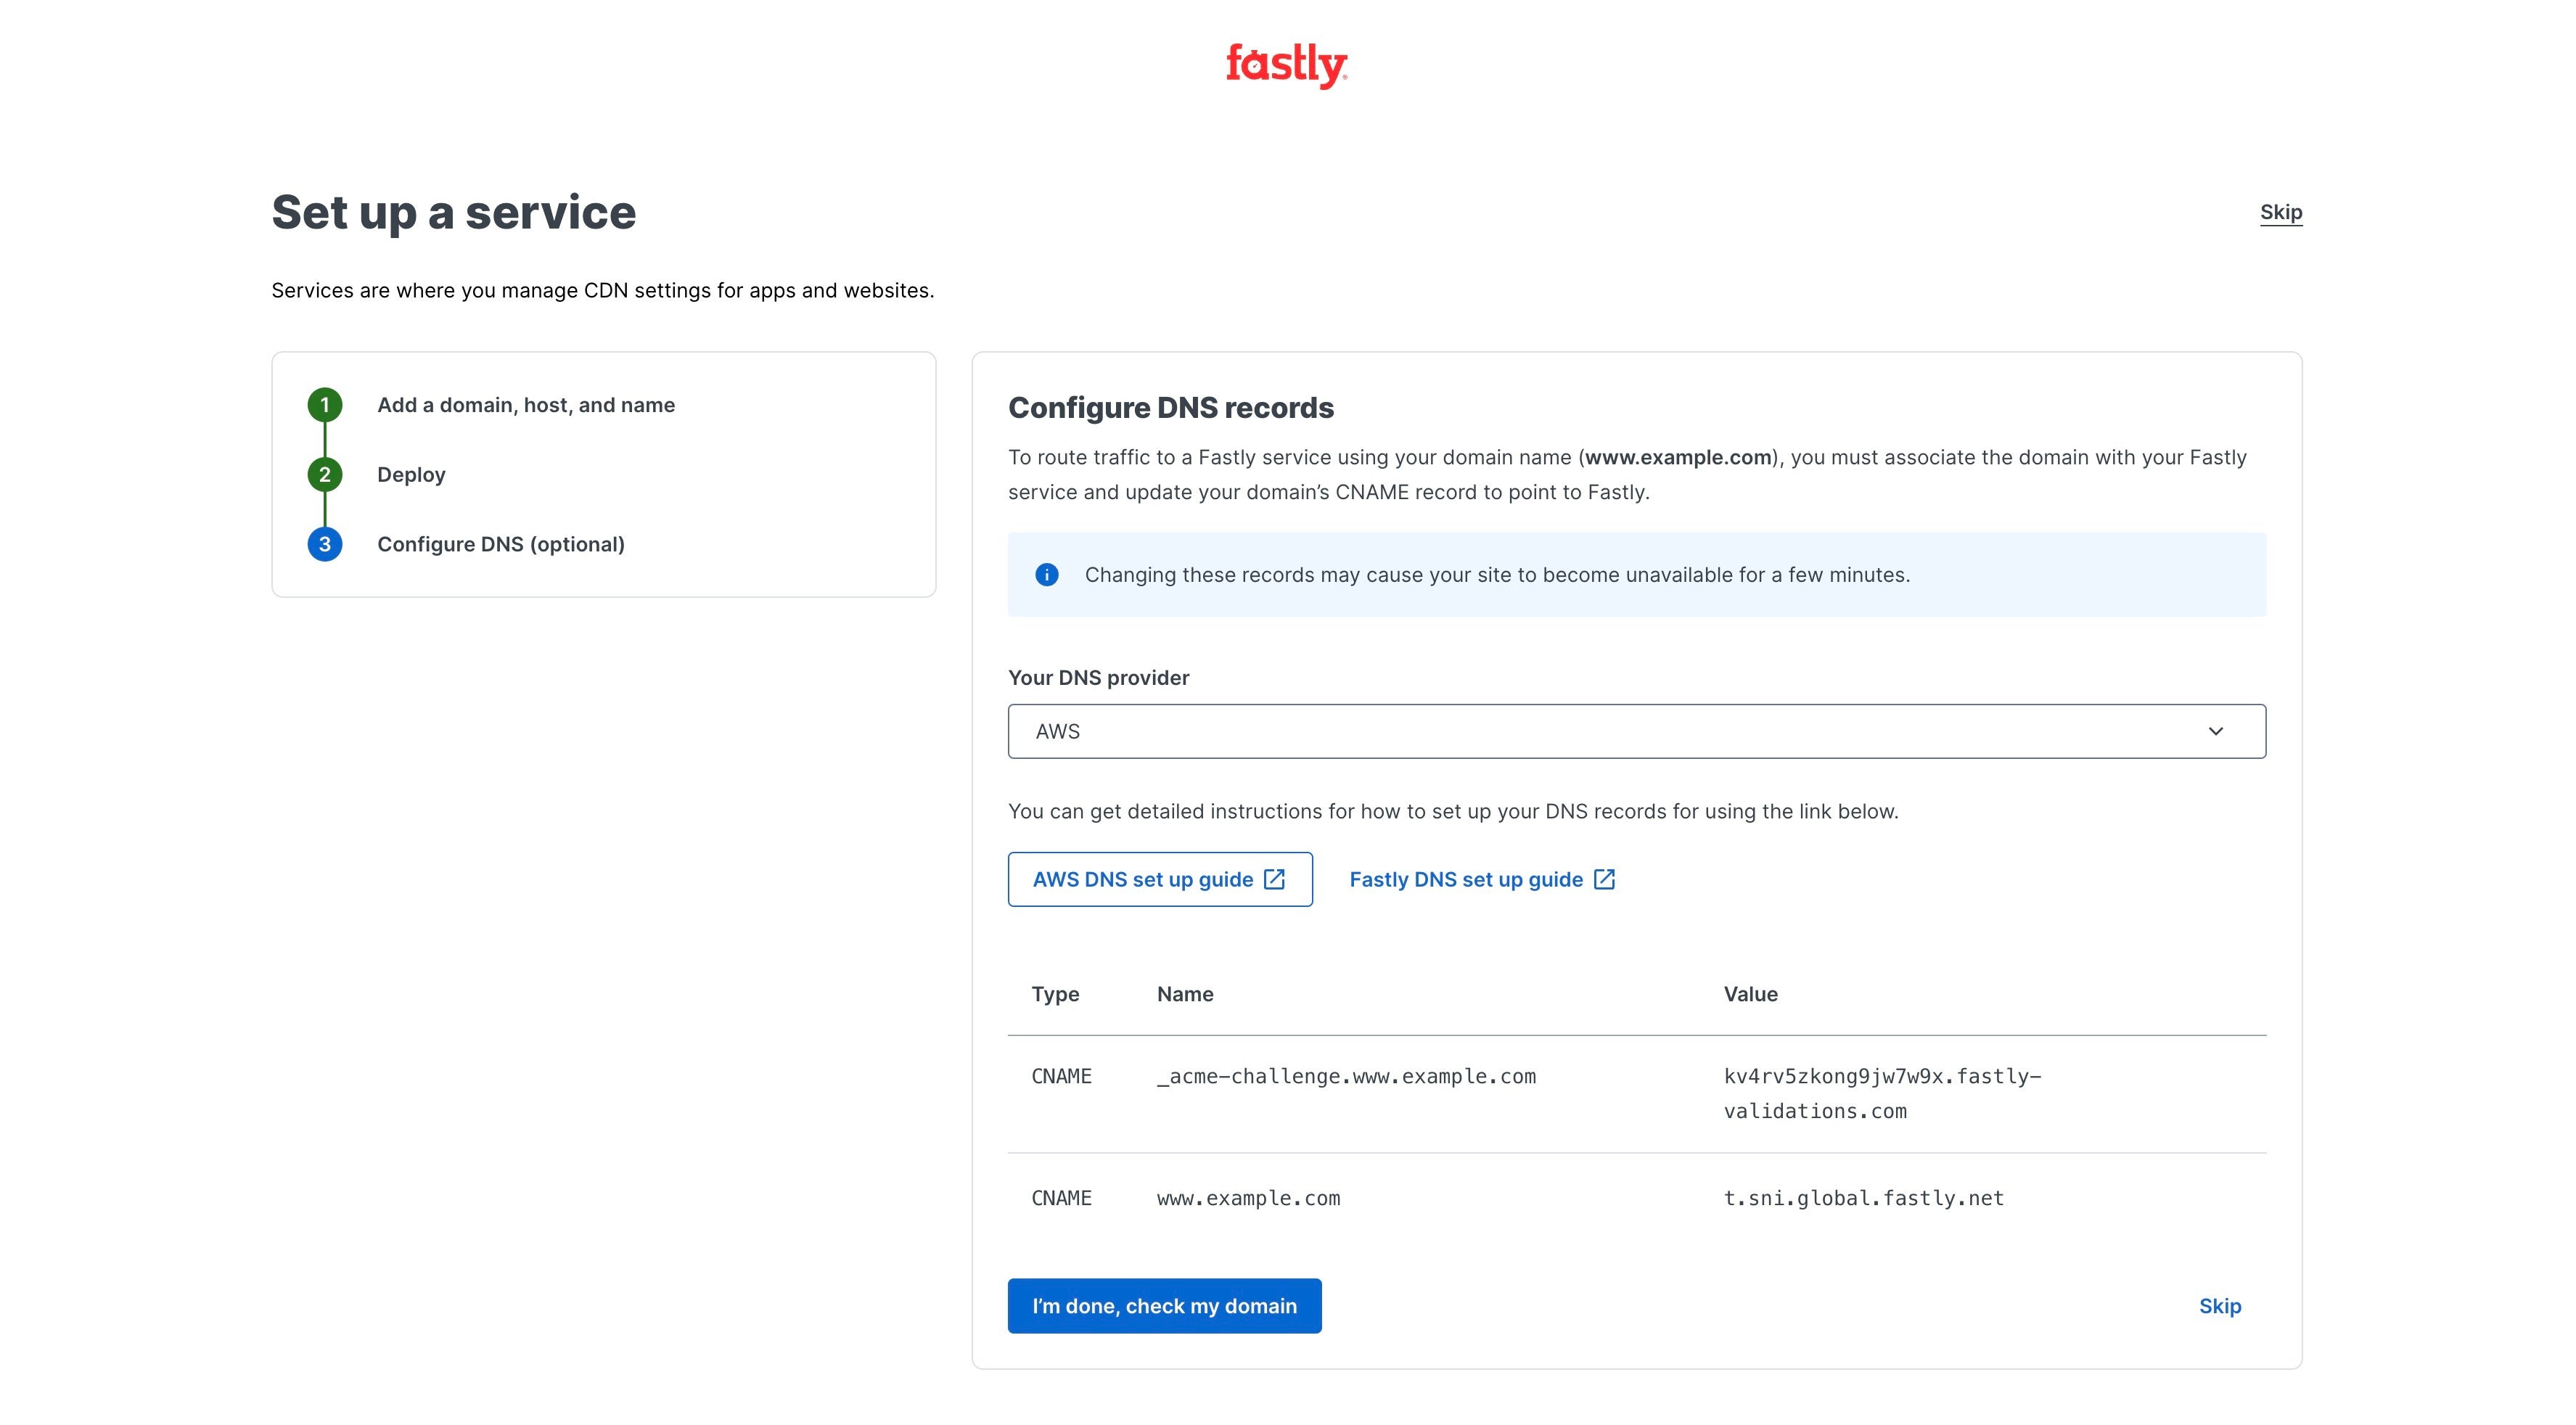
Once you've set up your DNS records, click I'm done, check my domain. Fastly will verify your DNS settings, which typically takes a few minutes. Once Fastly verifies everything is set up correctly, your site is live!
Click Finish and then Configure to enter the service configuration, where you can continue to customize how your traffic is served by Fastly.
Beyond the basics
Now, when someone requests your domain, the request will be sent to Fastly, and Fastly will return a response to the visitor:
- If the content is in the cache, Fastly will return it without visiting the origin.
- If the content is not in cache, Fastly will fetch it from the origin and store it in cache (if it's cacheable content).
If you want to change the cache rules or behaviors, you can do so in the service configuration and around the Fastly control panel.
Enable origin shielding to increase cache hits
By designating a Fastly POP to serve as a shield for your origin server, you can increase the cache hit rates for your Fastly service and potentially protect your origin server from unexpected spikes in requests for content. Check out our guide on shielding to learn how to enable origin shielding.
Enable automatic compression to speed up your site
Fastly's automatic compression feature dynamically fetches content from origin, compresses it, and then caches it. Compression is a simple, effective way to save bandwidth and speed up your site. See our guide on enabling automatic compression for more information. Consider using Brotli for better compression and performance.
Purge the cache to keep content fresh
When you make a change to your site, you have to purge the cached content to force Fastly to fetch the new content from your origin server. You can do this manually or programmatically. Check out our purging guides for more information.
Let Fastly serve stale content when there's issues with your origin
Fastly can optionally serve stale content when there is a problem with your origin server or if it's taking a long time to fetch new content from your origin server. For example, if Fastly can't reach your origin server, our POPs can continue to serve cached content when users request it. See our guides on serving stale content and staleness and revalidation to learn how to enable this feature.
Create custom error pages
Synthetic responses give your users a more reliable experience if something goes wrong on your origin server. You can add a response for specific errors, such as 404 and 503, your origin returns if the user requests a page that doesn't exist.
What's next
Go deeper with our Introduction to Fastly's CDN, a step-by-step tutorial that shows you how to use Fastly with an example website and domain name. It guides you through more features of Fastly's Full-Site Delivery as you cache and deliver a static website using the Jekyll static site generator, Amazon AWS, and the Fastly CDN.
Explore other products and services
CDN is only one of many products offered by Fastly. We encourage you to explore some of our other products and services like Compute, image optimization, security, application observability, logging, and Next-Gen WAF.
Do not use this form to send sensitive information. If you need assistance, contact support. This form is protected by reCAPTCHA and the Google Privacy Policy and Terms of Service apply.
