
Configuring attack thresholds
Last updated 2024-08-28
Attack threshold configurations (also known as system site alerts and system workspace alerts) apply to an entire site and target attackers’ ability to use scripting and tooling.
How attack thresholds works
System site alerts (system workspace alerts) monitor and flag IP addresses that exhibit repeat malicious behavior and then handle requests from the flagged IP addresses.
Flagging occurs when enough attacks are seen from a single IP address. More explicitly, we count the number of attack signals per IP address, and when this number reaches one of the attack thresholds, we flag and blocklist the IP address.
After an IP address has been flagged, subsequent requests that are from the flagged IP address and that are tagged with an attack signal are either blocked or logged depending on the Agent mode (also known as Protection mode) setting. Specifically, requests with an attack signal are blocked when the setting is set to Blocked and logged when set to Not Blocking (also known as Logging).
By default, malicious traffic from the IP address is blocked or logged for 24 hours. If you have access to the Next-Gen WAF control panel, you can change the default time that blocklisted IP addresses are blocked by updating the blockDurationSeconds field via our API.
Limitations and considerations
When working with attack thresholds, keep the following things in mind:
- Requests that have only been tagged with anomaly and custom signals are not counted towards flagging thresholds.
- When an IP address is flagged by any Next-Gen WAF customer, we record that IP address as a known potential bad actor and make its status known across our whole network by tagging it with the SigSci Malicious IPs (
SigSci IP) anomaly signal.
Adjusting attack thresholds
The default attack thresholds are based on historical patterns that we've seen across all customers.
| Interval | Threshold | Frequency of check |
|---|---|---|
| 1 minute | 50 | Every 20 seconds |
| 10 minutes | 350 | Every 3 minutes |
| 1 hour | 1,800 | Every 20 minutes |
To raise or lower the attack thresholds, complete the following steps:
- Next-Gen WAF control panel
- Fastly control panel
- Log in to the Next-Gen WAF control panel.
- From the Sites menu, select a site if you have more than one site.
From the Manage menu, select Site Settings.
Click Attack Thresholds.
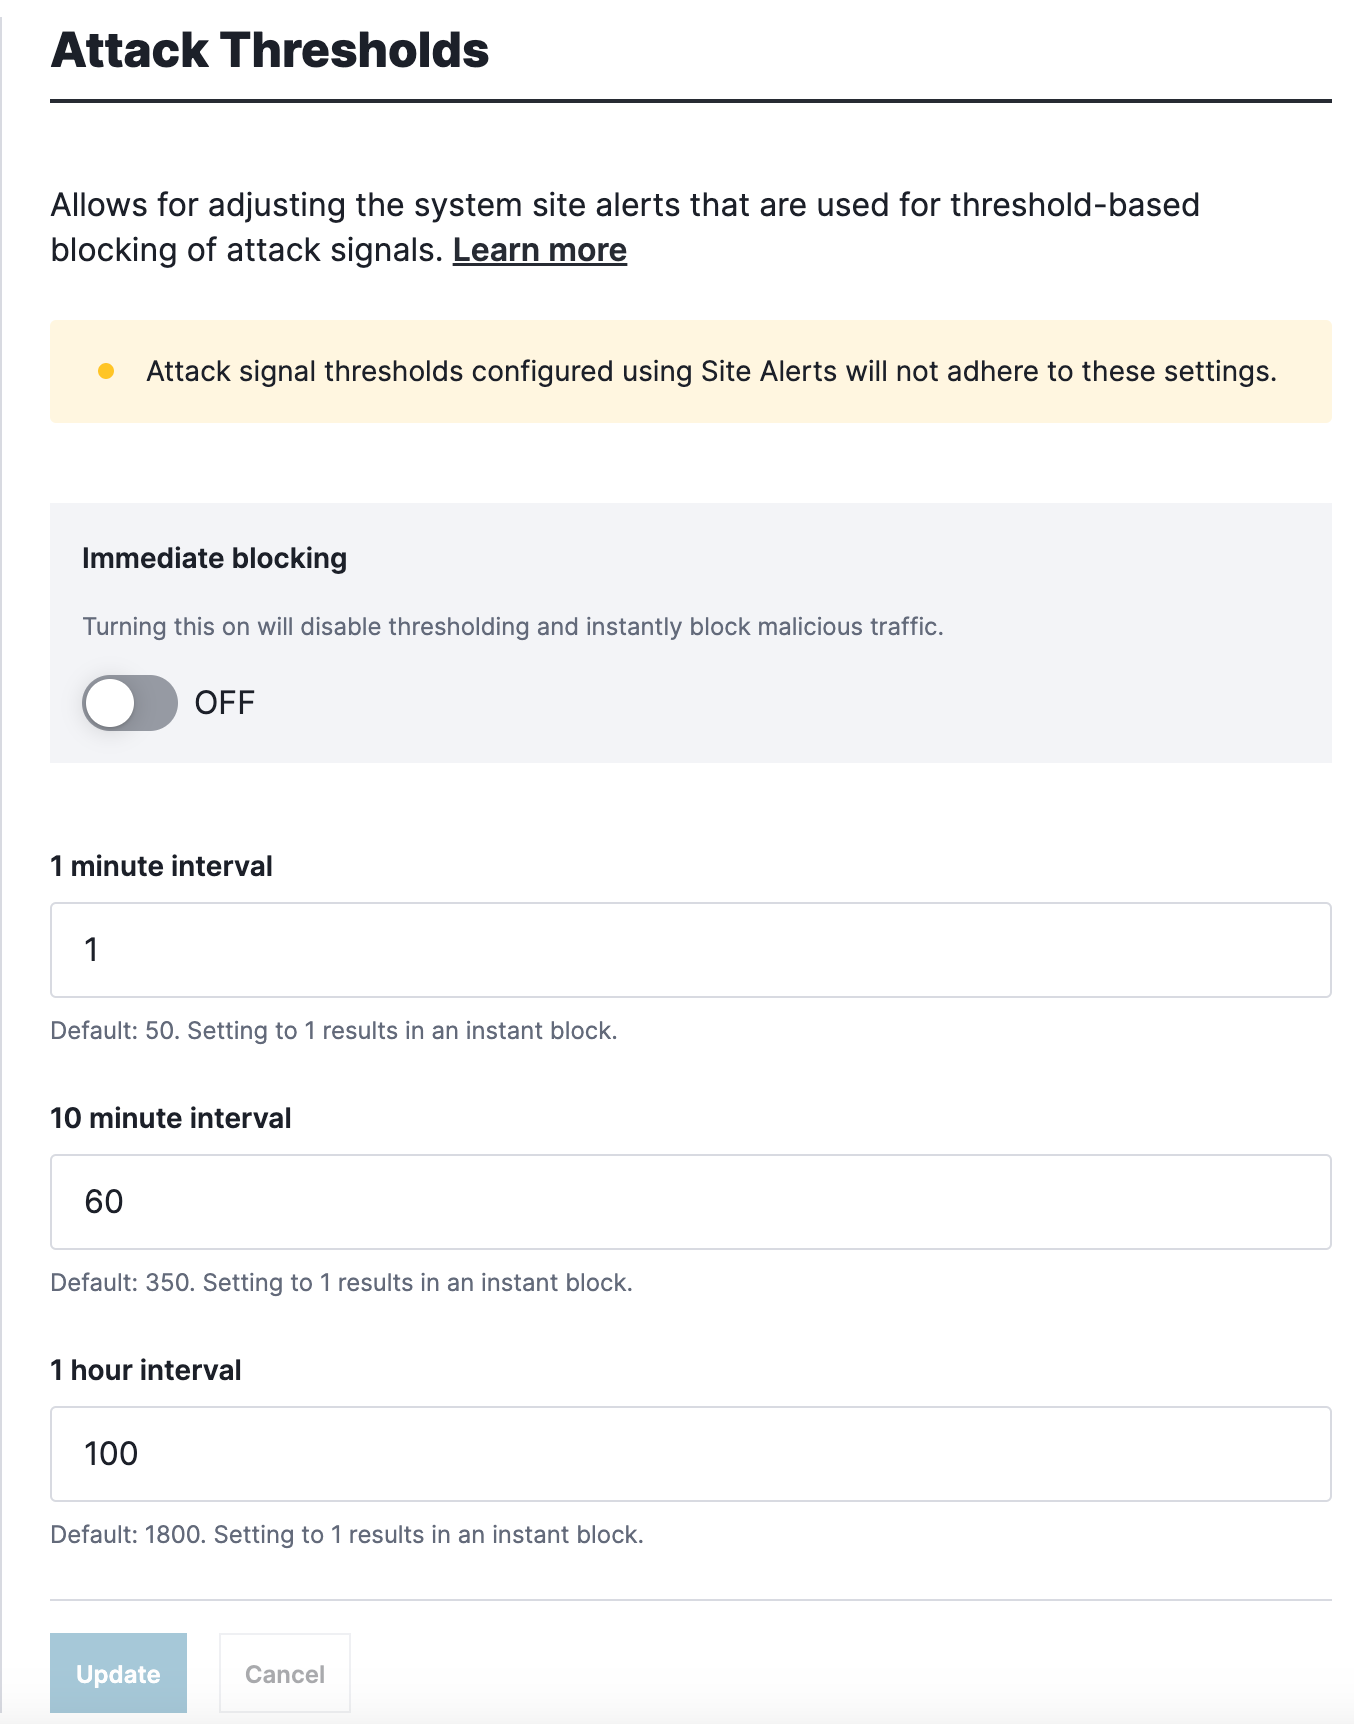
In the 1 minute interval, 10 minute interval, and 1 hour interval fields, enter the thresholds that are appropriate for your site. To immediately block requests that are tagged with at least one attack signal, use the Immediate blocking setting.
Click Update.
Overriding attack thresholds
IMPORTANT
Only Next-Gen WAF customers with access to the Next-Gen WAF control panel can override attack thresholds. If you have access to the Next-Gen WAF product in the Fastly control panel, you can't override them.
You can override the attack thresholds for individual attack signals. When multiple thresholds exist, precedence rules determine the order in which configurations are checked.
| Platform | How to override |
|---|---|
| Professional and Premier platforms | Create custom site alerts (custom workspace alerts). |
| Essentials platform | Use the alert configuration options on the Signals page. |
Applying immediate blocking
You can use the Immediate blocking setting to immediately block all requests tagged with at least one attack signal. While Immediate blocking is enabled, your existing attack threshold settings are maintained so that you can easily revert to threshold-based blocking.
To enable immediate blocking:
- Next-Gen WAF control panel
- Fastly control panel
- Log in to the Next-Gen WAF control panel.
- From the Sites menu, select a site if you have more than one site.
- From the Manage menu, select Site Settings.
- Click Attack Thresholds.
- Click the Immediate blocking switch to the on position.
Do not use this form to send sensitive information. If you need assistance, contact support. This form is protected by reCAPTCHA and the Google Privacy Policy and Terms of Service apply.
