
- English
- 日本語
Manipulating the cache key
Last updated 2022-11-29
Before you begin
If your origin uses special values (e.g., request headers) to select content for users or to otherwise direct requests to appropriate security domains, consider including those values in your cache key or Vary header. Doing so will prevent you from accidentally caching content across security domains and could prevent malicious attackers from poisoning your cache.
Redefining the cache key
WARNING
By default, Fastly uses the URL and the Host of a request (plus a special, internal Fastly variable for purging purposes) to create unique HTTP objects. Although Fastly allows you to explicitly set the cache key to define this more precisely, changing the default behavior risks the following:
- If you add too much information to the cache key, you can significantly reduce your hit ratio.
- If you make a mistake when explicitly setting the cache key, you can cause all requests to get the same object.
- If you add anything to the hash, you will need to send a purge for each combination of the URL and value you add in order to purge that specific information from the cache.
To avoid these dangers, consider using the Vary header instead of following the instructions below.
Explicitly setting the cache key
You can set the cache key explicitly (including attaching conditions by adding a request setting via the Settings page in the service configuration controls and including a comma-separated list of cache keys. The values of the cache keys listed are combined to make a single hash, and each unique hash is considered a unique object.
For example, if you don't want the query string to be part of the cache key, but you don't want to change req.url so that the query string still ends up in your logs, you could use the following text for the hash keys:
req.url.path, req.http.hostIn the web interface, the text would appear in the Cache keys field:
As a general rule, you should always have req.url as one of your cache keys or as part of one.
Purging adjustments when making additions to cache keys
Because purging works on individual hashes, additions to cache keys can complicate purging URLs. However, it can also be simplified.
For example, if you were to change your cache key to just req.url and not the default req.url, req.http.host, then purging http://foo.example.com/file.html would also purge http://bar.example.com/file.html. Keep in mind this is because they're actually the same object in the cache!
On the other hand, if you were to change your cache key to req.url, req.http.host, req.http.Fastly-SSL, you would have to purge http://example.com/ and https://example.com/ individually.
In the latter case, if you were to use the Vary header instead of changing the cache key, you could still have different content on the two URLs, yet purge them with a single purge. In this case you would add a new Cache Header, use http.Vary as the Destination, and use the following as the Source:
if(beresp.http.Vary, beresp.http.Vary ",", "") "Fastly-SSL"Using a cookie as a cache key
You can use a cookie as a cache key or just check for the presence of a cookie set to a specific value by controlling its request conditions. Both methods are simple and shown in the steps below.
To use a cookie as a cache key
Using a cookie as a cache key looks complicated but it's actually quite simple. Let's say your cookie is called "MyCookie" and it looks like mycookie=.
Create new headers
- Log in to the Fastly control panel.
- From the Home page, select the appropriate service. You can use the search box to search by ID, name, or domain.
- Click Edit configuration and then select the option to clone the active version.
- Click Content.
Click Create header.
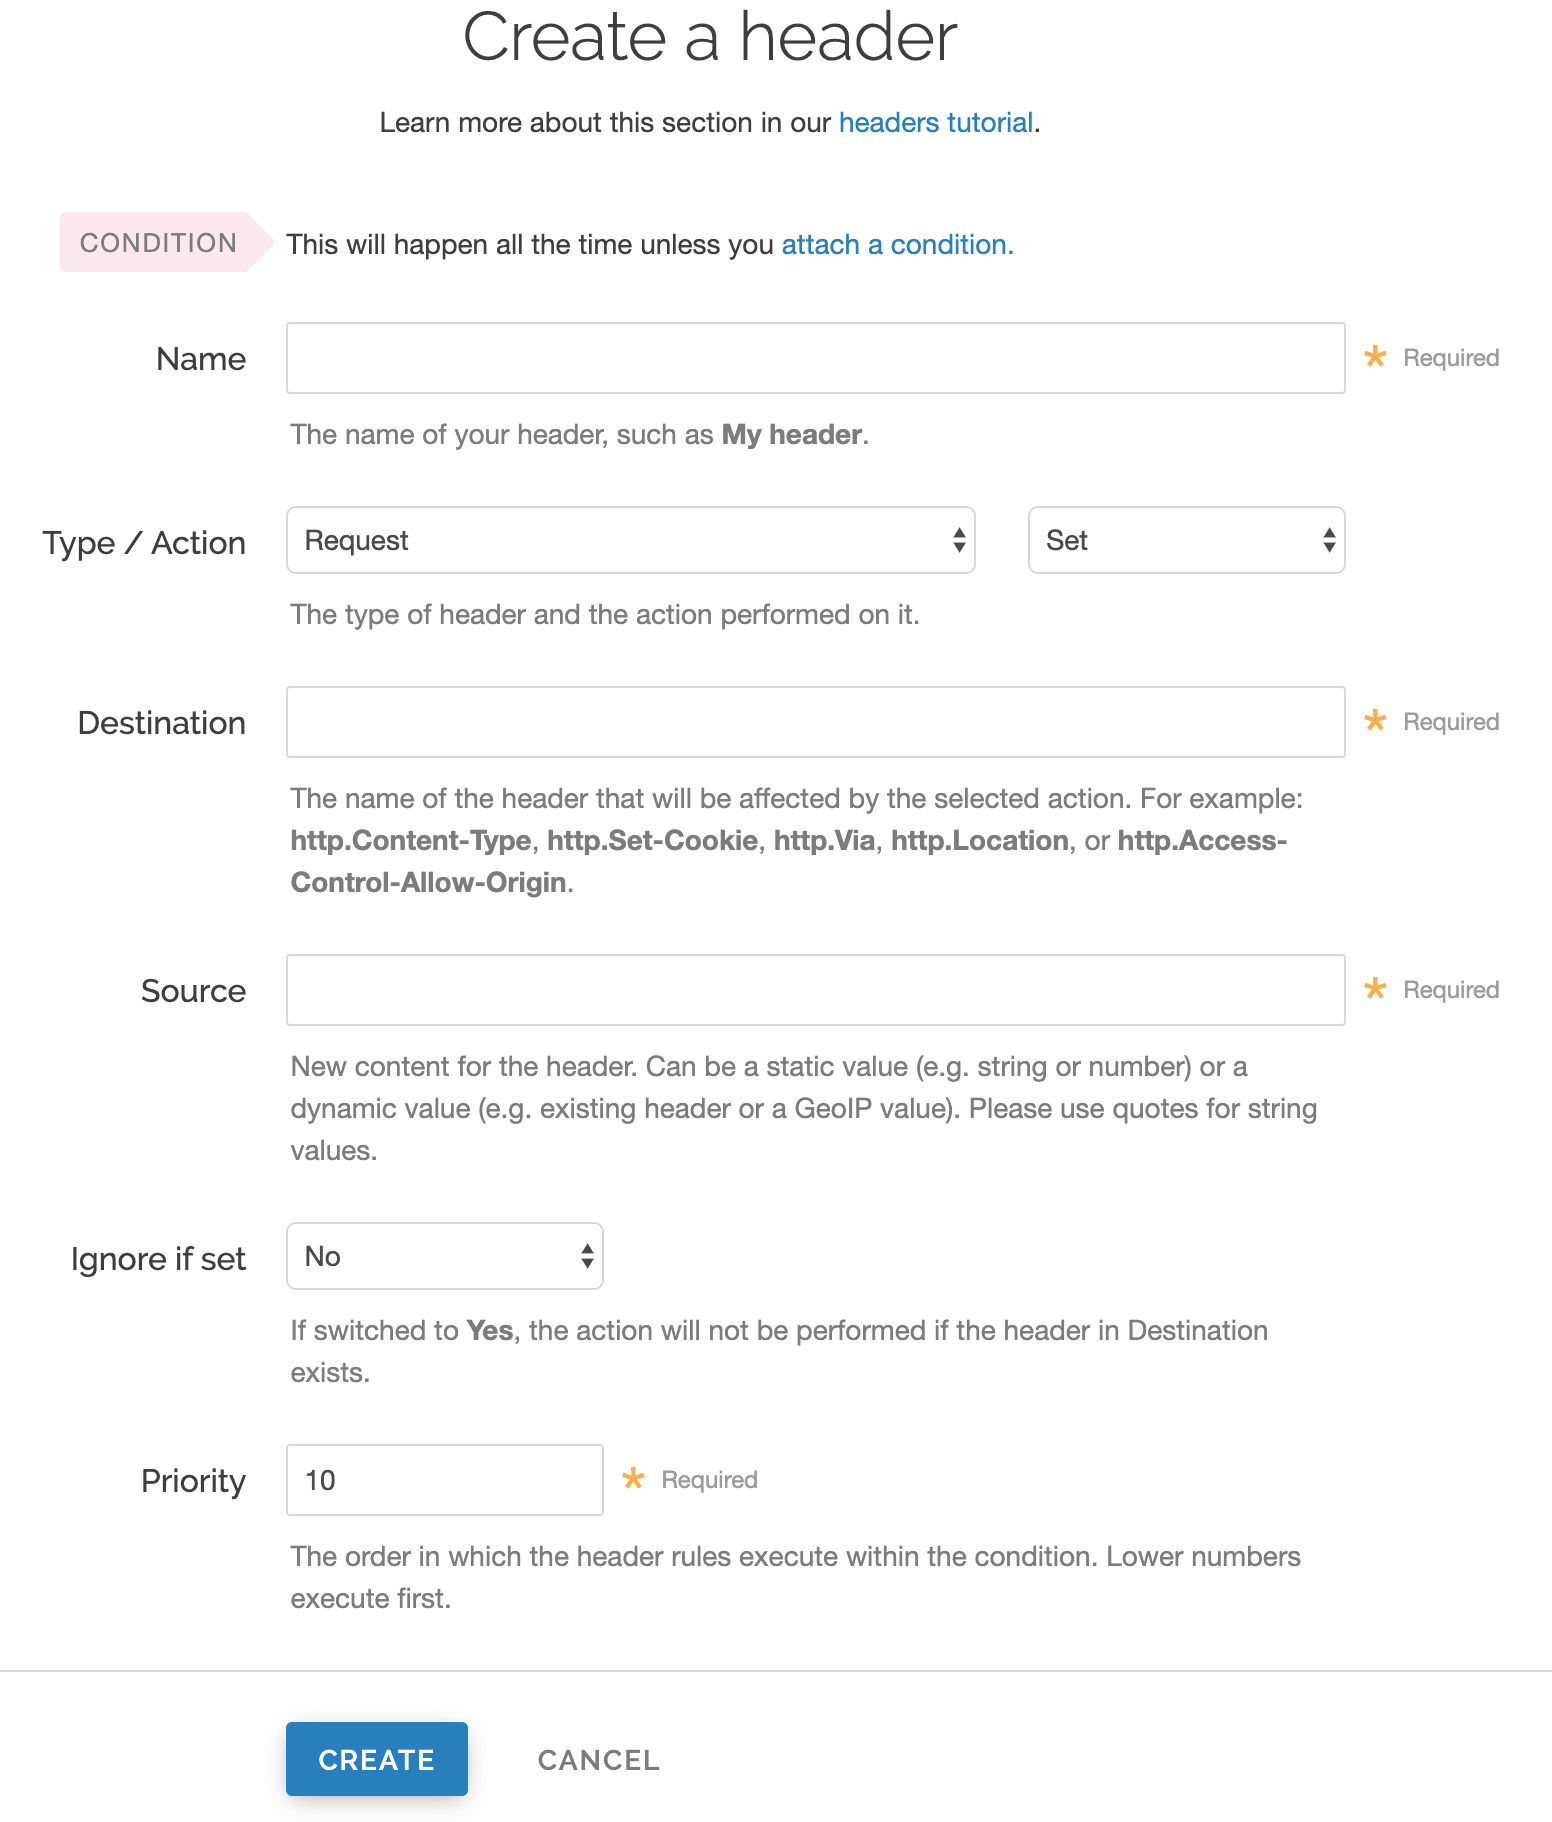
Fill out the Create a header fields as follows:
- In the Name field, enter
Set MyCookie Header Default. - From the Type menu, select Request, and from the Action menu select Set.
- In the Destination field, enter
http.X-MyCookie. - In the Source field, enter
"0"(with quotes). - Leave the Ignore if set menu set to the default, No.
- In the Priority field, enter a number representing the order in which the header rule should execute. The default is set to
10for new headers.
- In the Name field, enter
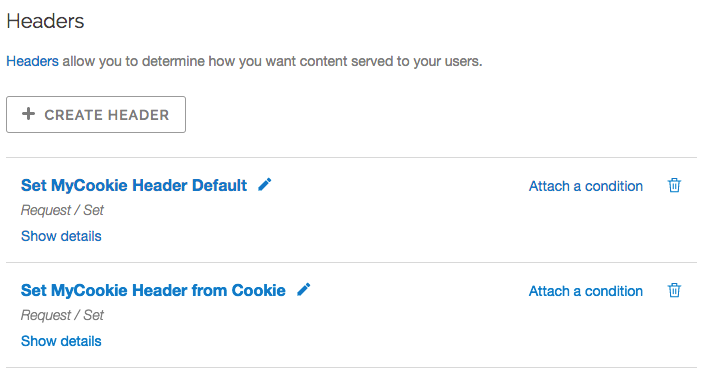
Click Create. The new header appears in the Headers area of the Content page.
Click Create header again and create a second new header by filling out the fields as follows:
- In the Name field, enter
Set MyCookie Header from Cookie. - From the Type menu, select Request, and from the Action menu select Set.
- In the Destination field, enter
http.X-MyCookie. - In the Source field, enter
req.http.cookie:mycookie. - Leave the Ignore if set menu set to the default, No.
- In the Priority field, enter a larger number than the priority of previous header you just created. For example, if you left the default priority set to
10, enter20.
- In the Name field, enter
Click Create. The second header appears in the Headers area of the Content page.
Attach conditions to the new headers
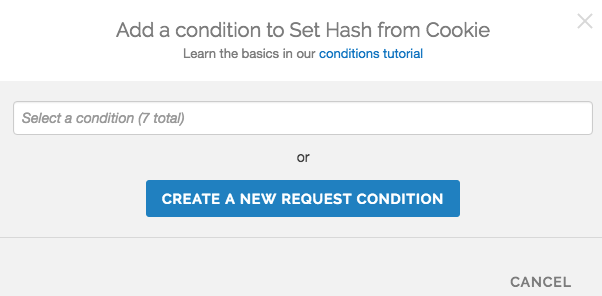
Click Attach a condition next to the
Set MyCookie Header from Cookieheader.Click Create a new request condition.

Fill out the fields of the Create a new request condition page as follows:
- In the Name field, enter
Has MyCookie cookie. - In the Apply if field, enter
req.http.cookie:mycookie.
- In the Name field, enter
Click Save and apply to. The Headers area now displays the condition that must be met in order for your header to begin being used.

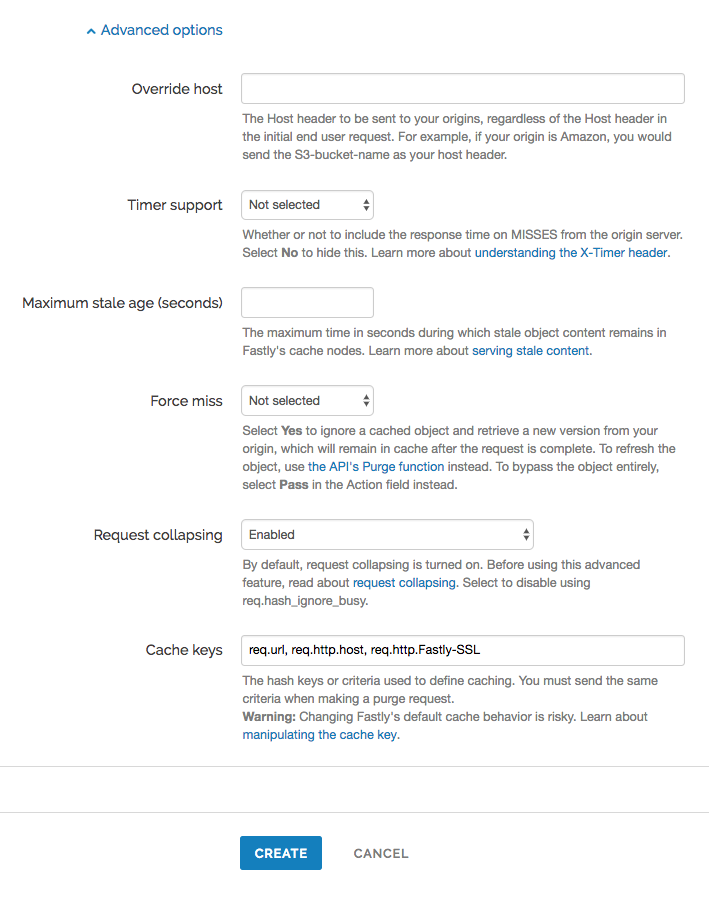
- Click Settings.
Click Create request setting.
In the Name field, enter
Set Hash from Cookie.Click Advanced options at the bottom of the page.
In the Cache keys field, enter
req.url, req.http.host, req.http.X-MyCookieClick Create.
Click Attach a condition next to the new request.
From the Select a condition menu, select
Has MyCookie cookie. The Request settings area now displays the condition that must be met in order for your request to begin being used.
- Click Activate to deploy your configuration changes.
To check for the presence of a cookie set to a specific value
An alternative way if you're just checking for the presence of the cookie set to some specific value (e.g., 1):
- Add a new Request setting where the Cache key field is set to
req.url, req.http.host, "Has mycookie". - Add a condition to that Request setting where the Apply if field contains
req.http.cookie:mycookie.
Do not use this form to send sensitive information. If you need assistance, contact support. This form is protected by reCAPTCHA and the Google Privacy Policy and Terms of Service apply.
