
- English
- 日本語
Enabling an IP allowlist for account logins through the web interface
Last updated 2025-04-07
Fastly allows you to define the range of IP addresses authorized on your Fastly account from which users are able to login to the Fastly control panel. It can restrict access to most of Fastly's API endpoints.
Limitations and considerations
An account owner telephone number is required in case of account lockouts. During setup, Fastly checks your current IP address against the list you provide to ensure you don't lock yourself out of your account. If your IP addresses change at a later date (for example, because you move offices) and you forget to update your allowlist configuration, you will be locked out of your account.
WARNING
If you are locked out of your account, you will need to contact support and request that a Customer Support representative contact your account's owner via telephone during Fastly's regular business hours. To protect your account's security, we will not unlock your account based on an email request alone.
Several API endpoints are exempt from allowlisting. By design, some API endpoints such as historical stats or real-time analytics do not enforce customer IP allowlist checks. For endpoints that support that functionality, if an IP address outside of an allowlist is used to make an API request, the API will respond with a 403 Forbidden error that includes an appropriate error message. For more information about this functionality, contact support.
Enabling an IP allowlist for account logins through the control panel
NOTE
Only superusers have the ability to access this feature.
To restrict logins to the Fastly web interface based on a specific list or range of IP addresses, follow these steps.
- Log in to the Fastly control panel and select Account from the navigation sidebar.
In the Login IP allowlist field of the Company settings area, replace
0.0.0.0/0(the default IP range indicating no allowlisting) with the IP addresses for which control panel access to your account should be restricted.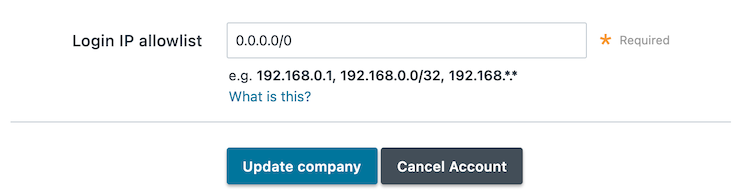
You can include single or multiple IP addresses or IP ranges (separated by commas) as follows:
- a single IPv4 address (e.g., replace the default with
192.168.0.1) - an IPv4 CIDR range (e.g., replace the default with
192.168.0.0/24,192.168.0.1/32) - an IPv4 Wildcard range (e.g., replace the default with
192.168.0.*,192.168.*.1,192.168.*.*)
- a single IPv4 address (e.g., replace the default with
Click Update Company.
Disabling an IP allowlist for account logins through the control panel
To disable IP allowlisting on your Fastly account and allow control panel access to any IP range, follow these steps.
- Log in to the Fastly control panel and select Account from the navigation sidebar.
- In the Login IP allowlist field of the Company settings area, enter
0.0.0.0/0(the default IP range indicating no allowlisting). - Click Update Company.
Do not use this form to send sensitive information. If you need assistance, contact support. This form is protected by reCAPTCHA and the Google Privacy Policy and Terms of Service apply.
