
- English
- 日本語
Using API tokens
Last updated 2024-11-22
API tokens are unique security credentials that allow human users and automated systems to prove their identity to Fastly, thereby indicating they can be trusted to access restricted resources and perform specific, restricted operations via the Fastly API.
Token types
There are two types of API tokens: user tokens and automation tokens.
User tokens
User tokens provide security credentials for API activities initiated by human users. They are associated with a specific human and are only active for the lifetime of their account. They are sometimes referred to as "personal tokens" or "personal API tokens."
Keep in mind the following things about user tokens:
- They can be created by any user and they only apply to the user that created them. This can't be updated.
- They carry the same permissions and scopes as the user who would be performing account-based actions via the API. For example, if you are a billing user, then your token will only allow you to perform the capabilities of the billing role.
- They must be deleted (revoked) before you can delete the account of the user who created them.
Automation tokens
Automation tokens provide security credentials for non-human clients (e.g., continuous integration and build systems) that need to conduct automated API activities like integration tests and routinely scripted tasks.
Keep in mind the following:
- They can only be created by users with the role of superuser and must use sudo mode to do so.
- They cannot be created via API if an account has force SSO or multi-factor authentication enabled.
- They can remain active indefinitely because they are not tied to a human user.
- They do not trigger or apply to Next-Gen WAF features and scopes.
Token scopes
You can limit the capabilities of API tokens by specifying the scope of their service-related activities. Specifically, you can allow or limit API tokens as follows:
- Global API access (
global) allows the token full control over a service with access to all API endpoints, including purging. - Purge full cache (
purge_all) allows the token purging ability for an entire service via apurge_allAPI request. - Purge select content (
purge_select) allows the token purging ability via Surrogate-Key and URL but does not include the ability to purge all cache. - Read-only access (
global:read) allows the token read-only access to account information, configuration, and stats.
General limitations and best practices
When managing and using API tokens, keep in mind the following limitations:
- API tokens can only be created, viewed, and deleted. They cannot be edited or updated.
- Each user is limited to 100 active API tokens. Deleted and expired tokens don't count against the limit.
- Unused tokens do not last forever. API tokens that remain unused for two years are automatically deleted even if they have been set to never expire.
- The event log only shows API token activity appropriate to your user role. If you've been assigned the
userrole, you can only see events from your own actions. If you've been assigned theengineerrole, you can see all events related to your own actions plus all the actions on services to which you've been granted access.
When creating API tokens, also keep the following best practices in mind:
- Keep it secret. Keep it safe. When you generate a new token, you should store it in a protected place like a password manager to keep it secret and safe. For security reasons, you will only be able to copy tokens once, at the time of creation. You won't be able to retrieve token strings later.
- Consider implementing minimal privileges. Limiting a token's service access, controlling its scope, and setting an expiration date restricts that credential's access can minimize the risk of damage if security credentials are somehow compromised. For more information, review the principle of least privilege.
Creating API tokens
To create API tokens, follow these steps.
Creating user tokens
IMPORTANT
Be sure you're creating tokens for the right account. If you've been invited as a user on multiple accounts, you'll need to switch to the appropriate account first.
To create user tokens, follow these steps:
- Log in to the Fastly control panel.
Go to Account > API tokens > Personal tokens.
Click Create token.
When prompted, enter your password to re-authenticate your permissions.
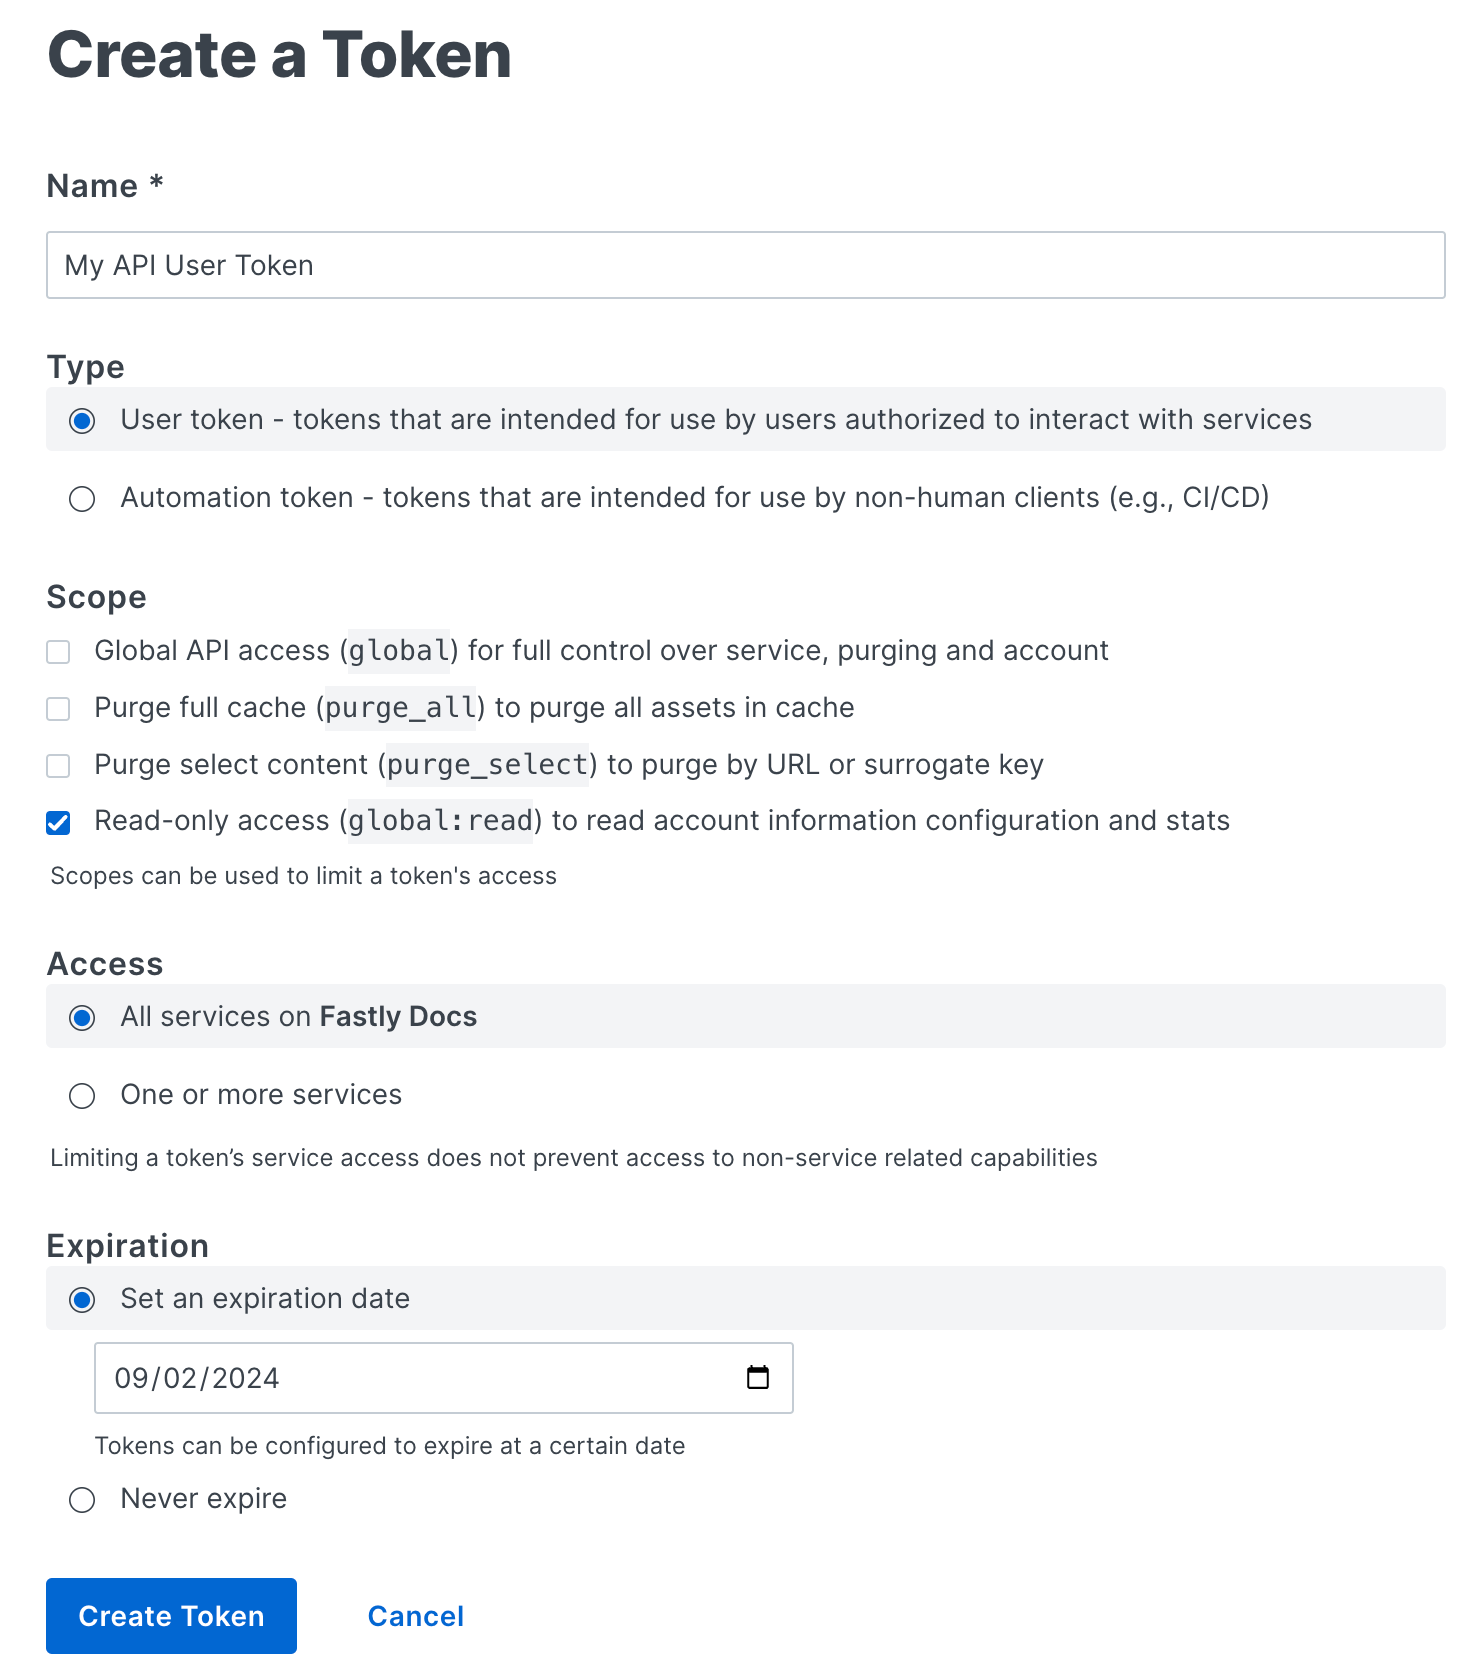
Fill out the Create a Token fields as follows:
- In the Name field, enter a descriptive name for the token that indicates how or where it will be used.
- (Optional) When visible, leave the Type option set to User token. These controls only appear when you've been assigned the role of superuser.
- From the Scope options, select one or more checkboxes to limit the token's access to a specific scope. Only the Scope options applicable to the chosen role will be selectable. Our guide to configuring user roles and permissions provides more information.
- From the Access options, select either all services or limit the token's access to a specific service or group of services by selecting them from the Search or select service menu.
- From the Expiration options, set the token expiration timeframe. By default the control panel will set the expiration date to 90 days from the date on which you create it. You can, however, set a token to never expire or you can select a specific date on which it expires.
TIP
After a token expires, using it for any request will return an HTTP 401 response.
Click Create Token to create the new token. A new token and its creation notification appears. This is the credential you'll use to authenticate via the Fastly API. You may use the same token for multiple applications.
Click the clipboard
 to copy the API token string so you can store it in a safe, secret location.
WARNING
This is the only time your API token string will be visible. Be sure to immediately copy it and store it in a safe location. It will never be visible again.
Click Okay.
Creating automation tokens
NOTE
Only superusers have the ability to create automation tokens.
To create automation tokens, follow these steps:
- Log in to the Fastly control panel.
Go to Account > API tokens > Personal tokens.
Click Create token.
When prompted, enter your password to re-authenticate your permissions.
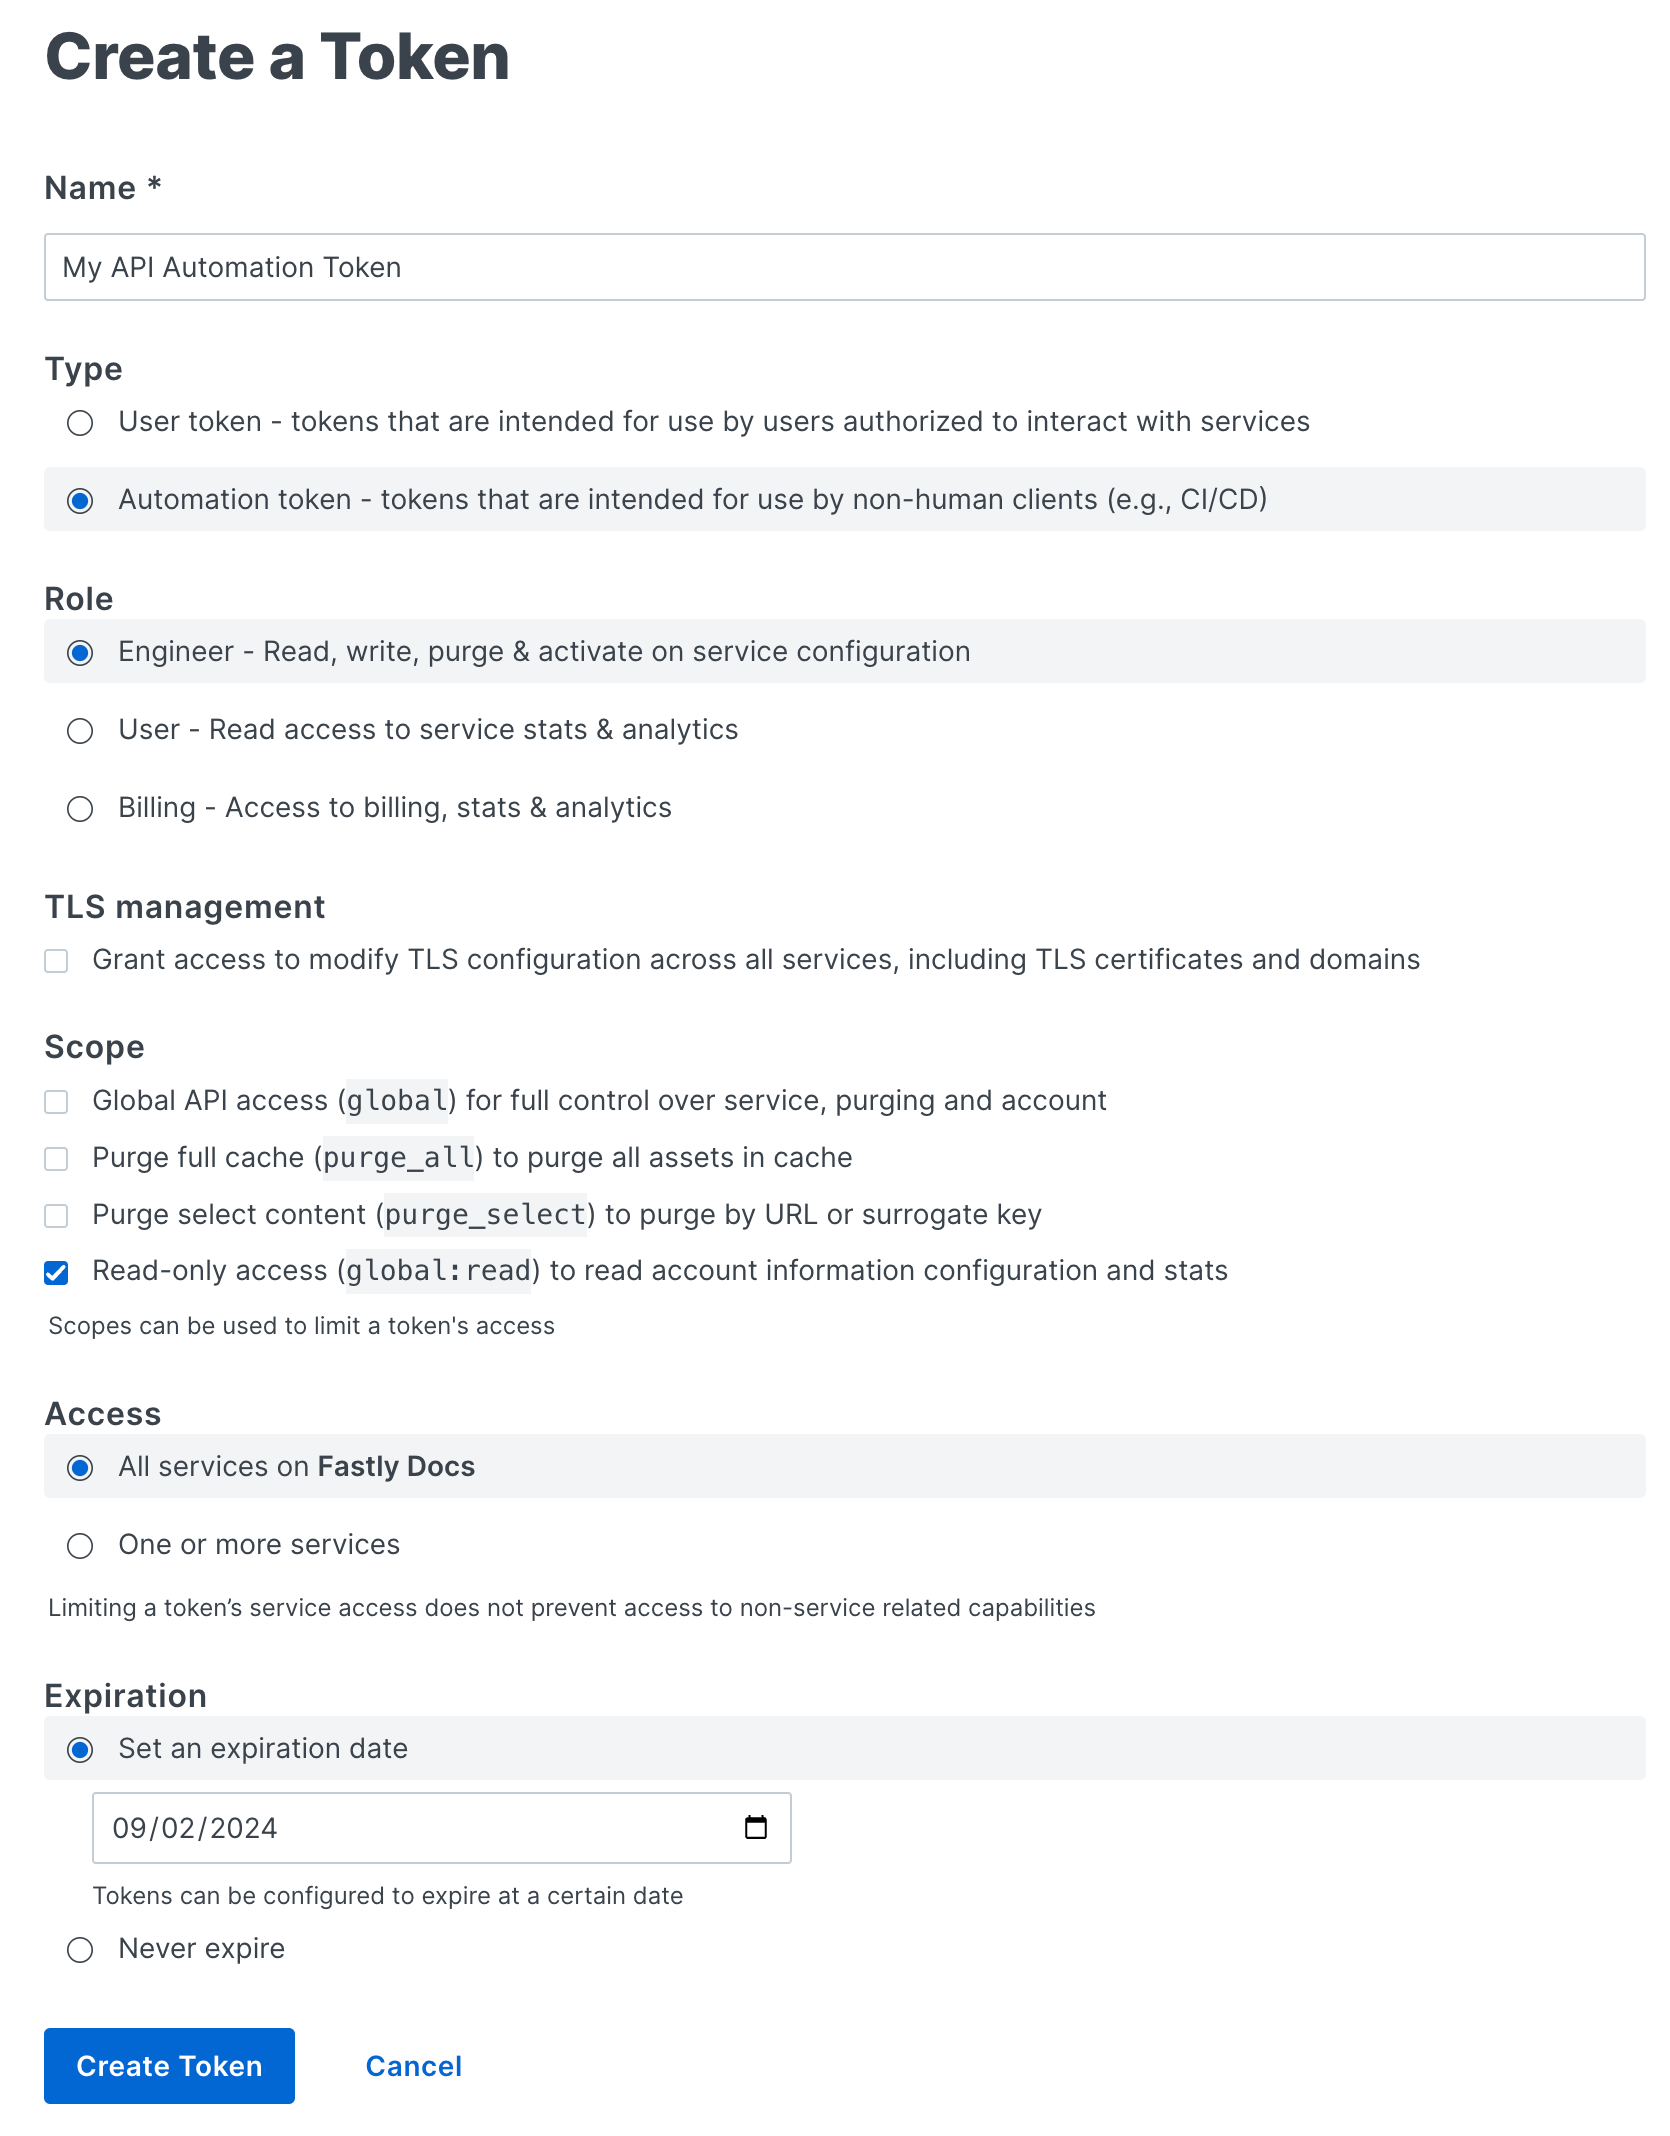
Fill out the Create a Token fields as follows:
- In the Name field, enter a descriptive name for the token that indicates how or where it will be used.
- From the Type options, select
Automation token. - From the Role options, select the user role that will assign the appropriate access permissions to the API token. Available options are
Engineer,User, andBilling. Our guide to configuring user roles and permissions provides more information. - (Optional) Select TLS management to grant the token the ability to modify TLS configurations across all services, including TLS certificates and domains.
- From the Scope options, select one or more checkboxes to limit the token's access to a specific scope. Only the Scope options applicable to the selected role will be selectable. Our guide to configuring user roles and permissions provides more information.
- From the Access options, select either all services or limit the token's access to a specific service or group of services by selecting them from the Search or select service menu.
- From the Expiration options, set the token expiration timeframe. By default the control panel will set the expiration date to 90 days from the date on which you create it. You can, however, set a token to never expire or you can select a specific date on which it expires.
TIP
After a token expires, using it for any request will return an HTTP 401 response.
Click Create Token to create the new token. A new token and its creation notification appears. This is the credential you'll use to authenticate via the Fastly API. You may use the same token for multiple applications.
Click the clipboard
to copy the API token string so you can store it in a safe, secret location.WARNING
This is the only time your API token string will be visible. Be sure to immediately copy it and store it in a safe location. It will never be visible again.
Click Okay.
Viewing API tokens
To view API tokens, follow these steps.
Viewing user tokens
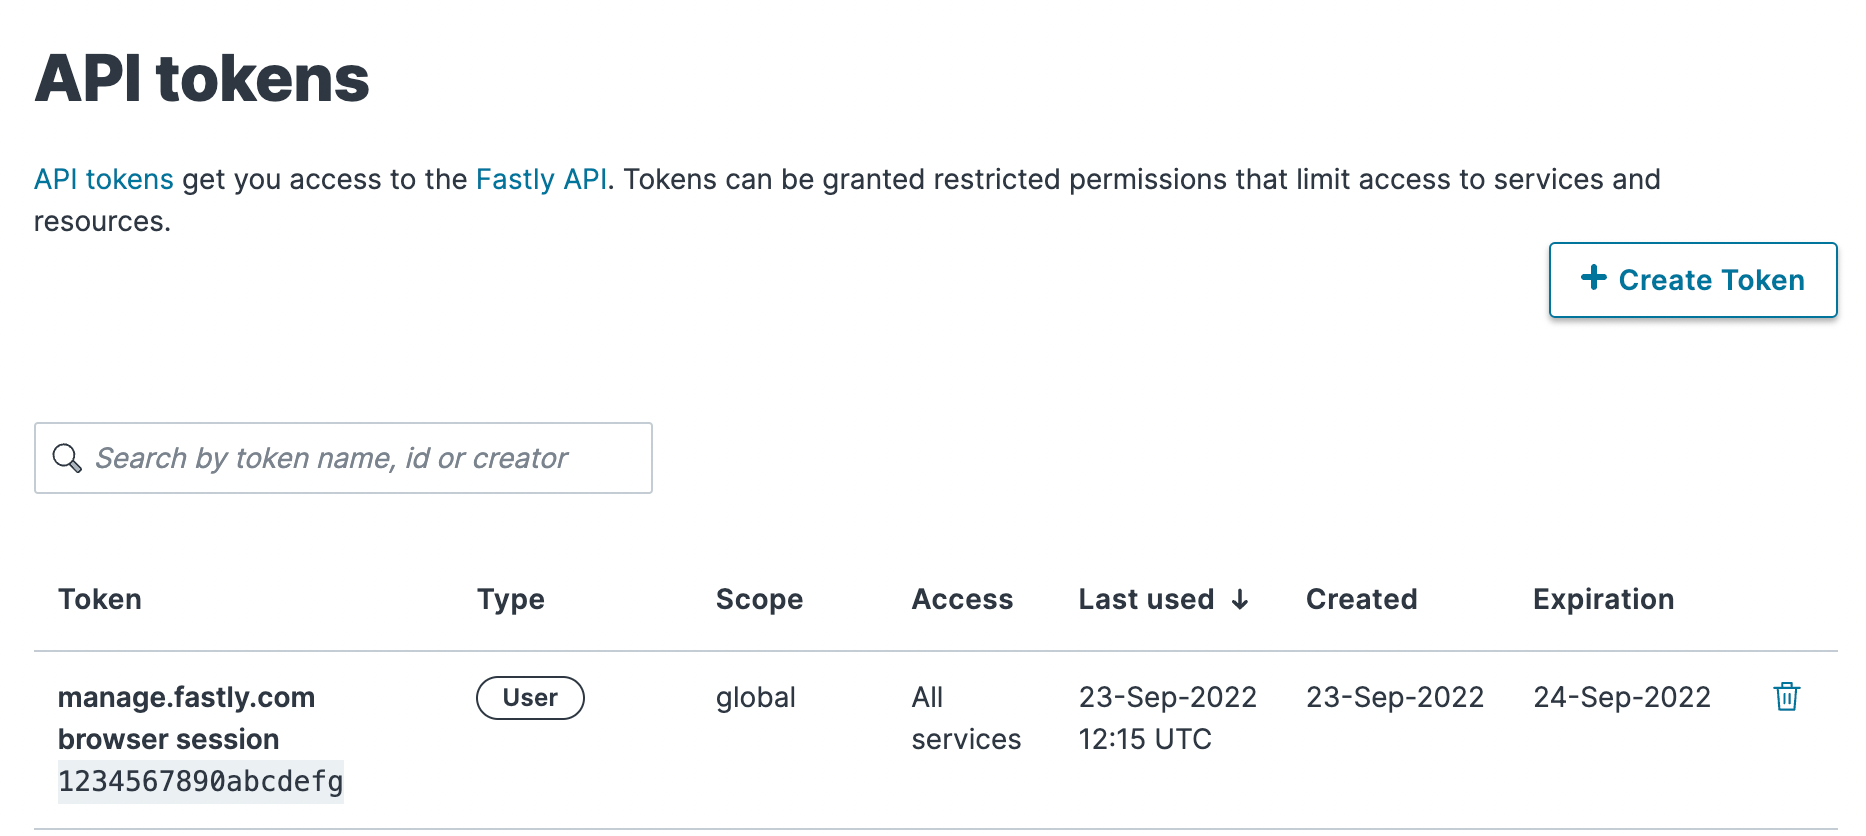
To view your personal user tokens, follow these steps:
- Log in to the Fastly control panel.
Go to Account > API tokens > Personal tokens. The API tokens page appears with a list of your personal tokens.
Viewing account tokens
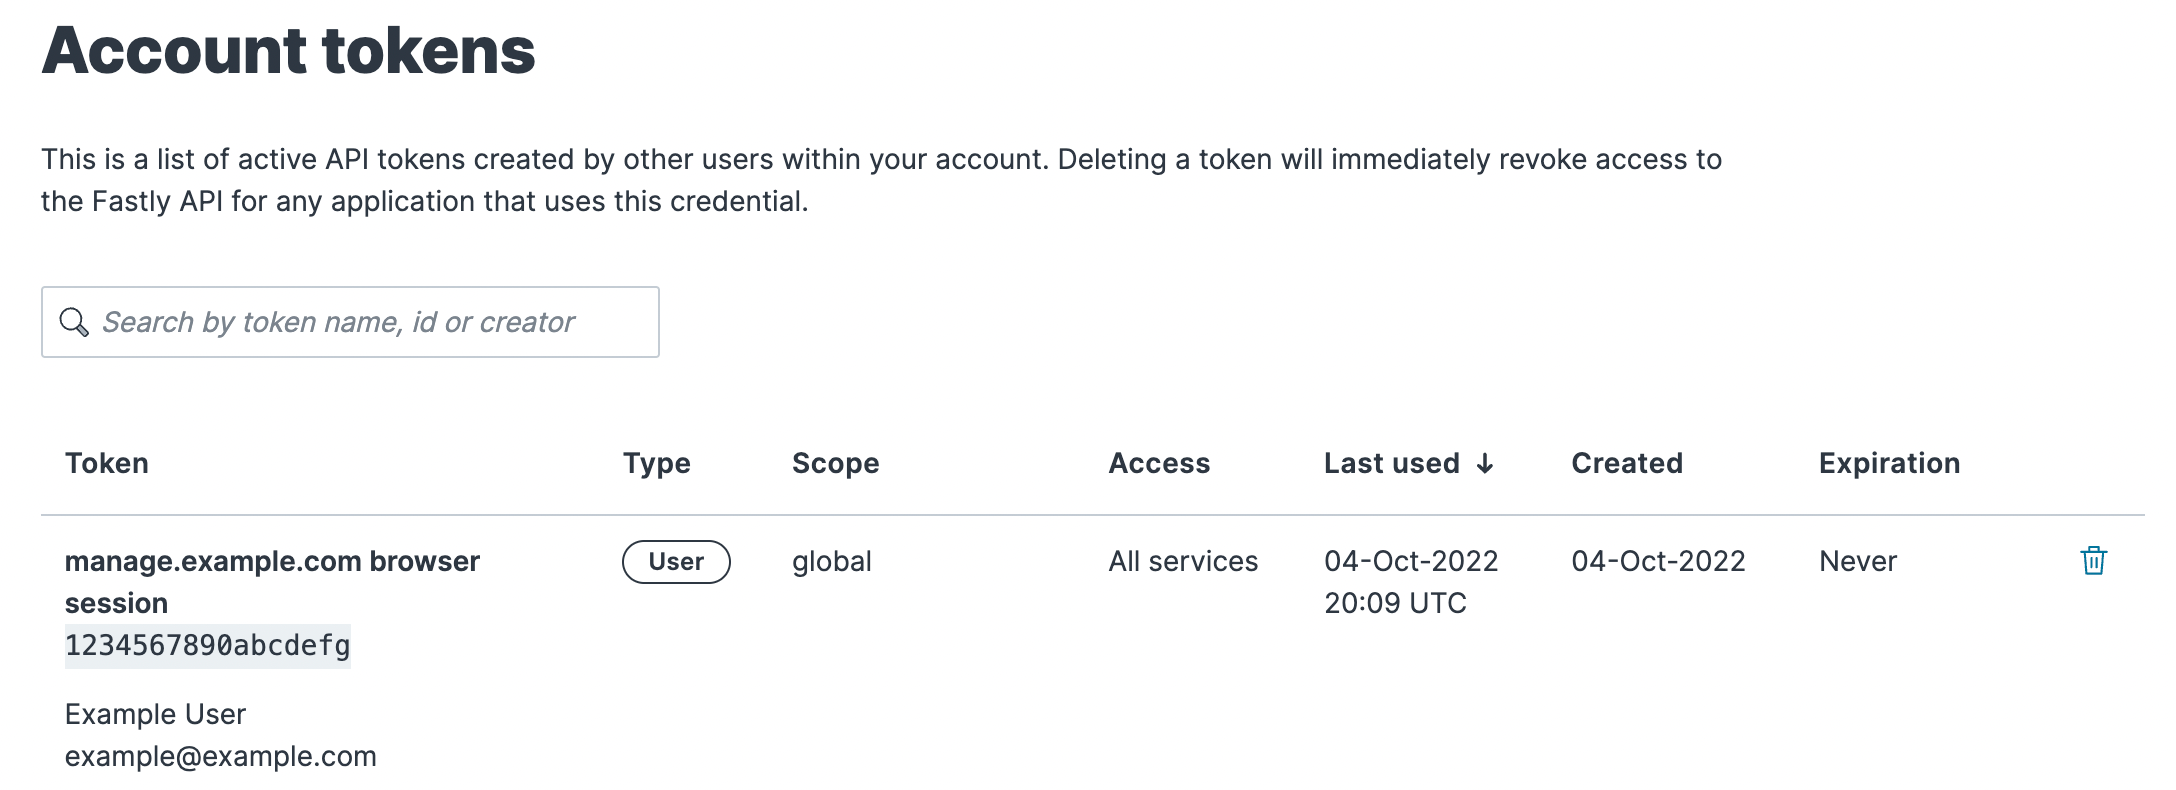
If you've been assigned the role of superuser, view account tokens using these steps:
- Log in to the Fastly control panel.
Go to Account > API tokens > Account tokens. The Account Tokens page appears with a list of tokens associated with your organization's Fastly account.
Deleting API tokens
WARNING
Deleting an API token will break any integration actively using that credential.
To delete user or automation tokens, follow these steps.
Deleting user tokens
To delete a user token you've created, follow these steps:
- Log in to the Fastly control panel.
- Go to Account > API tokens > Personal tokens.
- Find the token you want to delete and click the trash
 .
. - Click Delete to permanently delete the user token.
Deleting account tokens
To delete an account token or to revoke (and thereby delete) another user's token as a superuser, follow the steps:
- Log in to the Fastly control panel.
- Go to Account > API tokens > Account tokens.
- Find the token you want to delete and click the trash .
- Click Delete to permanently delete the token.
Legacy API credentials
If you created a Fastly account before May 15th, 2017, you may have used an API key (or multiple API keys) to authenticate API requests. This account-level credential was migrated to an API token with a global scope and access to all of your services. It was assigned to a newly created, synthetic user with the name Global API Token.

Do not use this form to send sensitive information. If you need assistance, contact support. This form is protected by reCAPTCHA and the Google Privacy Policy and Terms of Service apply.
