
- English
- 日本語
Log streaming: Coralogix
Last updated 2024-07-03
Fastly's Real-Time Log Streaming feature can send log files to Coralogix. Coralogix provides an analytics platform that allows you to detect abnormal behavior via dynamic alerts, ratio alerts, flow anomaly detection, and threat discovery.
NOTE
Fastly does not provide direct support for third-party services. Read Fastly's Terms of Service for more information.
Prerequisites
If you don't already have a Coralogix account, you'll need to register for one by following the signup instructions on the Coralogix website. Once you've signed up, navigate to the Send Your Logs area in the Settings section of your Coralogix dashboard and make note of your unique private key. Coralogix uses this to associate data you send them with your account. You'll need it when you set up your endpoint with Fastly.
TIP
Consider reading Coralogix's documentation on integrating with Fastly.
Adding Coralogix as a logging endpoint
Follow these instructions to add Coralogix as a logging endpoint:
- Deliver services
- Compute services
- Review the information in our guide to setting up remote log streaming.
- In the HTTPS area, click Create endpoint.
- Fill out the Create an HTTPS endpoint fields as follows:
- In the Name field, enter a human-readable name for the endpoint.
- In the Placement area, select where the logging call should be placed in the generated VCL. Valid values are Format Version Default, waf_debug (waf_debug_log), and None. Read our guide on changing log placement for more information.
- In the Log format field, replace the placeholder log format and make the appropriate changes as shown in our log format and recommendations section below.
- In the URL field, enter the Coralogix REST API Singles Endpoint for your Coralogix Domain. For example, you could use
https://ingress.coralogix.us/logs/v1/singlesfor thecoralogix.usdomain. - In the Maximum logs field, leave the default value of
0. - In the Maximum bytes field, enter
2000000.
- Click Advanced options and fill out the fields as follows:
- In the Content type field, enter
application/json. - In the Custom header name field, enter
Authorization. - In the Custom header value field, enter
Bearer <your Coralogix private key>. - From the Method controls, select POST.
- From the JSON log entry format controls, select Array of JSON.
- Leave the Select a log line format controls set to the defaults.
- Leave the remaining fields blank.
- In the Content type field, enter
- Click Create to create the new logging endpoint.
- Click Activate to deploy your configuration changes.
NOTE
For Coralogix, you do not need to configure anything to satisfy the HTTPS Proof of domain ownership requirement, and you can safely ignore any warning about it.
Log format and field setting recommendations
Use the following log format:
1{2 "timestamp":%{time.start.msec}V,3 "applicationName":"fastly",4 "subsystemName":"%{req.service_id}V",5 "severity": 3,6 "json": {7 "time": {8 "start":"%{begin:%Y-%m-%dT%H:%M:%S%Z}t",9 "end":"%{end:%Y-%m-%dT%H:%M:%S%Z}t",10 "elapsed":%D11 },12 "cdn_server": {13 "ip_ipaddr":"%A",14 "code":"%{server.datacenter}V",15 "hostname":"%{server.hostname}V",16 "region_code":"%{server.region}V",17 "response_state":"%{fastly_info.state}V",18 "is_h2":%{if(fastly_info.is_h2, "true", "false")}V,19 "is_h2_push":%{if(fastly_info.h2.is_push, "true", "false")}V,20 "h2_stream_id":"%{fastly_info.h2.stream_id}V"21 },22 "client": {23 "city_name":"%{client.geo.city.utf8}V",24 "country_code":"%{client.geo.country_code}V",25 "country_name":"%{client.geo.country_name}V",26 "continent_code":"%{client.geo.continent_code}V",27 "region":"%{client.geo.region}V",28 "ip_ipaddr":"%h",29 "name":"%{client.as.name}V",30 "number":"%{client.as.number}V",31 "connection_speed":"%{client.geo.conn_speed}V",32 "location_geopoint": {33 "lat":%{client.geo.latitude}V,34 "lon":%{client.geo.longitude}V35 }36 },37 "response": {38 "status":%>s,39 "content_type":"%{Content-Type}o",40 "age":"%{Age}o",41 "cache_control":"%{Cache-Control}o",42 "expires":"%{Expires}o",43 "last_modified":"%{Last-Modified}o",44 "tsv":"%{TSV}o",45 "header_size":%{resp.header_bytes_written}V,46 "body_size":%B47 },48 "request": {49 "host":"%{req.http.host}V",50 "is_ipv6":%{if(req.is_ipv6, "true", "false")}V,51 "backend":"%{req.backend}V",52 "service_id":"%{req.service_id}V",53 "url":"%{cstr_escape(req.url)}V",54 "url_ext":"%{req.url.ext}V",55 "header_size":%{req.header_bytes_read}V,56 "body_size":%{req.body_bytes_read}V,57 "method":"%m",58 "protocol":"%H",59 "referer":"%{Referer}i",60 "user_agent":"%{User-Agent}i",61 "accept_content":"%{Accept}i",62 "accept_language":"%{Accept-Language}i",63 "accept_encoding":"%{Accept-Encoding}i",64 "accept_charset":"%{Accept-Charset}i",65 "connection":"%{Connection}i",66 "dnt":"%{DNT}i",67 "forwarded":"%{Forwarded}i",68 "via":"%{Via}i",69 "cache_control":"%{Cache-Control}i",70 "x_requested_with":"%{X-Requested-With}i",71 "x_att_device_id":"%{X-ATT-Device-Id}i",72 "x_forwarded_for":"%{X-Forwarded-For}i"73 },74 "socket": {75 "cwnd":%{client.socket.cwnd}V,76 "pace":%{client.socket.pace}V,77 "nexthop":"%{client.socket.nexthop}V",78 "tcpi_rcv_mss":%{client.socket.tcpi_rcv_mss}V,79 "tcpi_snd_mss":%{client.socket.tcpi_snd_mss}V,80 "tcpi_rtt":%{client.socket.tcpi_rtt}V,81 "tcpi_rttvar":%{client.socket.tcpi_rttvar}V,82 "tcpi_rcv_rtt":%{client.socket.tcpi_rcv_rtt}V,83 "tcpi_rcv_space":%{client.socket.tcpi_rcv_space}V,84 "tcpi_last_data_sent":%{client.socket.tcpi_last_data_sent}V,85 "tcpi_total_retrans":%{client.socket.tcpi_total_retrans}V,86 "tcpi_delta_retrans":%{client.socket.tcpi_delta_retrans}V,87 "ploss":%{client.socket.ploss}V88 }89 }90}The first five fields of the recommended format are required:
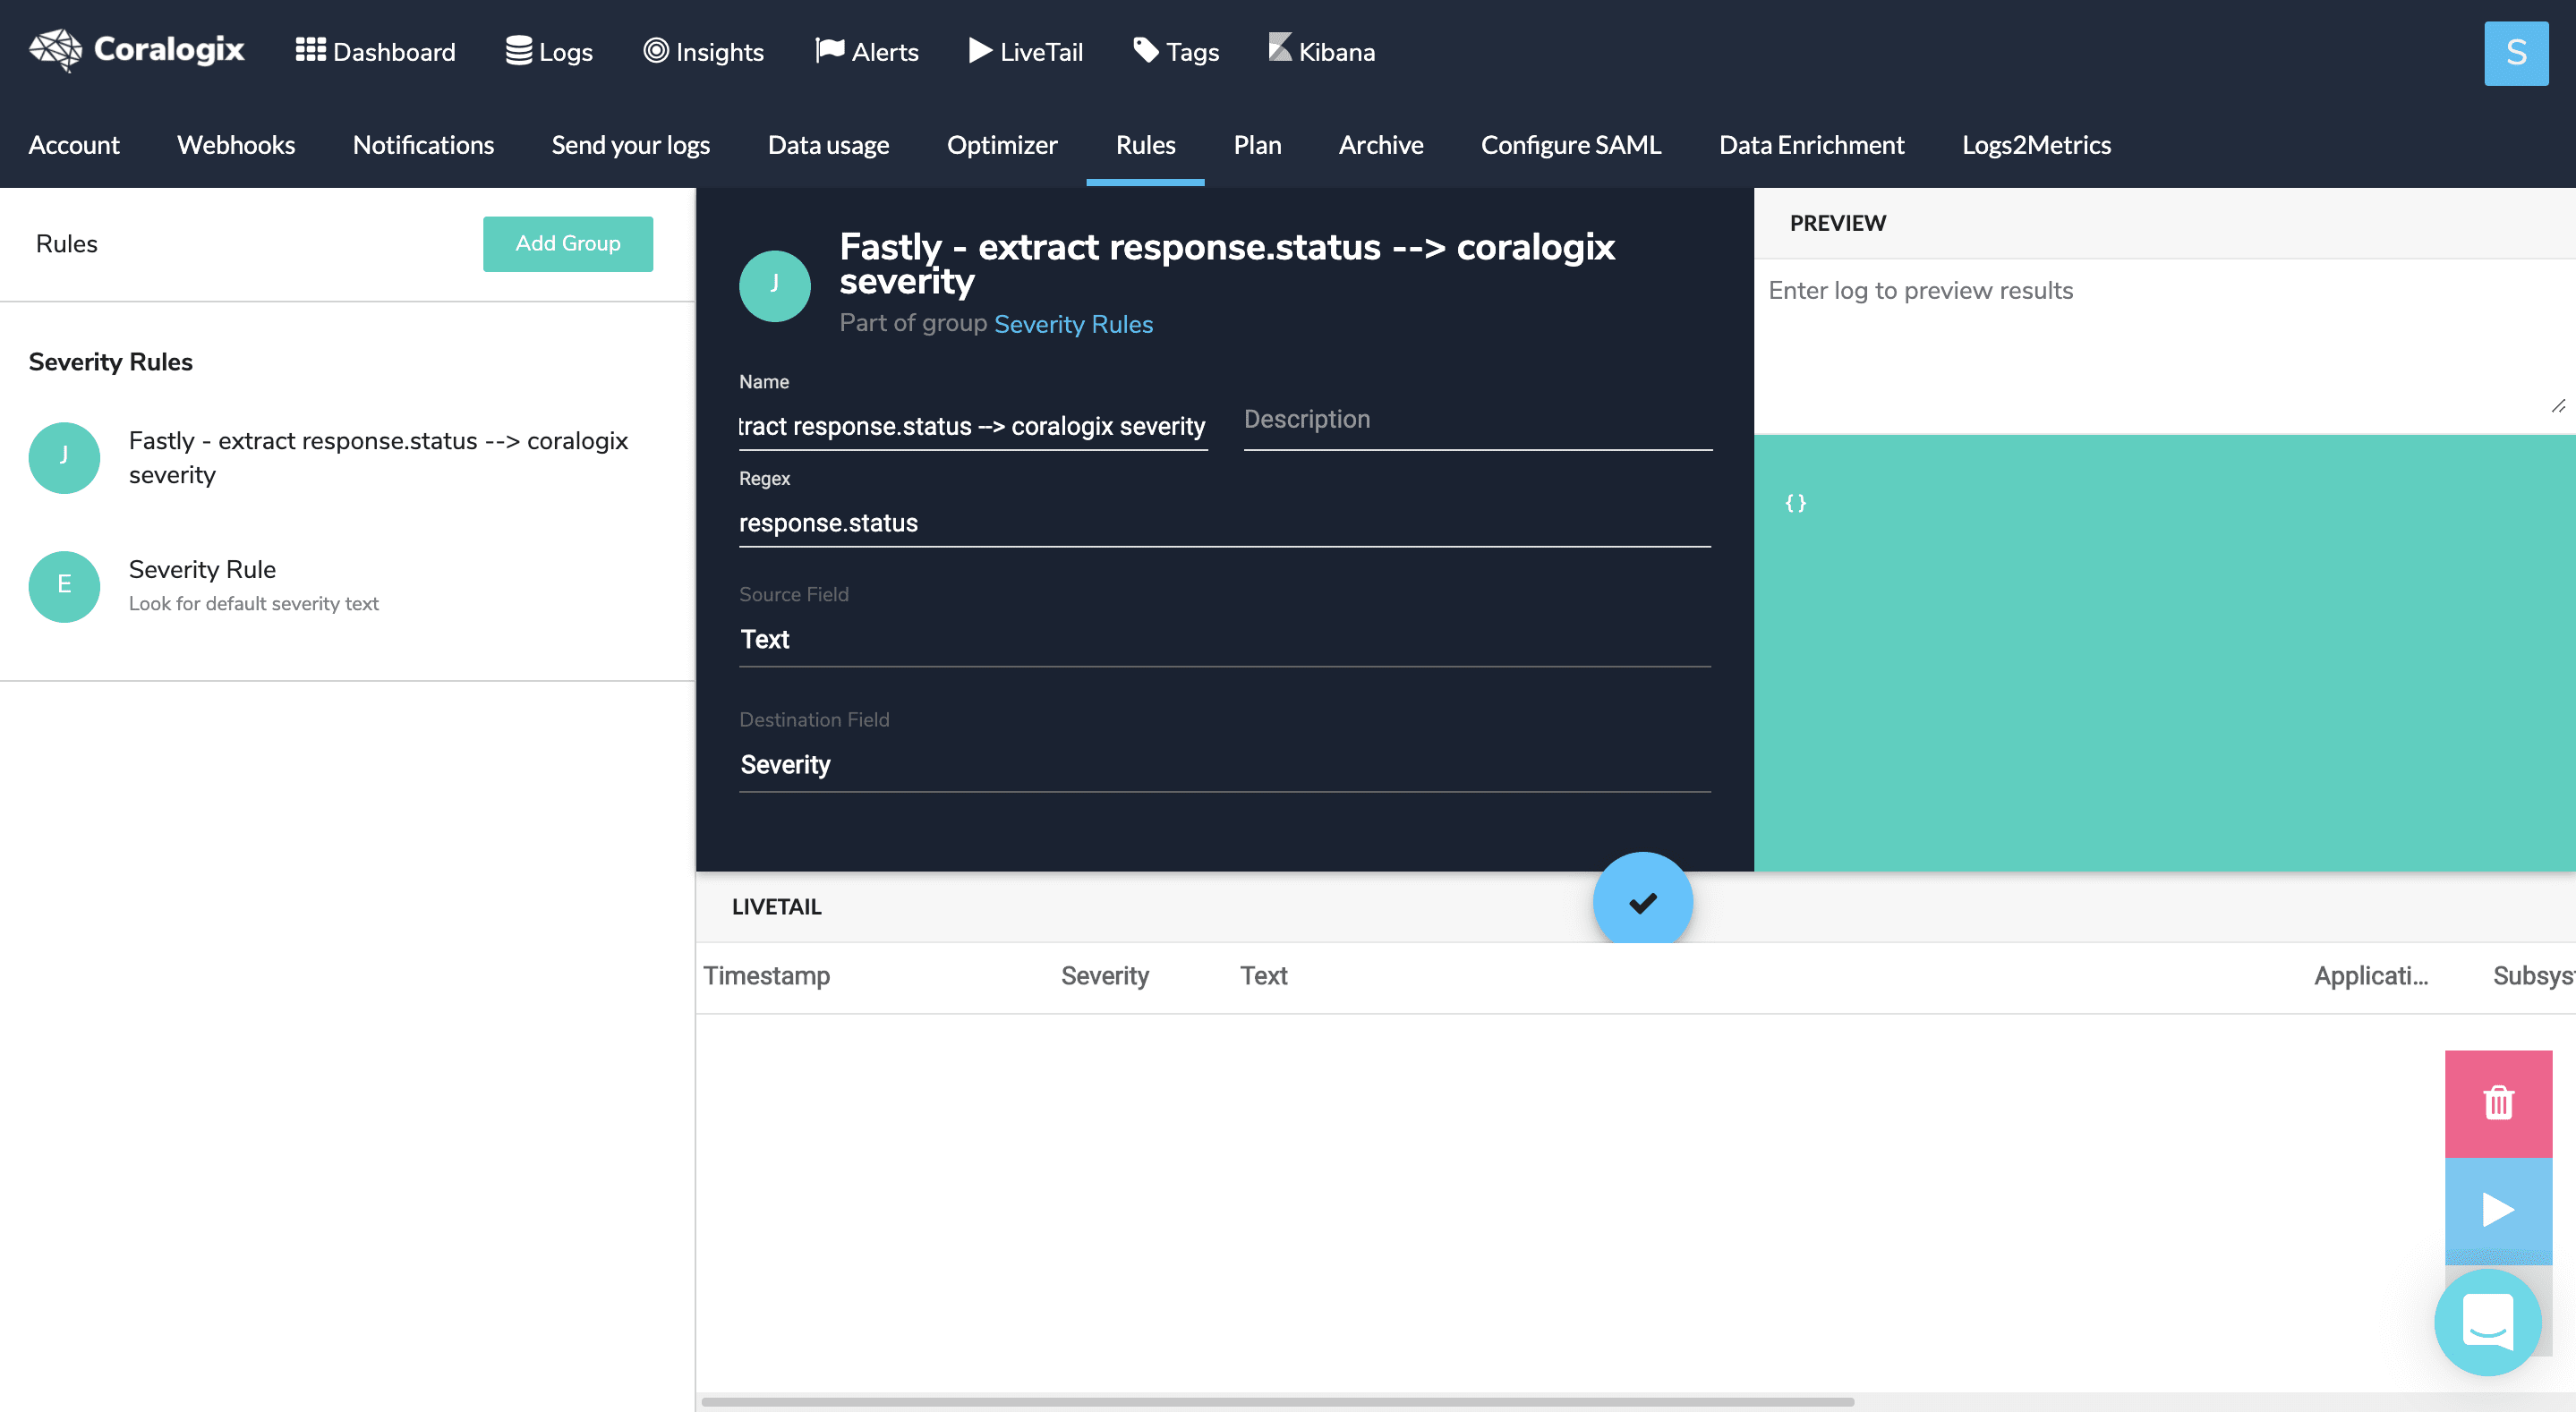
timestamp: Leave the format of this field unchanged.applicationName: Enter the name of the application in this field.subsystemName: Enter the name of the subsystem in this field. This is used to separate components. We usereq.service_idin the example, which isn't particularly human readable. Use whatever subsystem name makes sense that helps you identify the subsystem.severity: Specify the severity and apply it to all logs using the following choices: 1 (debug), 2 (verbose), 3 (info), 4 (warning), 5 (error), 6 (critical). This can be changed later using an extract rule as described below.json (object): Add or remove fields as necessary. Static fields can be added. Nested JSON formats are supported including any fields described in the Fastly VCL reference.Specifying a nested
response.statusfield is a useful way to identify the status for servicing the request. Using the Coralogix parsing rules, you can set a JSON Extract rule to use the status code value from the log to populate the severity field in the Coralogix interface. Specifically, you can automatically map an HTTP status code to a severity value. For example, status code2xxwill set the Coralogix severity as “INFO” and status code4xxwill set Coralogix severity as “ERROR”.In the Coralogix web interface, it will look like this:
Configuring Coralogix dashboards and alerting
Coralogix provides tutorials for integrating their service with Fastly via dashboards and alerting. This includes examples of data dashboards created using Fastly data, including one for a general service overview, a visitor breakdown, and quality of service.
Their tutorials also describe how to set up user-defined alerts for situations like no logs being received from Fastly, outages at your origin, elevated error ratios and cache misses, unusual or suspicious requests of various types, as well as potential website defacement attempts.
Do not use this form to send sensitive information. If you need assistance, contact support. This form is protected by reCAPTCHA and the Google Privacy Policy and Terms of Service apply.
