
- English
- 日本語
Log streaming: Datadog
Last updated 2024-12-16
Fastly's Real-Time Log Streaming feature can be configured to send logs in a format readable by Datadog. Datadog is a cloud-based monitoring and analytics solution that allows you to see inside applications within your stack and aggregate the results.
NOTE
Fastly does not provide direct support for third-party services. Read Fastly's Terms of Service for more information.
Prerequisites
Before adding Datadog as a logging endpoint for Fastly services, you will need to:
Register for a Datadog account. You can sign up for a Datadog account on their site. A free plan exists that has some restrictions or you can upgrade for more features. Where you register your Datadog setup, either in the United States (US), the European Union (EU), or Japan will affect which commands you use during logging endpoint setup at Fastly.
Get your Datadog API key from your settings page on Datadog. In the Datadog interface, navigate to Integrations -> APIs where you'll be able to create or retrieve an API key.
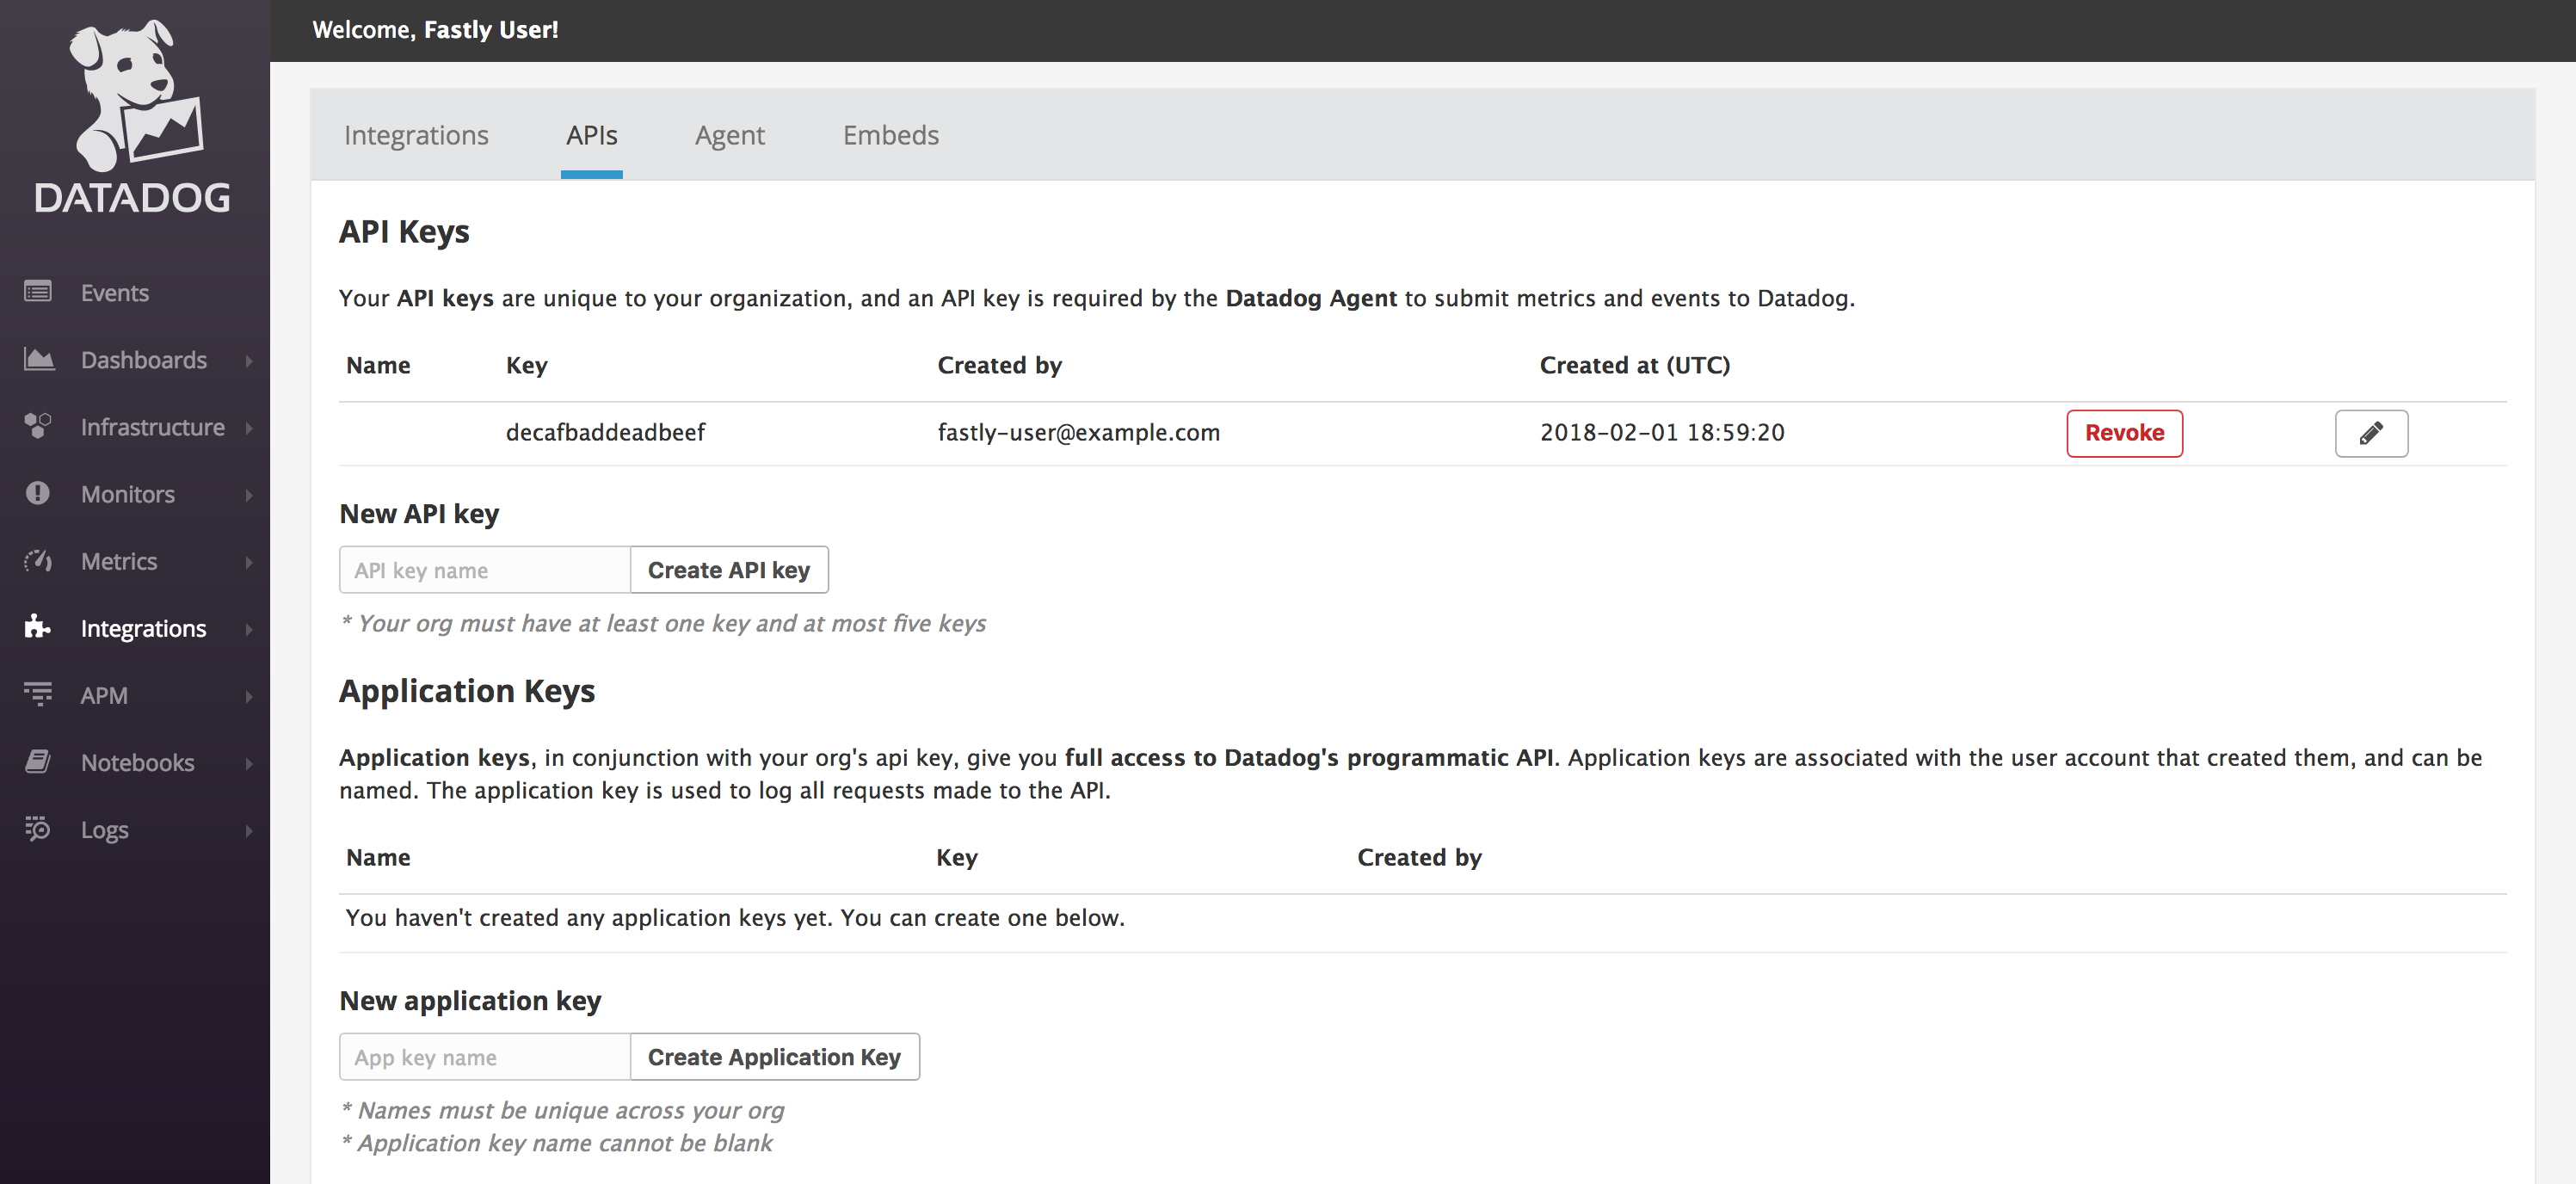
This example displays the key
decafbaddeadbeef. Your API key will be different. Make a note of this key somewhere.
Adding Datadog as a logging endpoint
After you've created a Datadog account and noted your Datadog API key, follow the steps below to add Datadog as a logging endpoint for Fastly services.
- CDN
- Compute
- Review the information in our guide to setting up remote log streaming.
- In the Datadog area, click Create endpoint.
- Fill out the Create a Datadog endpoint fields as follows:
- In the Name field, enter a human-readable name for the endpoint.
- In the Placement area, select where the logging call should be placed in the generated VCL. Valid values are Format Version Default,
waf_debug (waf_debug_log), and None. Read our guide on changing log placement for more information. - In the Log format field, enter the data to send to Datadog. We've described the use of this format below with additional suggestions.
- From the Region menu, select the region to stream logs to.
- In the API key field, enter the API key of your Datadog account.
- Click Create to create the new logging endpoint.
- Click Activate to deploy your configuration changes.
Logs should begin appearing in your Datadog account a few seconds after you've created the endpoint and deployed your service changes. These logs can then be accessed via the Datadog Log Explorer on your Datadog account.
Using the JSON logging format
Data sent to Datadog must be serialized as a JSON object. Datadog automatically parses log files created as JSON, and is able to recognize several reserved fields, such as service, host, and date.
NOTE
The JSON in this example is formatted for ease of reading. For proper parsing, it must be added as a single line in the Log format field, removing all line breaks and indentation whitespace first.
For example, in the JSON below we've set service to the ID of the Fastly service that sent the log but you could also use a human-readable name or you could group all logs under a common name such as fastly.
123456789101112131415161718192021222324252627282930313233343536373839404142434445464748495051525354555657585960616263646566676869707172737475767778798081{ "ddsource": "fastly", "service": "%{req.service_id}V", "date": "%{begin:%Y-%m-%dT%H:%M:%S%z}t", "time_start": "%{begin:%Y-%m-%dT%H:%M:%S%Z}t", "time_end": "%{end:%Y-%m-%dT%H:%M:%S%Z}t", "http": { "request_time_ms": %{time.elapsed.msec}V, "method": "%m", "url": "%{json.escape(req.url)}V", "useragent": "%{json.escape(req.http.User-Agent)}V", "referer": "%{json.escape(req.http.referer)}V", "protocol": "%H", "request_x_forwarded_for": "%{X-Forwarded-For}i", "status_code": "%s" }, "network": { "client": { "ip": "%h", "name": "%{client.as.name}V", "number": "%{client.as.number}V", "connection_speed": "%{client.geo.conn_speed}V" }, "destination": { "ip": "%A" }, "geoip": { "geo_city": "%{client.geo.city.utf8}V", "geo_country_code": "%{client.geo.country_code}V", "geo_continent_code": "%{client.geo.continent_code}V", "geo_region": "%{client.geo.region}V" }, "bytes_written": %B, "bytes_read": %{req.body_bytes_read}V }, "host":"%{if(req.http.Fastly-Orig-Host, req.http.Fastly-Orig-Host, req.http.Host)}V", "origin_host": "%v", "is_ipv6": %{if(req.is_ipv6, "true", "false")}V, "is_tls": %{if(req.is_ssl, "true", "false")}V, "tls_client_protocol": "%{json.escape(tls.client.protocol)}V", "tls_client_servername": "%{json.escape(tls.client.servername)}V", "tls_client_cipher": "%{json.escape(tls.client.cipher)}V", "tls_client_cipher_sha": "%{json.escape(tls.client.ciphers_sha)}V", "tls_client_tlsexts_sha": "%{json.escape(tls.client.tlsexts_sha)}V", "is_h2": %{if(fastly_info.is_h2, "true", "false")}V, "is_h2_push": %{if(fastly_info.h2.is_push, "true", "false")}V, "h2_stream_id": "%{fastly_info.h2.stream_id}V", "request_accept_content": "%{Accept}i", "request_accept_language": "%{Accept-Language}i", "request_accept_encoding": "%{Accept-Encoding}i", "request_accept_charset": "%{Accept-Charset}i", "request_connection": "%{Connection}i", "request_dnt": "%{DNT}i", "request_forwarded": "%{Forwarded}i", "request_via": "%{Via}i", "request_cache_control": "%{Cache-Control}i", "request_x_requested_with": "%{X-Requested-With}i", "request_x_att_device_id": "%{X-ATT-Device-Id}i", "content_type": "%{Content-Type}o", "is_cacheable": %{if(fastly_info.state~"^(HIT|MISS)$", "true","false")}V, "response_age": "%{Age}o", "response_cache_control": "%{Cache-Control}o", "response_expires": "%{Expires}o", "response_last_modified": "%{Last-Modified}o", "response_tsv": "%{TSV}o", "server_datacenter": "%{server.datacenter}V", "req_header_size": %{req.header_bytes_read}V, "resp_header_size": %{resp.header_bytes_written}V, "socket_cwnd": %{client.socket.cwnd}V, "socket_nexthop": "%{client.socket.nexthop}V", "socket_tcpi_rcv_mss": %{client.socket.tcpi_rcv_mss}V, "socket_tcpi_snd_mss": %{client.socket.tcpi_snd_mss}V, "socket_tcpi_rtt": %{client.socket.tcpi_rtt}V, "socket_tcpi_rttvar": %{client.socket.tcpi_rttvar}V, "socket_tcpi_rcv_rtt": %{client.socket.tcpi_rcv_rtt}V, "socket_tcpi_rcv_space": %{client.socket.tcpi_rcv_space}V, "socket_tcpi_last_data_sent": %{client.socket.tcpi_last_data_sent}V, "socket_tcpi_total_retrans": %{client.socket.tcpi_total_retrans}V, "socket_tcpi_delta_retrans": %{client.socket.tcpi_delta_retrans}V, "socket_ploss": %{client.socket.ploss}V}Do not use this form to send sensitive information. If you need assistance, contact support. This form is protected by reCAPTCHA and the Google Privacy Policy and Terms of Service apply.
